42
RTAA-IOM-3
Evaporator Piping
Components
“Piping components” include all
devices and controls used to provide
proper water system operation and
unit operating safety. These
components and their general
locations are given below.
Entering Chilled Water Piping
[ ] Air vents (to bleed air from system).
[ ] Water pressure gauges with shutoff
valves.
[ ] Vibration eliminators.
[ ] Shutoff (isolation) valves.
Thermometers (if desired).
[ ] Clean-out tees.
[ ] Pipe strainer.
Caution: To prevent tube damage
install strainer in evaporator water
inlet piping.
Leaving Chilled Water Piping
[ ] Air vents (to bleed air from system).
[ ] Water pressure gauges with shutoff
valves. Vibration eliminators.
[ ] Shutoff (isolation) valves.
[ ] Thermometers.
[ ] Clean-out tees.
[ ] Balancing valve.
[ ] Flow Switch (If desired)
Caution: To prevent evaporator
damage, do not exceed 215 psig
(14.6 bar) evaporator water
pressure.
Evaporator Drain
A 3/4" drain connection is located
under the outlet end of the evaporator.
This may be connected to a suitable
drain to permit evaporator drainage
during unit servicing. A shutoff valve
must be installed on the drain line.
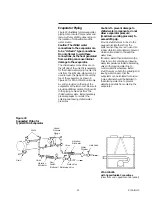
Evaporator Flow Switch
Chilled water flow protection is
provided by the UCM without the need
for a chilled water flow switch. A flow
switch for chilled water is strictly
discretionary but if not installed, a
signal still must be sent to the chiller to
indicate that water flow has been
established, e.g. chilled water pump
motor starter auxiliary contacts.
If additional chilled water flow
protection is desired, use a field-
installed flow switch or differential
pressure switch with the pump
interlock to sense system water flow.
Install and wire the flow switch in series
with the chilled water pump motor
starter auxiliaries (refer to “Electrical
Wiring”).
Specific connection and schematic
wiring diagrams are shipped with the
unit. Some piping and control
schemes, particularly those using a
single water pump for both chilled and
hot water, must be analyzed to
determine how and or if a flow sensing
device will provide desired operation.
Follow the manufacturer’s
recommendations for selection and
installation procedures. General
guidelines for flow switch installation
are outlined below
1. Mount the switch upright, with a
minimum of 5 pipe diameters of
straight horizontal run on each side.
Do not install close to elbows,
orifices or valves.
Note: The arrow on the switch must
point in the direction of flow.
2. To prevent switch fluttering, remove
all air from the water system.
Note: The UCM provides a 6-second
time delay after a “loss-of-flow”
diagnostic before shutting the unit
down. Contact a qualified service
representative if nuisance machine
shutdowns persist.
Содержание RTAA-130
Страница 2: ... American Standard Inc 1991 ...
Страница 8: ...8 RTAA IOM 3 ...
Страница 13: ...13 RTAA IOM 3 Figure 3 Typical RTAA Packaged Unit 240 400 Tons Control Panel Evaporator Outlet Inlet ...
Страница 24: ...24 RTAA IOM 3 ...
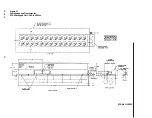
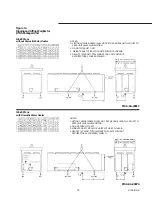
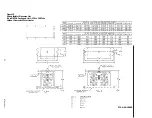
Страница 26: ...26 RTAA IOM 3 Figure 9 Dimensions and Clearances for RTAA Packaged Unit 130 to 200 Ton RTAA SU 1000E ...
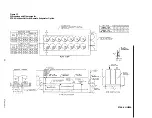
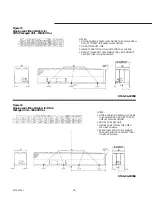
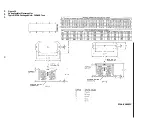
Страница 27: ...27 RTAA IOM 3 Figure 10 Dimensions and Clearances for RTAA Packaged Unit 240 300 Ton RTAA SU 1001C ...
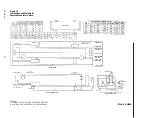
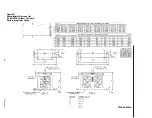
Страница 28: ...28 RTAA IOM 3 Figure 11 Dimensions and Clearances for RTAA Packaged Unit 340 to 400 Ton RTAA SU 1002C ...
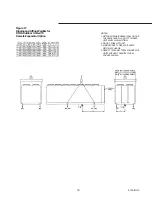
Страница 38: ...38 RTAA IOM 3 RTAA SA 2002C Figure 19 Spring Isolator Placement for Typical RTAA Packaged Unit 240 400 Tons ...
Страница 46: ...46 RTAA IOM 3 Figure 24 Typical Domestic Water Heater Piping Figure 25 Typical Domestic Water Heater Piping ...
Страница 50: ...50 RTAA IOM 3 Figure 30 Refrigerant Circuit Identification ...
Страница 52: ...52 RTAA IOM 3 Figure 31 Remote Evaporator Piping Example ...
Страница 58: ...58 RTAA IOM 3 Continued on Next Page Figure 34 Typical Field Wiring for RTAA Packaged Unit 130 to 200 Tons ...
Страница 59: ...59 RTAA IOM 3 Continued from Previous Page See Notes on Next Page ...
Страница 61: ...61 RTAA IOM 3 Figure 35 Typical Field Wiring for RTAA Packaged Unit 240 400 Tons Continued on Next Page ...
Страница 63: ...63 RTAA IOM 3 Continued from Previous Page See Notes on Page 61 ...
Страница 64: ...64 RTAA IOM 3 Figure 36 Typical Field Wiring for RTAA With Remote Evaporator Option Continued on Next Page ...
Страница 65: ...65 RTAA IOM 3 Continued from Previous Page See Notes on Page 61 ...
Страница 76: ...76 RTAA IOM 3 ...
Страница 78: ...78 RTAA IOM 3 Figure 40 Refrigeration System and Control Components Single Circuit Continued on Next Page ...
Страница 80: ...80 RTAA IOM 3 Figure 41 Refrigeration System and Control Components Duplex Circuit Continued on Next Page ...
Страница 92: ...92 RTAA IOM 3 Figure 51 Operator Interface Controls ...
Страница 120: ...120 RTAA IOM 3 ...
Страница 126: ...126 RTAA IOM 3 Figure 56 Unit Sequence of Operation RTAA 240 to 400 Tons Continued on Next Page ...
Страница 127: ...127 RTAA IOM 3 Continued from Previous Page 2307 1566C ...
Страница 128: ...128 RTAA IOM 3 Figure 57 Unit Sequence of Operation RTAA 130 to 200 Tons 2306 9122A ...
Страница 132: ...132 RTAA IOM 3 Figure 58 Operator s Log ...
Страница 138: ...138 RTAA IOM 3 ...

