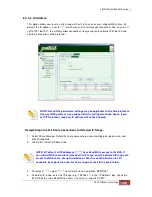
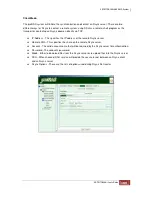

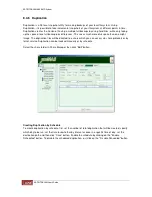


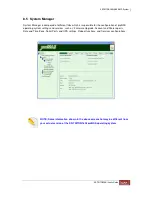
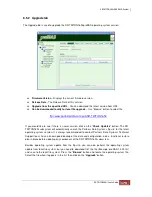
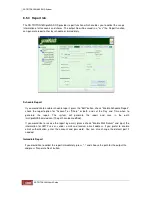
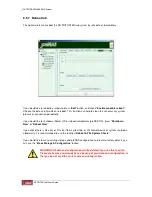
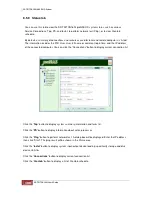
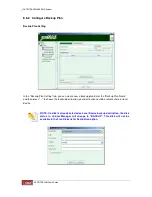


8.5.2 Upgrade tab
The Upgrade tab is used to upgrade the SR-TRITON16Ni proNAS operating system version.
♦
Firmware Version
- Displays the current firmware version.
♦
Release Date
- The Release Date of this version.
♦
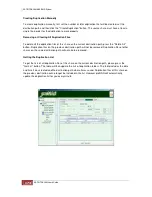
Upgrade from the specified URL
- You can download the latest version from URL:
♦
Can be downloaded locally for local file upgrade
– Use “Browse” button to select file.
ftp://www.partnersdata.com/pub/SR-TRITON16Ni/
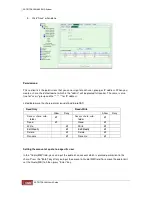
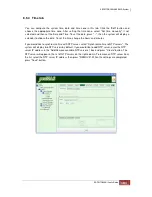
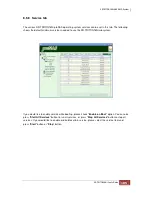
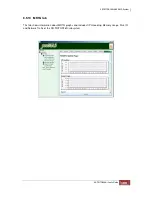
If you would like to see if there is newer version, click on the "
Check Updates
" button. The SR-
TRITON16Ni subsystem will automatically search the Partners Data System’s ftp site for the latest
operating system version. It is always recommended to contact Partners Data Systems Technical
Support team, have a known good backup of the data and configuration, also a functional restore
plan in place before updating any component of the SR-TRITON16Ni subsystem.
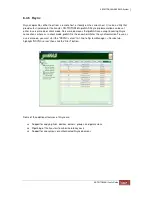
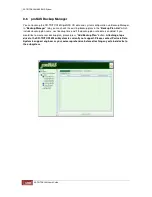
Besides operating system update from the ftp-site, you can also perform the operating system
update from local file system, but you need to download first the file (Example: proNAS-1.3.00.tar)
and save to the local file system. Press the "
Browse
" button and locate the operating system file.
Select the file when it appears in the list, then click on the “
Upgrade
” button.
Содержание TRITON 16Ni
Страница 1: ...SurfRAID TRITON 16Ni User s Guide Revision 1 1...
Страница 40: ......
Страница 41: ......
Страница 42: ......
Страница 43: ......
Страница 67: ...5 3 7 Stop Volume Check Use this option to stop current running Check Volume Set process...
Страница 111: ...4 Verify the new LV size...
Страница 135: ...4 The iSCSI logical volume capacity is extended...
Страница 207: ...The proBackup page will be displayed Click Start Java Web Enter the login account admin and password 00000000...
Страница 216: ...10 5 Account Detail Under Plan Manager click the account name to view information about the account...
Страница 236: ...2 Select Set LAN Configuration and press Enter key 3 Setup LAN Configuration...
Страница 238: ...6 Press F10 to save configuration changes and exit setup With Ok selected press Enter key to restart system...
Страница 247: ......


