


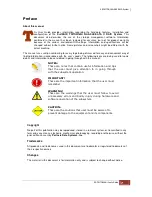


Preface
About this manual
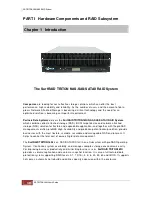
his User Guide provides information regarding the hardware features, installation and
configuration of the
SurfRAID TRITON16Ni
NAS-SAS/SATA II RAID System
. This
document also describes the use of the storage management software. Information
contained in the manual has been reviewed for accuracy, but not for product warranty
because of the various environment/OS/settings. Information and specifications will be
changed without further notice. Some pictures and screenshots might be different with the
actual machine.
This manual uses section numbering for every topic being discussed for easy and convenient way of
finding information in accordance with the user’s needs. The following icons are being used for some
details and information to be considered in going through with this manual:
Copyright
No part of this publication may be reproduced, stored in a retrieval system, or transmitted in any
form or by any means, electronic, mechanical, photocopying, recording or otherwise, without the
prior written consent by
Partners Data Systems, Inc
.
Trademarks
All products and trade names used in this document are trademarks or registered trademarks of
their respective owners.
Changes
The material in this document is for information only and is subject to change without notice.
Содержание TRITON 16Ni
Страница 1: ...SurfRAID TRITON 16Ni User s Guide Revision 1 1...
Страница 40: ......
Страница 41: ......
Страница 42: ......
Страница 43: ......
Страница 67: ...5 3 7 Stop Volume Check Use this option to stop current running Check Volume Set process...
Страница 111: ...4 Verify the new LV size...
Страница 135: ...4 The iSCSI logical volume capacity is extended...
Страница 207: ...The proBackup page will be displayed Click Start Java Web Enter the login account admin and password 00000000...
Страница 216: ...10 5 Account Detail Under Plan Manager click the account name to view information about the account...
Страница 236: ...2 Select Set LAN Configuration and press Enter key 3 Setup LAN Configuration...
Страница 238: ...6 Press F10 to save configuration changes and exit setup With Ok selected press Enter key to restart system...
Страница 247: ......