
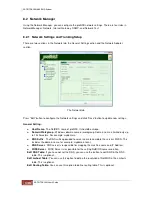
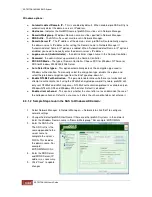


Windows options:
♦
Automatic detect Domain IP
– This is enabled by default. When enabled, proNAS will try to
automatically detect the domain server’s IP address.
♦
Hostname
- Indicates the NetBIOS name of proNAS; must be set in Network Manager.
♦
Domain/Workgroup
- Windows Domain name; must be specified in Network Manager.
♦
DNS Suffix
- The DNS suffix used; must be set in Network Manager.
♦
Domain Server IP
- The IP address of the domain server. proNAS will automatically acquire
the domain server's IP address after setting the Domain name in Network Manager if
“Automatic detect Domain IP” option is enabled. When “Automatic detect Domain IP” option is
disabled, you need to manually enter the domain server’s IP address.
♦
Logon account (Administrator)
– the administrator’s logon name in the Domain Controller
♦
Password
- the administrator's password in the Domain Controller.
♦
PDC/ADS Mode
– The type of Domain Controller. Choose PDC for Windows NT Server or
ADS for Windows 2000/2003/2008 Server.
♦
Auto Detect Enctypes
–
This option automatically detects the encryption type used in
Windows authentication. To manually select the encryption type, disable this option and
select the preferred encryption type from the EncType drop-down list.
♦
Enable NTLMv2 authentication
- This parameter determines whether or not smbclient will
attempt to authenticate itself using the NTLMv2 encrypted password. If enable, proNAS will
only sent NTLMv2 and LMv2 responses. NTLMv2 authentication protocol is available only on
WindowsNT4 with SP4 and Windows 2000 or later. Default is disabled.
♦
Enable client schannel
- This controls whether the client offers or even demands the use of
the netlogon schannel. Default is auto, means it offers the schannel but does not enforce it.
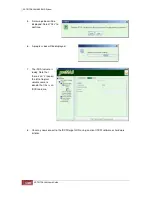
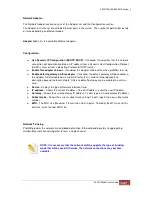
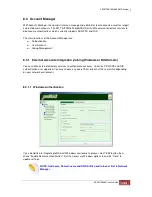
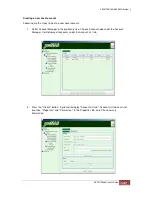
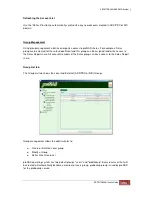
8.3.1.2 Sample Steps to Join the NAS to Windows AD Domain:
Select Network Manager. In Network Manager –> Network tab, click “Edit” to configure
network settings.
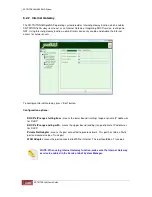
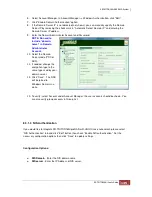
Change the default proNAS Host Name if there are other proNAS systems in the network.
Enter the Windows Domain name in “Domain/Workgroup”. For example: MYDOMAIN
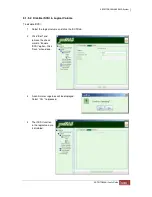
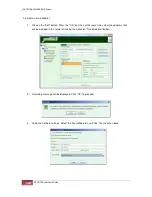
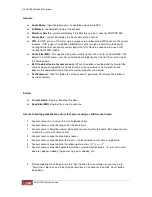
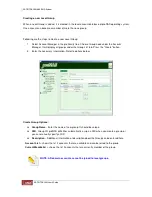
Enter the DNS Suffix.
The DNS suffix is the
name appended to the
server name to
complete the server’s
FQDN. This includes
the domain name. For
example:
MYDOMAIN.LOCAL
Enter the DNS Server
and WINS Server (IP
address) as necessary.
Click “Save” to update
changes.
Содержание TRITON 16Ni
Страница 1: ...SurfRAID TRITON 16Ni User s Guide Revision 1 1...
Страница 40: ......
Страница 41: ......
Страница 42: ......
Страница 43: ......
Страница 67: ...5 3 7 Stop Volume Check Use this option to stop current running Check Volume Set process...
Страница 111: ...4 Verify the new LV size...
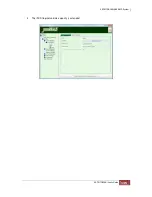
Страница 135: ...4 The iSCSI logical volume capacity is extended...
Страница 207: ...The proBackup page will be displayed Click Start Java Web Enter the login account admin and password 00000000...
Страница 216: ...10 5 Account Detail Under Plan Manager click the account name to view information about the account...
Страница 236: ...2 Select Set LAN Configuration and press Enter key 3 Setup LAN Configuration...
Страница 238: ...6 Press F10 to save configuration changes and exit setup With Ok selected press Enter key to restart system...
Страница 247: ......