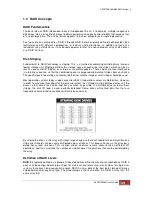

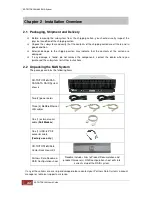
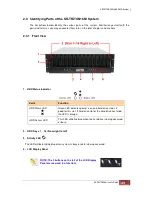
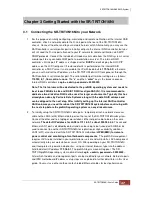

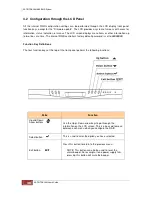

5. Smart Function Front Panel
The smart LCD panel is an option to configure the RAID subsystem. If you are configuring the
subsystem using the LCD panel, press the Select button to login and configure the RAID
subsystem.
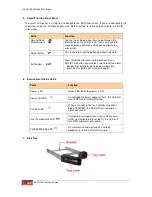
Parts
Function
Up and Down
Arrow buttons
Use the Up or Down arrow keys to go through the
information on the LCD screen. This is also used to
move between each menu when you configure the
subsystem.
Select button
This is used to enter the option you have selected.
Exit button
EXIT
Press this button to return to the previous menu.
NOTE: This button can also be used to reset the alarm
beeper. For example, if one power supply fails,
pressing this button will mute the beeper.
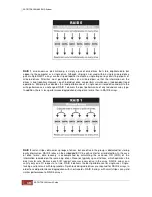
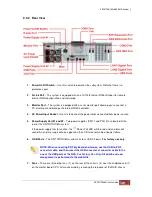
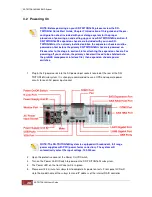
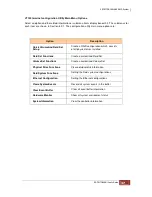
6. Environment Status LEDs
7. Disk Tray
Parts
Function
Power LED
Green LED indicates power is ON.
Power Fail LED
If a redundant power supply unit fails, this LED will
turn to RED and alarm will sound.
Fan Fail LED
When a fan fails or the fan’s rotational speed is
below 1500RPM, this LED will turn red and an
alarm will sound.
Over Temperature LED
If temperature irregularities in the system occurs
(HDD slot temperature over 65°C), this LED will
turn RED and alarm will sound.
Voltage Warning LED
An alarm will sound warning of a voltage
abnormality and this LED will turn red.
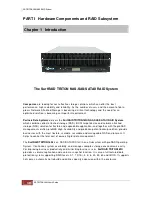
Содержание TRITON 16Ni
Страница 1: ...SurfRAID TRITON 16Ni User s Guide Revision 1 1...
Страница 40: ......
Страница 41: ......
Страница 42: ......
Страница 43: ......
Страница 67: ...5 3 7 Stop Volume Check Use this option to stop current running Check Volume Set process...
Страница 111: ...4 Verify the new LV size...
Страница 135: ...4 The iSCSI logical volume capacity is extended...
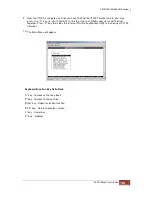
Страница 207: ...The proBackup page will be displayed Click Start Java Web Enter the login account admin and password 00000000...
Страница 216: ...10 5 Account Detail Under Plan Manager click the account name to view information about the account...
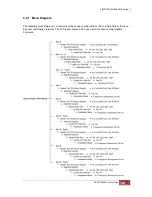
Страница 236: ...2 Select Set LAN Configuration and press Enter key 3 Setup LAN Configuration...
Страница 238: ...6 Press F10 to save configuration changes and exit setup With Ok selected press Enter key to restart system...
Страница 247: ......