


5.3 Volume Set Function
Volume Set is seen by the host system as a single logical device. It is organized in a RAID level
with one or more physical disks. RAID level refers to the level of data performance and protection of
a Volume Set. A Volume Set capacity can consume all or a portion of the raw capacity available
in a Raid Set.
Multiple Volume Sets can exist on a group of disks in a Raid Set. Additional Volume Sets created in
a specified Raid Set will reside on all the physical disks in the Raid Set. Thus each Volume Set on
the Raid Set will have its data spread evenly across all the disks in the Raid Set.
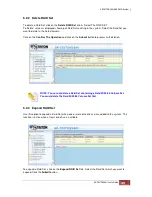
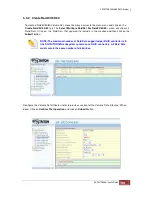
5.3.1 Create Volume Set
The following are the Volume Set features:
1. Volume sets of different RAID levels may coexist on the same Raid Set.
2. Up to
128 Volume Sets
in a Raid Set can be created by the RAID controller. If multiple RAID
sets are created, the total quantity of Volume Sets from the RAID system is still 128.
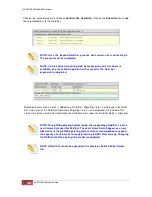
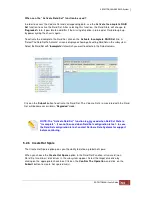
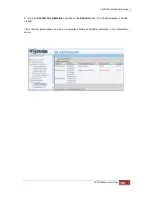
To create Volume Set from a Raid Set, expand the Volume Set Functions in the main menu and
click on the
Create Volume Set
link. The
Select The Raid Set To Create On It
screen will show
all existing Raid Sets.
Click
on the Raid Set where you want to create the Volume Set and then
click
on the
Submit
button.
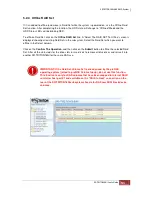
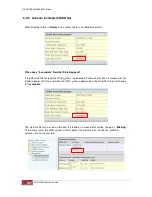
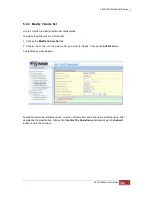
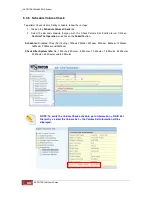
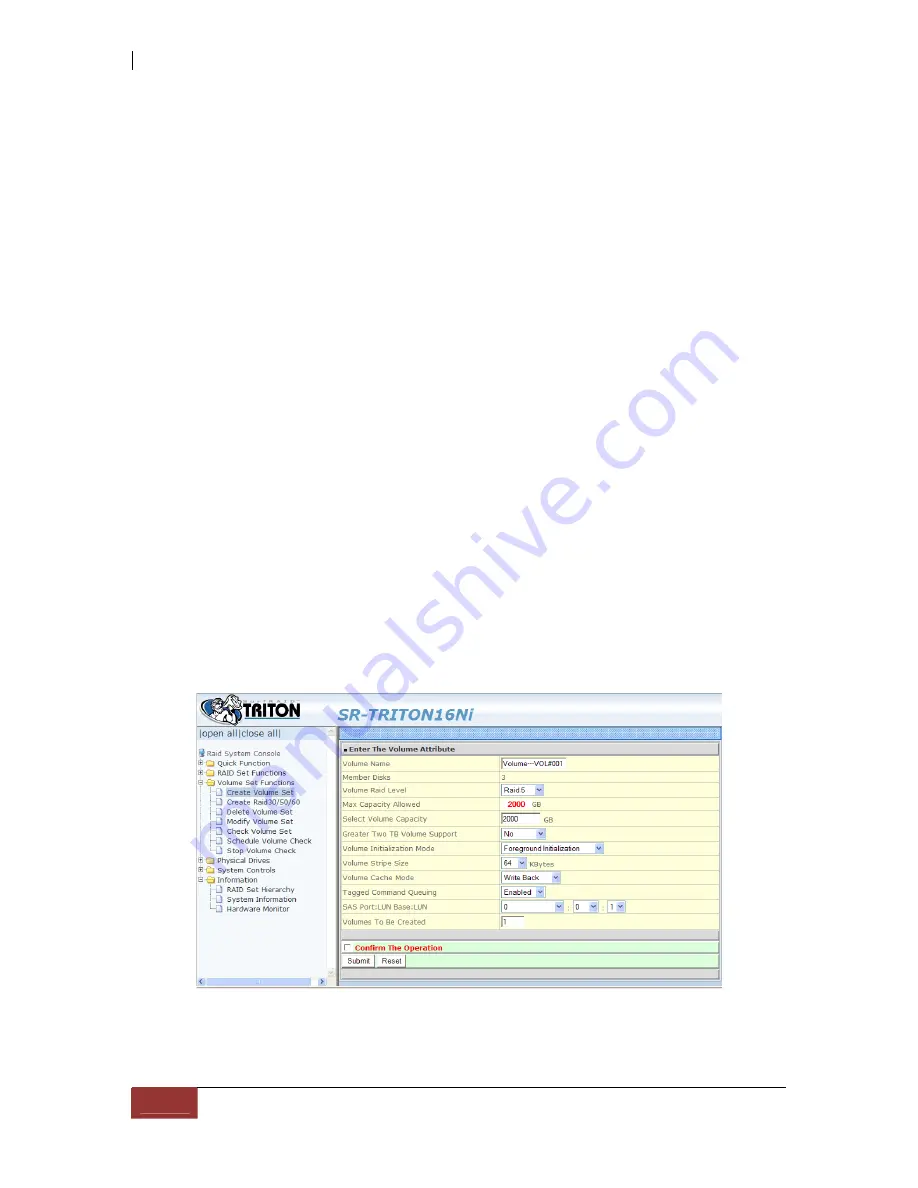
The Volume Set setup screen allows user to configure the Volume Name, Capacity, RAID level,
Initialization Mode, Stripe Size, Cache Mode, Tagged Command Queuing, SAS Port/LUN Base/LUN,
and Volume To Be Created.
Содержание TRITON 16Ni
Страница 1: ...SurfRAID TRITON 16Ni User s Guide Revision 1 1...
Страница 40: ......
Страница 41: ......
Страница 42: ......
Страница 43: ......
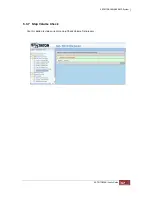
Страница 67: ...5 3 7 Stop Volume Check Use this option to stop current running Check Volume Set process...
Страница 111: ...4 Verify the new LV size...
Страница 135: ...4 The iSCSI logical volume capacity is extended...
Страница 207: ...The proBackup page will be displayed Click Start Java Web Enter the login account admin and password 00000000...
Страница 216: ...10 5 Account Detail Under Plan Manager click the account name to view information about the account...
Страница 236: ...2 Select Set LAN Configuration and press Enter key 3 Setup LAN Configuration...
Страница 238: ...6 Press F10 to save configuration changes and exit setup With Ok selected press Enter key to restart system...
Страница 247: ......