
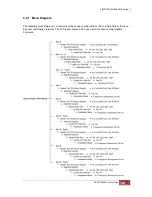

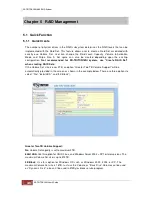

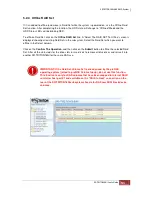


5.2 RAID Set Functions
Use the Raid Set Function and Volume Set Function if you prefer to create customized Raid Sets and
Volume Sets. User can manually configure and take full control of the Raid Set settings, but it will
take a little longer to setup than the Quick Create configuration. Select the Raid Set Function
to manually configure the Raid Set for the first time or to delete existing Raid Set and
reconfigure a Raid Set.
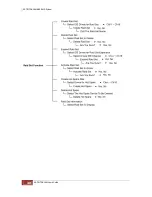
5.2.1 Create RAID Set
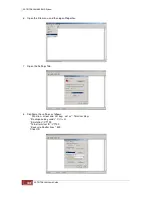
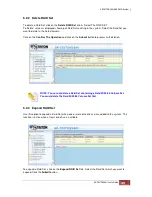
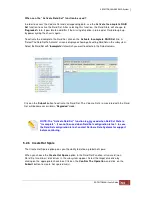
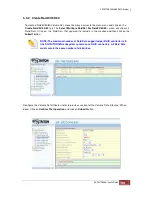
To create a Raid S et, click on the
Create RAID Set
link. A “Select The Drives For RAID Set”
screen is displayed showing the disk drives in the system. Click the box next to each disk
drive that w ill be included in Raid Set to be created. Enter the preferred Raid Set Name (1
to 16 alphanumeric characters) to define a unique identifier for the Raid Set. The default Raid Set
name will always appear as
Raid Set # xxx
.
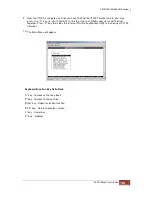
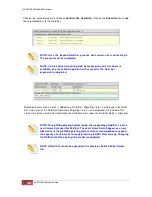
Click on the
Confirm The Operation
option and click on the
Submit
button in the bottom of the
screen. A “RAID Set Created Successfully” message with appear.
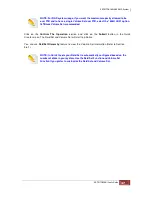
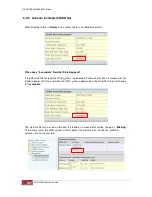
NOTE: Maximum number of disk drives supported per RAID Set is 32. For
example, you have 16 disk drives in the NAS system, and you connect a SAS
JBOD expansion chassis also with 16 disk drives, you can create a single RAID
Set using all 32 disk drives.
NOTE: For better performance and flexibility it is recommended to dedicate a
two disk drive RAID Set for the proNASVG Volume Set. The proNASVG Volume
Set is used by the proNAS operating system and is required as the first Volume
Set to be created.
Содержание TRITON 16Ni
Страница 1: ...SurfRAID TRITON 16Ni User s Guide Revision 1 1...
Страница 40: ......
Страница 41: ......
Страница 42: ......
Страница 43: ......
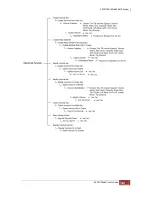
Страница 67: ...5 3 7 Stop Volume Check Use this option to stop current running Check Volume Set process...
Страница 111: ...4 Verify the new LV size...
Страница 135: ...4 The iSCSI logical volume capacity is extended...
Страница 207: ...The proBackup page will be displayed Click Start Java Web Enter the login account admin and password 00000000...
Страница 216: ...10 5 Account Detail Under Plan Manager click the account name to view information about the account...
Страница 236: ...2 Select Set LAN Configuration and press Enter key 3 Setup LAN Configuration...
Страница 238: ...6 Press F10 to save configuration changes and exit setup With Ok selected press Enter key to restart system...
Страница 247: ......