


3.2 Powering On
NOTE: Before powering on your SR-TRITON16Ni, please review the SR-
TRITON16i Quick Start Guide, Chapter 7 Introduction of this guide and the pre-
configuration sheet included with your storage system for the proper
procedure of powering on and setting up your new SR-TRITON16Ni solution. If
SR-TRITON16JS3 expansion chassis are included with your new SR-
TRITON16Ni or if an already installed solution the expansion chassis must be
powered on first before the primary SR-TRITON16Ni chassis is powered on.
Please refer to the steps in section 3.4 for attaching the expansion chassis. For
powering off your solution, the primary chassis will need to be shutdown via
the proNAS management interface first, then expansion chassis power
switches.
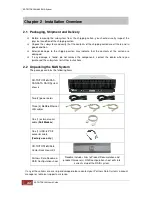
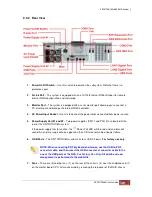
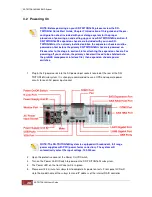
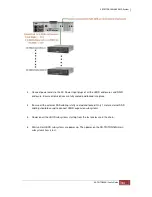
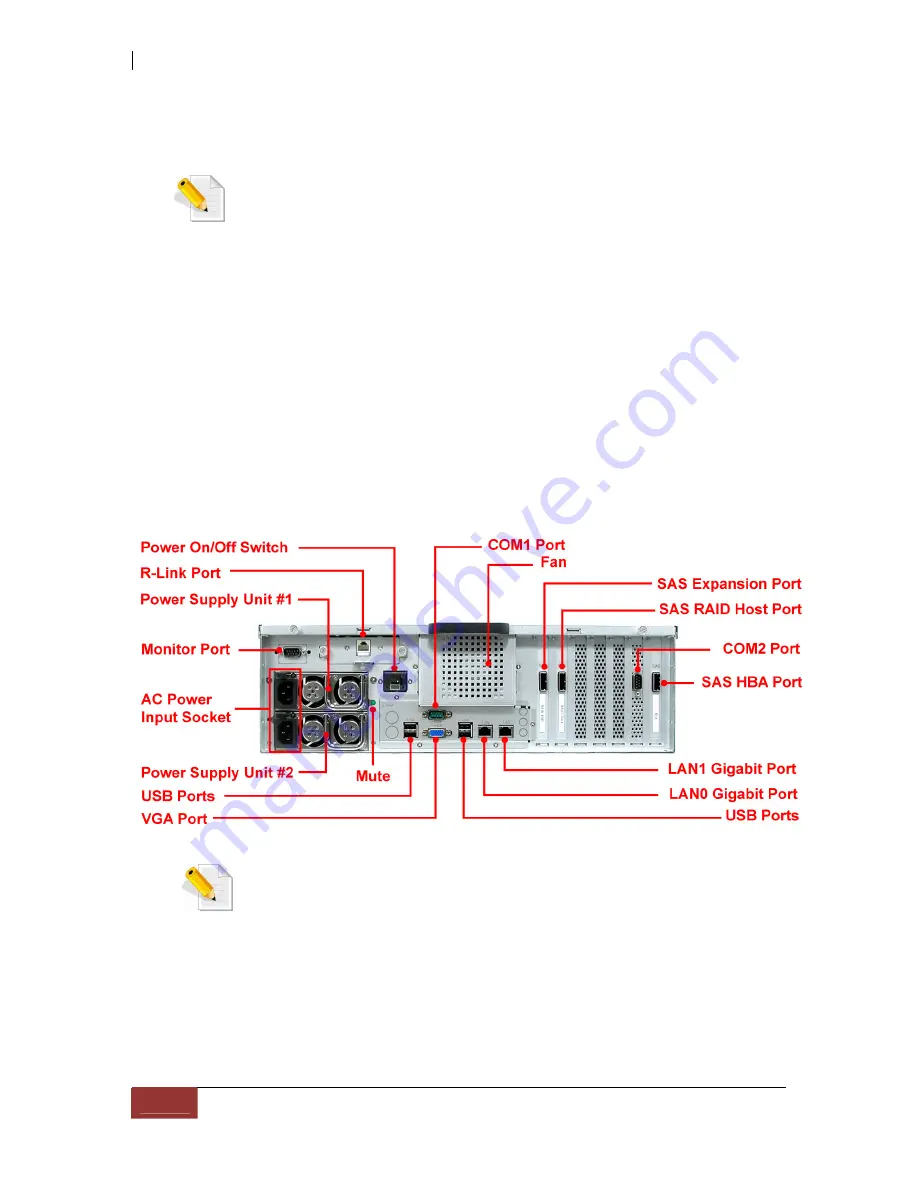
1. Plug in the 2 power cords into the AC power input sockets located at the rear of the SR-
TRITON16Ni subsystem. It is strongly recommended to use a UPS and separate power
circuits for each AC power input socket.
NOTE: The SR-TRITON16Ni system is equipped with redundant, full range
power supplies with PFC (power factor correction). The system will
automatically select the input voltage, 100-240vac.
2. Open the protective cover of the Power On/Off Switch.
3. Turn on the Power On/Off Switch to power on the SR-TRITON16Ni subsystem.
4. The Power LED on the front Panel will turn green.
5. Please wait 3-4 minute for subsystem to complete its power on tests. Front panel LCD will
state the model name of the subsystem and IP address of the internal RAID controller.
Содержание TRITON 16Ni
Страница 1: ...SurfRAID TRITON 16Ni User s Guide Revision 1 1...
Страница 40: ......
Страница 41: ......
Страница 42: ......
Страница 43: ......
Страница 67: ...5 3 7 Stop Volume Check Use this option to stop current running Check Volume Set process...
Страница 111: ...4 Verify the new LV size...
Страница 135: ...4 The iSCSI logical volume capacity is extended...
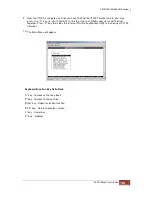
Страница 207: ...The proBackup page will be displayed Click Start Java Web Enter the login account admin and password 00000000...
Страница 216: ...10 5 Account Detail Under Plan Manager click the account name to view information about the account...
Страница 236: ...2 Select Set LAN Configuration and press Enter key 3 Setup LAN Configuration...
Страница 238: ...6 Press F10 to save configuration changes and exit setup With Ok selected press Enter key to restart system...
Страница 247: ......