
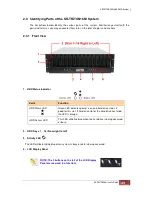
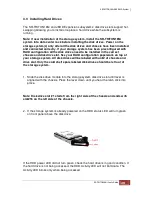


3.3 Installing Hard Drives
The SR-TRITON16Ni and JBOD Expansion subsystems’ disk drive slots support hot-
swapping allowing you to install or replace a hard drive while the subsystem is
running.
Note: If new installation of the storage system, install the SR-TRITON16Ni
system into data center rack before installing the disk drives. Power on the
storage system(s) only after all the disk drives and chassis have been installed
and connected correctly. If your storage system has been preconfigured with
RAID configuration all the disk drives need to be installed in the correct
chassis and disk drive slot. See your RAID configuration paperwork on top of
your storage system. All disk drives will be labeled with unit# of chassis and
drive slot. Only the cold shelf spare labeled disk drives should be left out of
the storage system.
1. Slide the disk drive module into the storage system disk drive slot until lever is
aligned with the chassis. Press the lever down until you hear the latch click into
place.
Note: Disk drive slot #1 starts from the right side of the chassis and ends with
slot#16 on the left side of the chassis.
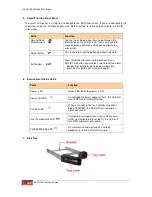
2. If the storage system is already powered on the HDD status LED will turn green
on front panel above the disk drive.
If the HDD power LED did not turn green, check the hard drive is in good condition. If
the hard drive is not being accessed, the HDD Activity LED will not illuminate. The
Activity LED blinks only when being accessed.
Содержание TRITON 16Ni
Страница 1: ...SurfRAID TRITON 16Ni User s Guide Revision 1 1...
Страница 40: ......
Страница 41: ......
Страница 42: ......
Страница 43: ......
Страница 67: ...5 3 7 Stop Volume Check Use this option to stop current running Check Volume Set process...
Страница 111: ...4 Verify the new LV size...
Страница 135: ...4 The iSCSI logical volume capacity is extended...
Страница 207: ...The proBackup page will be displayed Click Start Java Web Enter the login account admin and password 00000000...
Страница 216: ...10 5 Account Detail Under Plan Manager click the account name to view information about the account...
Страница 236: ...2 Select Set LAN Configuration and press Enter key 3 Setup LAN Configuration...
Страница 238: ...6 Press F10 to save configuration changes and exit setup With Ok selected press Enter key to restart system...
Страница 247: ......