Setting Measurement Conditions
3-4
3
TYPE RUN COND SCREEN SAVE
COLOR F C2 BRT
1
MONITOR OUTPUT
NG IMGS
2
CAPTURE IMG
PARTIAL-IMG
3
MESSSAGE DISPLAY YES(NUMERIC)
4
PATTERN DISPLAY
YES
5
SHOW BINARY IMG
YES
6
SOW
q
FIX IMG
YES
7
OPS MAIN DISP
YES
8
DISP CHG-EVAL
NO
9
PC-MNTR
NO
0
THROUGH DISPLAY
NO
q
EXTERNSION FUNC. NO
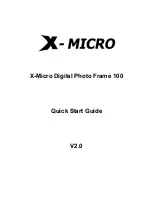
CAM1
NG IMGS
CAM1&NG-IMG(HORIZ)
CAM1&NG-IMG(VERT)
SET=SELECT A MENU ESC=BACK SEL=CHNG IMG TRG=FUNC
SELECT CAMERA
Description
CAM1&2
Camera 1 and camera 2 can be used for measurements (0 to 4) and for
image pre-processing.
CAM1&NG-IMG
Only camera 1 can be used for measurements (0 to 4) and image pre-
processing. Using camera 1, NG images can be displayed on the monitor.
- See page 1-19.
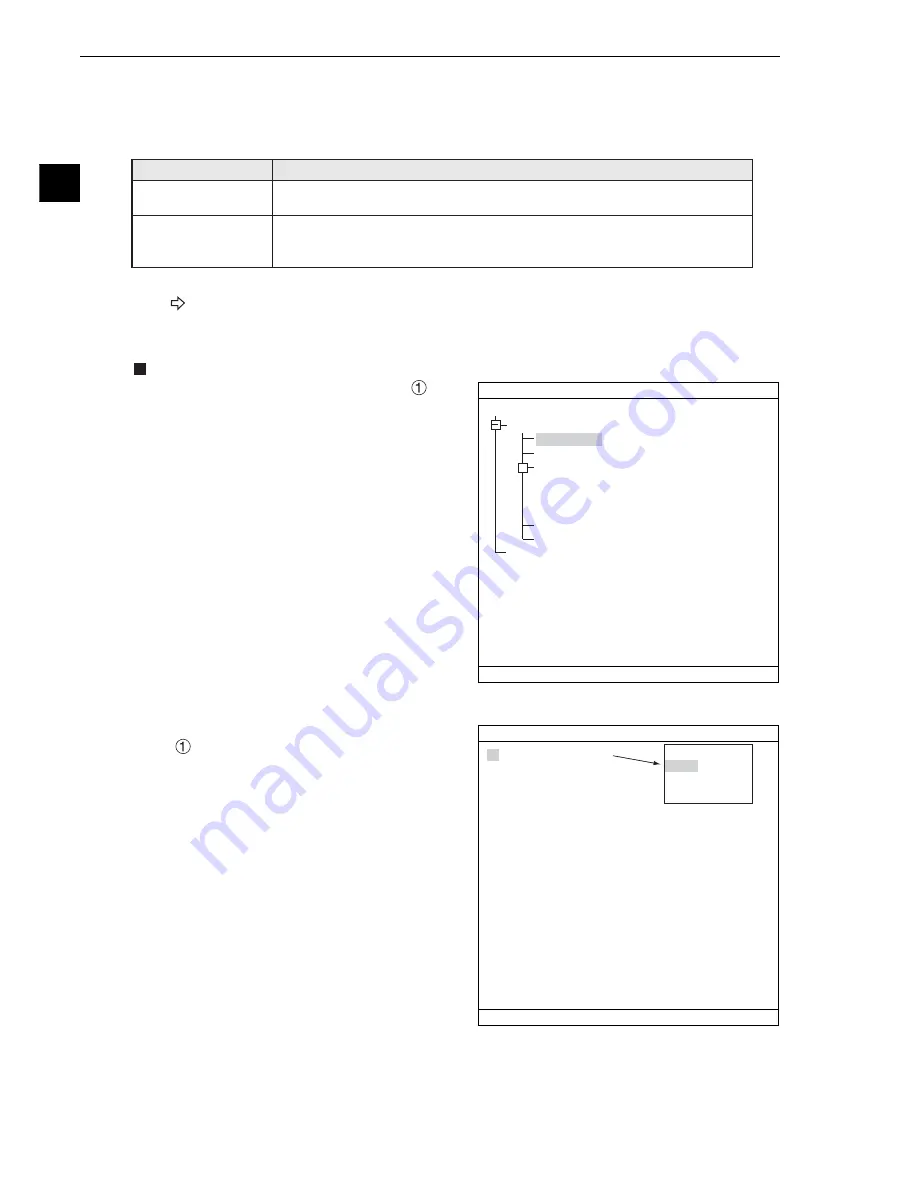
OBJECT TYPE COND
TYPE00
TYPE RUN COND
IMAGE-ADJ
MEA-CND(CAMERA1)
MEA-CND(CAMERA2)
FINAL NUM.CALC
FINAL OUTPUT COND
OBJ-TYPE I/O
OBJ-TYPE SYS.
TYPE(NEW)
+
SELECT OBJECT TYPE COND
COLOR F C2 BRT
1
MONITOR OUTPUT
2
CAPTURE IMG
3
MESSAGE DISPLAY
4
PATTERN DISPLAY
5
SHOW BINARY IMG
6
SHOW
q
FIX IMG
7
OPS MAIN DISP
8
DISP CHG-EVAL
9
PC-MNTR
0
THROUGH DISPLAY
q
EXTENSION FUNC.
w
CURSOR 1
e
CLOSS CURSOR COORD
r
CURSOR 2
t
CLOSS CURSOR COORD
SET=TO NEXT SUB-MENU ESC=BACK SEL=CHNG IMG TRG=POPUP
3-2 Shared settings
[1] Camera selection
Specify which cameras to use (Camera 1, Camera 2) in "MEA-CND" on the "OBJECT TYPE COND"
screen for each object type.
Note: Before choosing the NG screen, you will first have to change Camera 2 to NG screen.
For details, see page 1-17.
When the select camera is changed from "CAM1&2" to "CAM1&NG-IMG," the setting details for
"MEASURE0 CAM2" and "MEASUREMENT1 to 4" are initialized.
Setting method
To set the output to the monitor, select "
MONI-
TOR OUTPUT" on the "TYPE RUN COND" screen.
1. On the "OBJECT TYPE COND" screen, select
"TYPE00" and "TYPE RUN COND."
2. On the "TYPE RUN COND" screen, select
"
MONITOR OUTPUT." Then, select "NG-
IMGS" from the popup men.


