213
11. Using SmarThru Workflow, Shared Folder, Stored Document, and USB
Scanning to a USB memory device
•
The machine cannot detect the unformatted USB memory device.
Format and then reinsert the USB memory device into the USB memory
port on your machine.
•
The machine could not detect the USB memory device when the
machine is in power save mode. Wait until the machine returns to ready
mode, and then reinsert the USB memory device into the USB memory
port on your machine.
1
Insert a USB memory device into the USB memory port on your machine.
2
Place the originals face up in the DSDF or place a single original face
down on the scanner glass and close the DSDF (see "Loading originals"
on page 64).
3
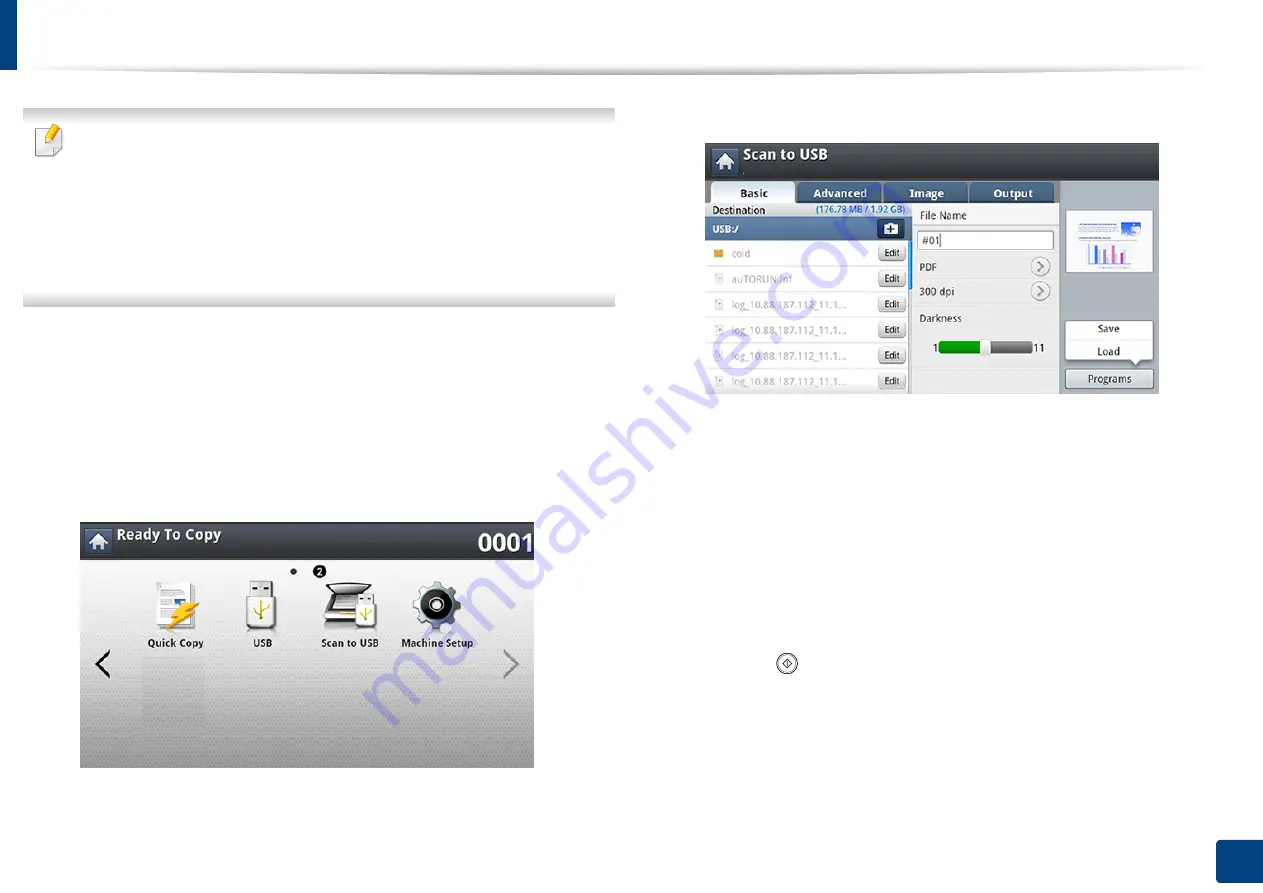
Press
Scan to USB
from the display screen.
4
Press the
Basic
tab.
5
Select a folder for storing the scanned image. If you do not select a folder,
the scanned image is stored in root directory.
6
Press the
File Name
input area. The pop-up keyboard appears.
7
Enter a file name to store the scan data. Press
Done
.
8
Set the
File format
,
Resolution
, and
Darkness
.
9
Set the scan features in the
Advanced
,
Image
, or
Output
tabs, if
necessary (see "Changing the scan feature settings" on page 141).
10
Press the
(
Start
) button to scan and store the file.
If an original is placed on the scanner glass, the machine shows the
window asking if you want to place another page. Load another original
and press
Yes
. When you finish, press
No
on this window.
11
After scanning is complete, you can remove the USB memory device
from the machine.
Содержание ProCpress M408 Series
Страница 282: ...Redistributing toner 278 14 Maintenance ...
Страница 284: ...Replacing the toner cartridge 280 14 Maintenance 2 1 ...
Страница 285: ...Replacing the toner cartridge 281 14 Maintenance ...
Страница 289: ...Installing accessories 285 14 Maintenance 1 2 ...
Страница 293: ...Cleaning the machine 289 14 Maintenance 1 1 2 2 ...
Страница 301: ...Clearing paper jams 297 15 Troubleshooting If you do not see the paper in this area stop and go to next step 1 2 2 1 ...
Страница 302: ...Clearing paper jams 298 15 Troubleshooting 2 In optional trays The procedure is same for all optional trays ...
Страница 303: ...Clearing paper jams 299 15 Troubleshooting If you do not see the paper in this area stop and go to next step ...
Страница 304: ...Clearing paper jams 300 15 Troubleshooting If you do not see the paper in this area stop and go to next step ...
Страница 305: ...Clearing paper jams 301 15 Troubleshooting 3 In the multi purpose tray ...
Страница 307: ...Clearing paper jams 303 15 Troubleshooting 2 1 1 2 ...
Страница 308: ...Clearing paper jams 304 15 Troubleshooting If you do not see the paper in this area stop and go to next step ...
Страница 310: ...Clearing paper jams 306 15 Troubleshooting If you do not see the paper in this area stop and go to next step ...
Страница 312: ...Clearing paper jams 308 15 Troubleshooting 6 In the duplex unit area 1 2 1 2 1 2 ...
Страница 317: ...Clearing paper jams 313 15 Troubleshooting If you do not see the paper in this area stop and go to next step ...


