


1-47
Various Settings
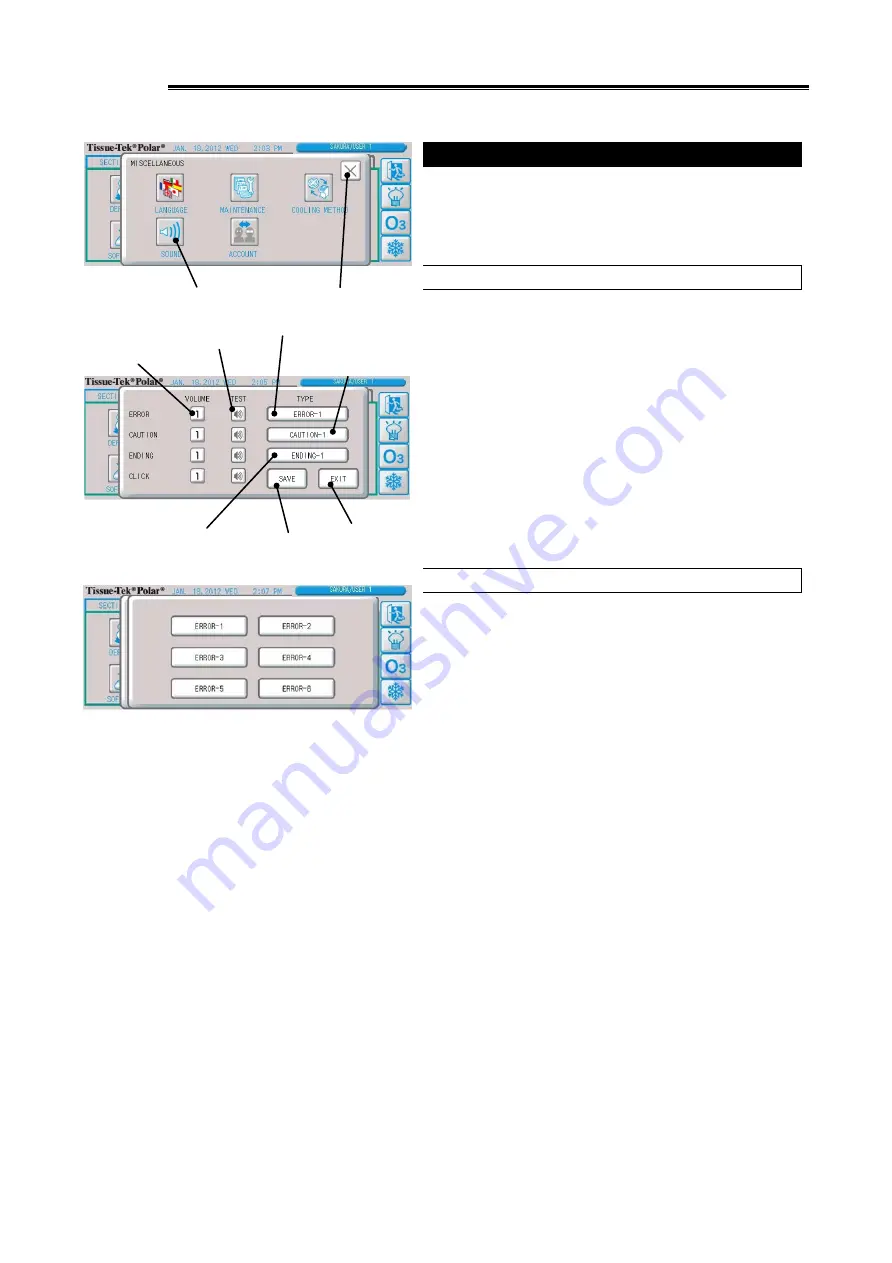
Setting Sounds
You can set the error sound, alarm sound, end sound and click
sound.
Changing the Sound Volume
1. Press the "Miscellaneous" button on the [UTILITIES] Tab
Screen.
2. Press the "Sound Setting" button on the other settings
screen.
3. The sound setting screen appears.
Pressing the "Sound Volume" button for the sound you want to
change the volume of, to increase the value and raise the sound
volume. The setting range is 1 to 8, and once 8 is reached, the
next pressing of the button returns the setting to 1.
You can test the selected sound by pressing the "Test" button.
4. Pressing the "Save" button saves the setting and closes the
setting screen.
Changing the Sound
1. Press the "Miscellaneous" button on the [UTILITIES] Tab
Screen.
2. Press the "Sound Setting" button on the other settings
screen.
3. The sound setting screen appears.
Press the button of the type of sound you want to change ("error
sound," "alarm sound" or "end sound"), and the sound selection
screen will appear.
4. Press the button of the sound you want to change, and the
display will return to the sound setting screen.
5. Pressing the "Save" button saves the setting and closes the
setting screen.
End sound button
Save button
Exit button
Sound volume
button
Alarm sound button
Test button
Error sound button
Close button
Sound setting button
Содержание Tissue-Tek Polar DM
Страница 1: ...Operating Manual Frozen Tissue Section Preparation Instrument Cryostat Microtome...
Страница 15: ...Chapter 1 Basic Knowledge of Instrument...
Страница 32: ...1 17 Standard Accessories Options 4 5 15...
Страница 68: ...1 53...
Страница 69: ...Chapter 2 Operating Method...
Страница 108: ...2 39...
Страница 109: ...Chapter 3 Maintenance Inspection...
Страница 122: ...3 13...
Страница 123: ...Chapter 4 Troubleshooting...


