1.
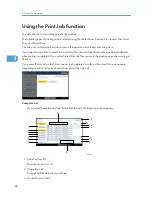
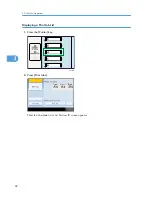
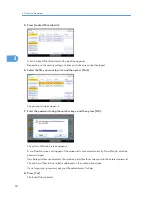
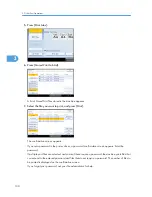
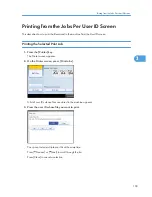
Press the [Printer] key to display the Printer screen.
2.
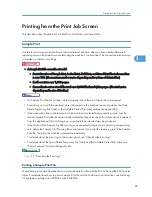
Press [Print Jobs].
A list of the print files stored in the machine appears.
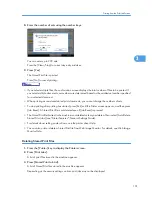
3.
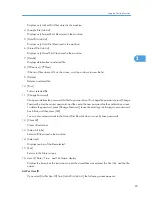
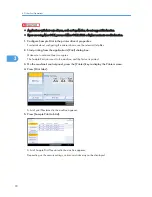
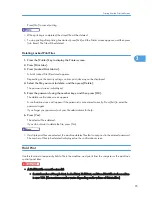
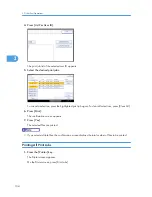
Press [Sample Print Job List].
A list of Sample Print files stored in the machine appears.
Depending on the security settings, certain print jobs may not be displayed.
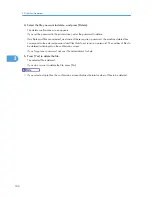
4.
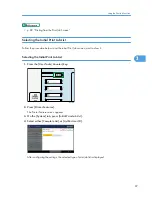
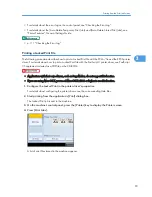
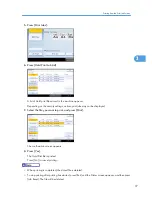
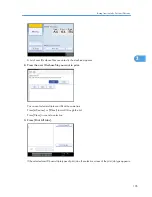
Select the file you want to delete, and then press [Delete].
The delete confirmation screen appears.
5.
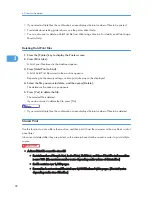
Press [Yes] to delete the file.
The selected file is deleted.
• If you do not want to delete the file, press [No].
• If you select multiple files, the confirmation screen displays the total number of files to be deleted.
Locked Print
Use this function to maintain privacy when printing confidential documents on the machine over a shared
network. Usually, it is possible to print data using the control panel once it is stored in this machine. When
using Locked Print, it is not possible to print unless a password is entered on the machine's control panel.
Your confidential documents will be safe from being viewed by other people.
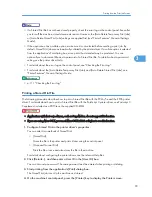
• A Locked Print file cannot be stored if:
• the total number of Sample Print, Locked Print, Hold Print, and Stored Print files in the machine
is over 100. (The maximum number varies depending on the volume of data in files.)
• the file contains over 1,000 pages.
• the machine's sent or stored files total over 9,000 black-and-white pages. (The total varies
depending on the size of the files.)
• If a Locked Print file has not been stored properly, check the error log on the control panel.
• Even after you turn off the machine, stored documents remain. However, the [Auto Delete Temporary
Print Jobs] or [Auto Delete Stored Print Jobs] settings are applied first.
• If the application has a collate option, make sure it is not selected before sending a print job. Locked
Print jobs are automatically collated by the printer driver as default. If a collate option is selected in
the application print dialog box, more sets than intended may be printed.
• After the Locked Print file is printed, the job is automatically deleted.
3. Other Print Operations
92
3
Содержание Aficio MP 4000
Страница 46: ...1 Getting Started 46 1 ...
Страница 50: ...2 Entering Text 50 2 ...
Страница 99: ...MEMO 99 ...
Страница 100: ...MEMO 100 EN USA D012 7754 ...
Страница 138: ...2 Troubleshooting When Using the Copy Document Server Function 34 2 ...
Страница 184: ...4 Troubleshooting When Using the Printer Function 80 4 ...
Страница 205: ...Original Orientation Exposure glass ADF copy scanner Paper Orientation BBR036S Loading Paper 101 6 ...
Страница 217: ...BAZ035S Adding Staples 113 6 ...
Страница 220: ...6 Adding Paper Toner and Staples 116 6 ...
Страница 224: ...When C is displayed BBR030S When D is displayed BBR031S 7 Clearing Misfeeds 120 7 ...
Страница 225: ...When P is displayed BBR040S Removing Jammed Paper 121 7 ...
Страница 227: ...When R5 R8 is displayed in the case of 3000 sheet finisher BAZ052S Removing Jammed Paper 123 7 ...
Страница 234: ...BAZ062S 7 Clearing Misfeeds 130 7 ...
Страница 242: ...BBR022S Clean 1 and 2 8 Remarks 138 8 ...
Страница 246: ...MEMO 142 ...
Страница 247: ...MEMO 143 ...
Страница 248: ...MEMO 144 EN USA D012 7804 ...
Страница 275: ...BAT021S 1 Press Special Original 2 Select the original orientation and then press OK Placing Originals 23 1 ...
Страница 284: ...1 Placing Originals 32 1 ...
Страница 338: ...2 Basic Copying 86 2 ...
Страница 396: ...3 Advanced Copying 144 3 ...
Страница 420: ...4 Document Server 168 4 ...
Страница 442: ...MEMO 190 ...
Страница 443: ...MEMO 191 ...
Страница 444: ...MEMO 192 EN USA D012 7652 ...
Страница 478: ...2 After checking the settings on the display press Exit 1 Transmission 30 1 ...
Страница 602: ...1 Transmission 154 1 ...
Страница 608: ... p 131 Sender Settings 2 Other Transmission Features 160 2 ...
Страница 626: ...2 Other Transmission Features 178 2 ...
Страница 666: ...6 Press SMTP 7 Select Yes or No and then press OK 8 Press OK 4 Changing Confirming Communication Information 218 4 ...
Страница 778: ...MEMO 330 ...
Страница 779: ...MEMO 331 ...
Страница 780: ...MEMO 332 EN USA D346 8515 ...
Страница 808: ...24 ...
Страница 858: ...2 Setting Up the Printer Driver 74 2 ...
Страница 915: ...ftp ftp put path name file name Virtual Printer Name Using the Virtual Printer 131 3 ...
Страница 916: ...3 Other Print Operations 132 3 ...
Страница 928: ...5 Appendix 144 5 ...
Страница 931: ...MEMO 147 ...
Страница 932: ...MEMO 148 EN USA AE AE D381 ...
Страница 933: ...Copyright 2007 ...
Страница 934: ...Operating Instructions Printer Reference D381 7002 EN USA ...
Страница 943: ...Specifications 174 INDEX 177 7 ...
Страница 946: ... p 115 Scanning Originals with the Network TWAIN Scanner p 75 Storing Files Using the Scanner Function 10 ...
Страница 954: ...18 ...
Страница 986: ...1 Sending Scan Files by E mail 50 1 ...
Страница 1010: ...2 Sending Scan Files to Folders 74 2 ...
Страница 1050: ...4 Delivering Scan Files 114 4 ...
Страница 1098: ...Scan size Maximum resolution dpi A6 1200 7 Appendix 162 7 ...
Страница 1112: ...7 Appendix 176 7 ...
Страница 1118: ...Operating Instructions Scanner Reference D381 7102 EN USA ...

