Pratt & Whitney Rzeszów S.A.
MAINTENANCE MANUAL
PZL-10W ENGINE
75-12-00
2008.01.20
Page 402
Export Control Classification: PL/UE 9E999
(8)
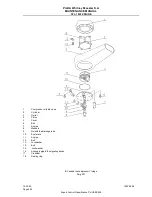
Prepare the adhering surfaces offlanges at ends of pipe (15), valve (1) and drive
gearbox (15), pipe connection (16) and washers (14) and (17) in order to make
connection.
(9)
Next, put on the both surfaces of washers: (14) (see 72-02-00 Table 203 item 49)
and (17)-(see 72-02-00 Table 203 item 50) the leak stopper (see 72-02-00 Table 202
item 42).
(10)
Put the washer (14) under the flange of pipe 15 (from the side of valve), and next put
the flange of pipe (15) and lock washers (13) on the threaded studs of valve (1) -
(see 72-02-00 Table 203 item 51) and screw down the nuts (12) by hand.
(11)
Put the washer (17) under the second flange of pipe (1b). Put the washers (18) under
bolt heads (19) and screw down the tlange of pipe to the pipe connection (16) on the
shield of combustion chamber.
(12)
Tighten the nuts (12) with the wrench and bend the tabs of the lockwashers (13).
(13)
Place and tighten the electric cable plug (22) on the valve and safety wire it.
(14)
Perform the tests (see 71-02-00, ADJUSTMENT AND TESTS, item 4.C, subitem 5).
NOTE:
Carry out the test of engine after about 10 hours from
the end of assembly of anti-icing valve.
2.
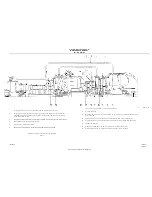
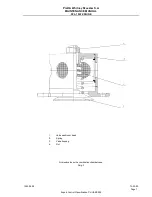
The anti-icing system electromagnetic valve - removal and installation (Dwq. 401).
A.
The electromagnetic valve removal.
(1)
Unsecure and unscrew the pipe (8) nut at the electromagnetic valve.
(2)
Unsecure and unscrew the plug of the electric cable (11 ).
(3)
Unscrew the nuts of the bolts fastening the clamp (10) to the bracket and remove the
valve (9).
B.
The electromagnetic valve installation.
(1 )
Screw in the electric cable (11 ) plug on the valve and safety wire.
(2)
Install the electromagnetic valve (9) and the clamp (10) on the bracket. Place new
self-locking nuts (see 72-02-00 Table 203, item 16) on the clamp bolts. Do not screw
in the nuts witch wrench.
(3)
Screw in the pipe (8) nut to the valve ferrule by hand.
(4)
Tighten the clamp (10) bolt nuts fastening the valve with the wrench.
(5)
Tighten the pipe nut (5) with the wrench and safety wire.
(6)
Perform the tests (see 71-02-00, ADJUSTMENT / TEST, item 4.C. subitem 5).


