


OmniTek OTR 1001 User Guide, v3.1
D-6
Individual tiles can be brought to the front or sent to the back as follows:
Mouse & Keyboard
To send to front/back:
1.
Select the tile that you want to affect.
2.
Right-click anywhere on the display.
3.
Take the option to
Send to back
or
Bring to front
as appropriate.
Snapping into position
To aid the process of aligning the different tiles, the OTR
automatically ‘snaps’ the edges of the tile you are re-
sizing/re-positioning to the edge of the adjacent tile once
the edge gets close to this.
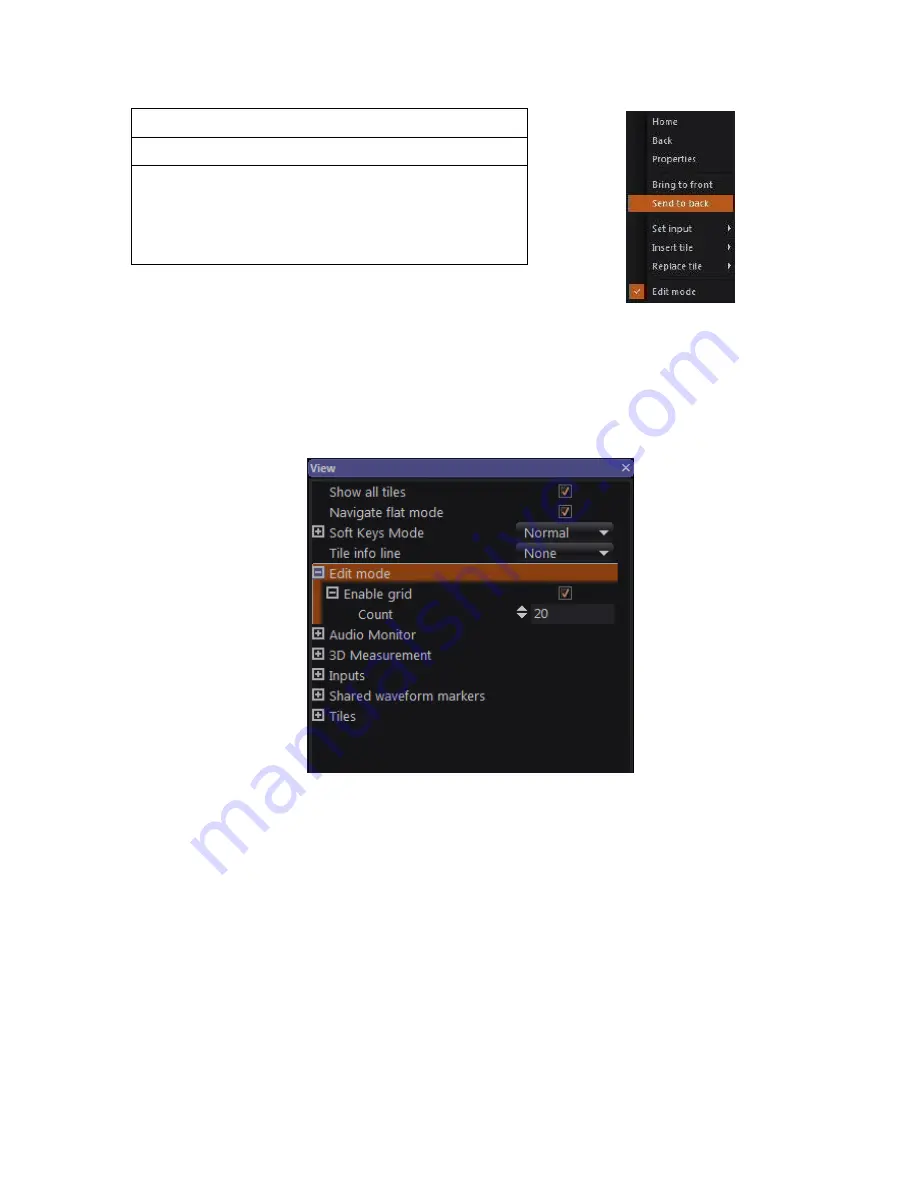
Edit mode also offers a grid to which tiles may be aligned. Enabling this grid typically makes it
even easier to put the tiles into a neat, ‘tiled’ arrangement.
Figure D-11
: Grid settings with the Properties control
The grid is enabled by ticking the
Enable grid
option within the
Edit mode
section of the View
window’s Properties control.
This section also includes a
Count
setting that sets the granularity of the grid to which the tiles
are aligned by defining the number of sections into which the ‘working’ area of the screen is
divided both horizontally and vertically. (This working area doesn’t include the area reserved for
the Status Bar/Button Bar.) Larger values of the Count correspond to a finer grid.
D.5 Saving the New Layout
The layout you create using the above steps will be the one used until you either change it further
or call up a View Preset. At that point, the layout may be lost: calling up a View Preset
automatically changes to the View window layout to the one that was in place when the View
Preset was recorded.
To have the layout you have created available for future use, it needs to be recorded as a View
Preset – as described in Section B.4.
Figure D-10
: Right-click menu when
in Edit mode
Содержание OTR 1001
Страница 1: ...Advanced Measurement Technology OTR 1001 User Guide Software Version 3 1 October 2013...
Страница 28: ...OmniTek OTR 1001 User Guide v3 1a A 16...
Страница 52: ...OmniTek OTR 1001 User Guide v3 1 B 24...
Страница 96: ...OmniTek OTR 1001 User Guide v3 1a E 24...
Страница 116: ...OmniTek OTR 1001 User Guide v3 1 G 6...
Страница 124: ...OmniTek OTR 1001 User Guide v3 1 H 8...
Страница 130: ...OmniTek OTR 1001 User Guide v3 1 I 6 Figure I 3 Difference view Figure I 4 Anaglyph representation...
Страница 184: ...OmniTek OTR 1001 User Guide v3 1 J 22...
Страница 238: ...OmniTek OTR 1001 User Guide v3 1 M 14...
Страница 250: ...OmniTek OTR 1001 User Guide v3 1 N 12...
Страница 254: ...O 4 OmniTek OTR 1001 User Guide v3 1...
Страница 280: ...Q 14 OmniTek OTR 1001 User Guide v3 1 Figure Q 12 Video Index options within the Gen window Properties...
Страница 283: ...OmniTek OTR 1001 User Guide v3 1 Q 17 Figure Q 15 Save File settings within the Gen window Properties...
Страница 292: ...Q 26 OmniTek OTR 1001 User Guide v3 1...
Страница 326: ...OmniTek OTR 1001 User Guide v3 1a S 26...
Страница 358: ...OmniTek OTR1001 User Guide v3 1 U 12...
Страница 364: ...OmniTek OTR 1001 User Guide v3 1 V 6...
Страница 379: ...OmniTek OTR 1001 User Guide v3 1 I 15 Example XML Statements Example Result...
Страница 386: ...OmniTek OTR 1001 User Guide v3 1 II 6...
Страница 389: ...OmniTek OTR 1001 User Guide v3 1...


