151
●
Saving Multiple Files in a Single Operation
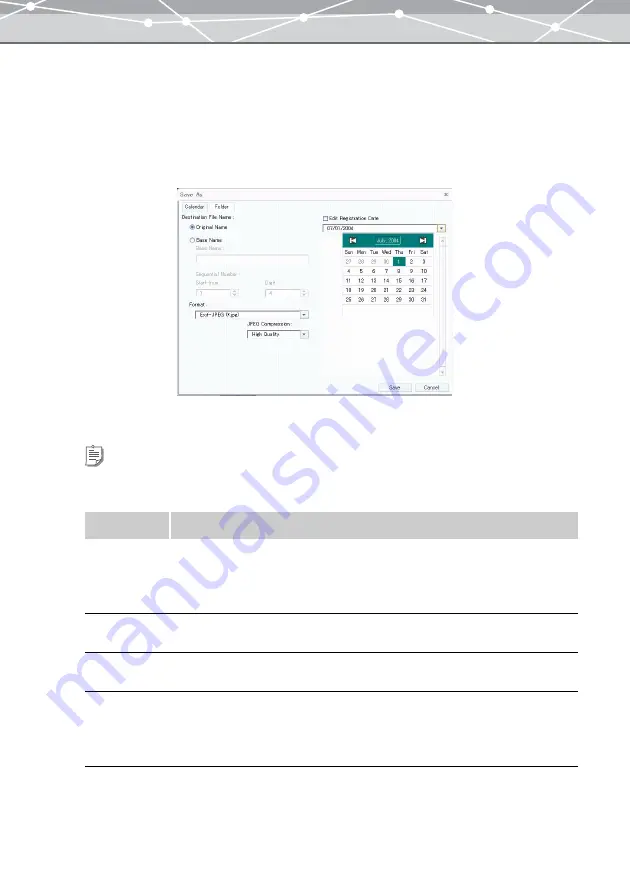
If two or more files are selected for RAW development processing, clicking the [Save All] button displays
the [Save in] dialog box.
The new name can be the prefix you specify followed by the sequential number (e.g. selected files 5, prefix
OLMPS, digits 3, start from 101: OLMPS101, OLMPS102, OLMPS103, OLMPS104, OLMPS105).
To save two or more converted files in OLYMPUS Master in a single operation, follow the procedure below.
1
Set the following items.
Tip
If you save processed files using the [Calendar] tab of the [Save As] dialog box, the saved files will be registered in
the OLYMPUS Master database, and you can view them in calendar view.
Item
Description
File Name
Selects from [Original Name] or [Base Name].
Select [Original Name] to save the file renaming to shooting date; select [Base
Name] when you want to start all of the new names with the same stem.
If a file does not have a shooting date, the date of the last update is used instead.
Prefix
If you select [Base Name] as the file name, enter the stem to prefix to all of the new
names.
Sequential
Number
If you select [Base Name], in the [Start from] and [Digits] edit boxes, enter the
number to start with and the digits (including leading zeros) respectively.
Format
Selects the file format by clicking the [
▼
] button.
If you select either of the following formats, you can set the image quality options.
•
Exif-JPEG (*.jpg)
•
JPEG (*.jpg)
Содержание Master 1.1 Plus
Страница 1: ...Software for Editing and Managing Images Operating Instructions OLYMPUS Master 1 1 Plus ...
Страница 30: ...30 Main Menu The main menu has the following components ...
Страница 94: ...94 5 Click the OK button The shooting date and time is changed ...
Страница 109: ...109 4 Click the Find button Searching starts The search results are displayed in the image display area ...
Страница 136: ...136 6 Click the Transfer button The selected files are transferred to the camera album ...
Страница 163: ...163 3 Click the OK button The settings are applied to the calendar you created ...
Страница 245: ...245 5 Click the Save button The Save As dialog box appears g page 246 ...
Страница 255: ...255 Create button Launches the CD DVD writing software No Item Description ...
Страница 321: ...321 4 Click the Apply button The image in the image display area is resized ...
Страница 323: ...323 3 Click the Apply button The image in the image display area is cropped ...
Страница 332: ...332 5 Click the Apply button The hue saturation and lightness of the image in the image display area are adjusted ...
Страница 338: ...338 4 Click the Apply button The corrected image appears in the image display area ...
Страница 351: ...351 3 Click the Apply button The movie in the movie display area rotates according to the setting you made ...
Страница 355: ...355 6 Click the Apply button The specified section is removed from the movie ...
Страница 382: ...382 Wallpaper 209 Work file 168 176 Z Zoom In 308 Zoom Out 308 ...
Страница 383: ...VE898801 ...


