d-Color MF4003/MF3303
F DISASSEMBLY/REASSEMBLY > 4.
d-Color MF4003/MF3303
F-33
[2]
[1]
5.
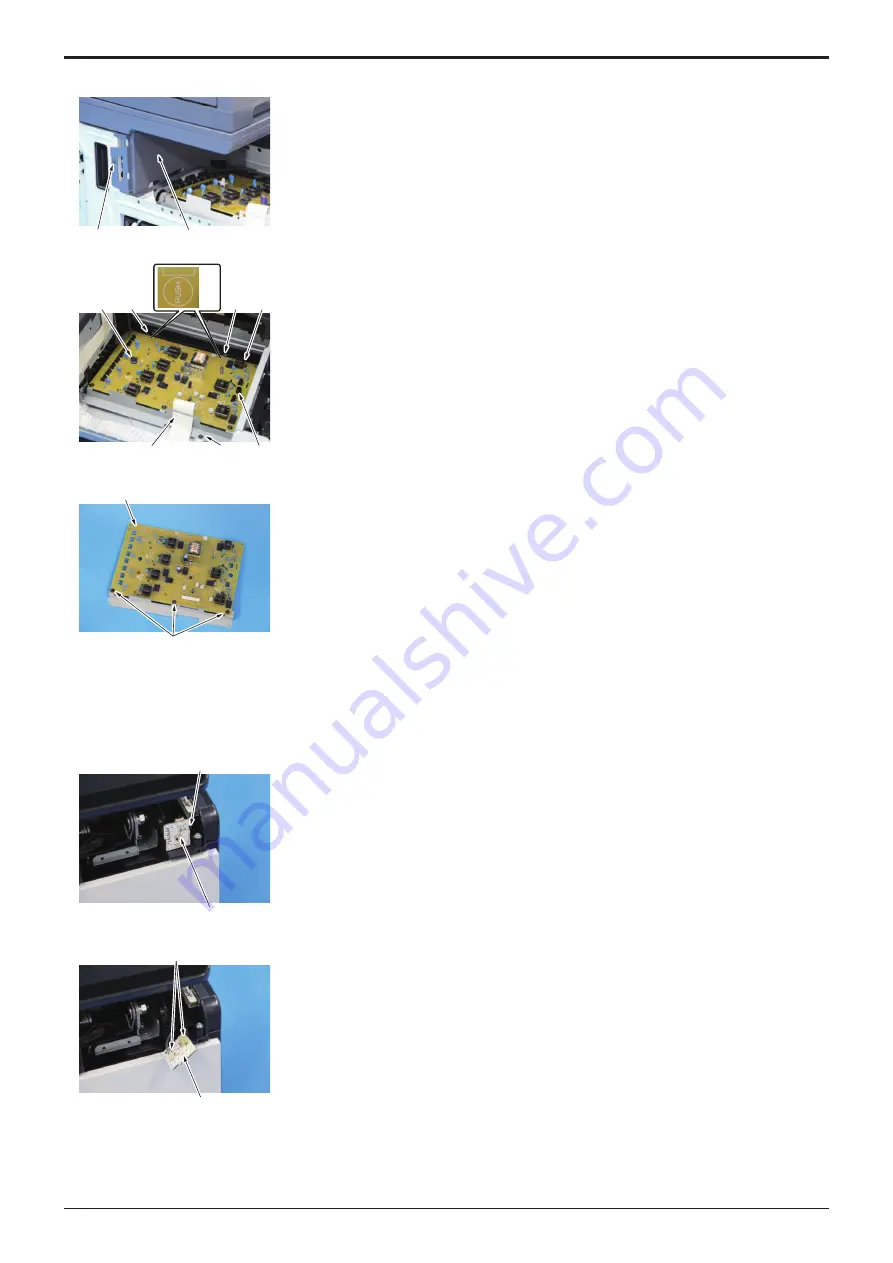
Remove the screw [1], and remove the cover [2].
[4]
[3]
[1]
[6]
[2]
[5]
[4]
[7]
6.
Remove the stopper [1].
7.
Disconnect the flat cable [2], and remove the screw [3].
8.
Unhook two tabs [4] and the tab [5], and remove the high voltage unit assy [6].
NOTE
▪ Pay attention not to damage the flat cable when removing high
voltage unit assy.
▪ When installing the high voltage unit assy, be careful not to touch
the electronic parts around the stopper [1] and the tab [5] to prevent
those parts from being damaged.
▪ When installing the high voltage unit assy, push the press part [7] to
lock the tab.
▪ When installing the high voltage unit assy, make sure that the tab [5]
is locked.
[1]
[2]
9.
Remove three screws [1], and remove the high voltage unit [2].
10.
To reinstall, reverse the order of removal.
4.3.8 Machine condition monitor board/Fr (MCMB/Fr)
1.
Remove the control panel cover.
[2]
[1]
2.
Unhook the tab [1], and slide out the machine condition monitor board/Fr [2].
[2]
[1]
3.
Disconnect two connectors [1], and remove the machine condition monitor
board/Fr [2].
4.
To reinstall, reverse the order of removal.
4.3.9 Machine condition monitor board/Edg (MCMB/Edg)
1.
Remove the control panel cover.
Y119930-3
Service Manual
Содержание d-Color MF 4003
Страница 1: ...Multifunction Digital Copier d Color MF4003 MF3303 Service Manual Version 2 0 Code Y119930 3 ...
Страница 48: ...This page is intentionally left blank ...
Страница 54: ...This page is intentionally left blank ...
Страница 70: ...This page is intentionally left blank ...
Страница 76: ...This page is intentionally left blank ...
Страница 98: ...This page is intentionally left blank ...
Страница 216: ...This page is intentionally left blank ...
Страница 354: ...This page is intentionally left blank ...
Страница 388: ...This page is intentionally left blank ...
Страница 398: ...This page is intentionally left blank ...
Страница 512: ...d Color MF4003 MF3303 L TROUBLESHOOTING 10 DIAGNOSTIC CODES L 114 Not used bit is set to 0 Service Manual Y119930 3 ...
Страница 570: ...This page is intentionally left blank ...
Страница 572: ...This page is intentionally left blank ...
Страница 574: ...This page is intentionally left blank ...
Страница 686: ...This page is intentionally left blank ...
Страница 687: ...UPDATINGSTATUS DATE UPDATED PAGES PAGES CODE 2nd EDITION 688 Y119930 3 07 2019 1st EDITION 650 06 2020 ...


