SETTING UP > 50
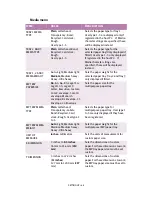
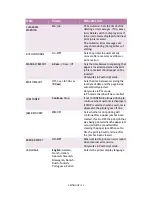
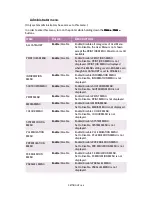
CYAN, MAGENTA,
YELLOW OR BLACK
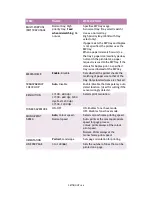
DARKNESS
0
+1+2+3-4-3-2-1
Adjusts
&\DQ
0DJHQWD
<HOORZ
%ODFN
engine density.
The Darkness settings for each CMYK
value will be reflected as offset values
(additions) to the corrections through
the Adjust Density/TRC Compensation
function.
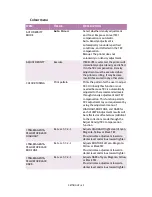
ADJUST
REGISTRATION
Execute
When this menu is selected, the
printer performs an Auto Adjust
Registration.
Must be executed in the idle state
(Auto Registration OFF).
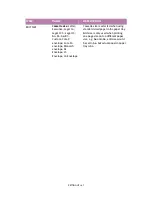
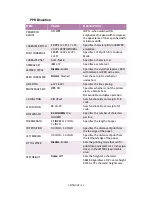
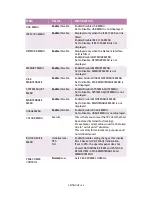
CYAN REGISTRATION
- FINE ADJUST
0
+1+2+3-3-2-1
Makes a fine adjustment to image
registration in Cyan, Magenta or Yellow
against Black in the horizontal
direction. The adjustment is reflected
as an offset (addition) value to the
corrections through Auto Colour
Registration Correction. Values are
adjusted in increments of .026 mm.
Example: if the paper movement is
upward - if a value is increased (+) it
means the image moves downward in
relation to it.
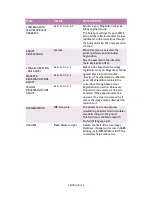
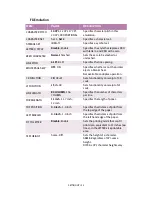
MAGENTA
REGISTRATION - FINE
ADJUST
0
+1+2+3-3-2-1
YELLOW
REGISTRATION - FINE
ADJUST
0
+1+2+3-3-2-1
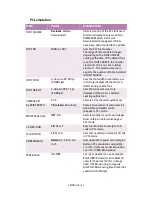
INK SIMULATION
Off
; Euroscale
The printer has its own process
simulation generator which simulates
standard colours in the printer.
This function is enabled only with
Postscript language jobs.
INK LIMIT
Dar
k; Medium; Light
Selects the limit of the toner layer
thickness. If paper curl occurs in DARK
printing, select MEDIUM or LIGHT. This
sometimes helps reduce curl.
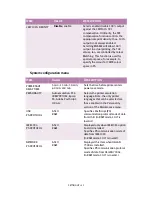
Item
Value
Description
Содержание C7300
Страница 1: ...C7100 C7300 C7500 USER S GUIDE WINDOWS 2000 l ...
Страница 20: ...SETTING UP 20 3 Remove the LED head restrainer from behind the LED heads in the top cover ...
Страница 22: ...SETTING UP 22 5 Remove the protective sheets from each of the four image drums ...
Страница 27: ...SETTING UP 27 LOADING PAPER 1 Remove the paper tray from the printer ...
Страница 82: ...PRINTER DRIVERS 82 6 Click on Paper Size and set the required paper size 7 Click on OK three times ...
Страница 98: ...OPERATION 98 1 Click on the Colour Management tab 2 Select Automatic or Manual setting for colour matching ...
Страница 116: ...OPERATION 116 2 Select Booklet from Pages per Sheet 3 Click on OK twice and close the printer dialogue box ...
Страница 158: ...MAINTENANCE 158 5 Remove the protective sheet from the new image drum ...
Страница 159: ...MAINTENANCE 159 6 Install the new image drum into its correct colour location in the printer 1 ...
Страница 168: ...MAINTENANCE 168 2 Gently wipe the LED head surface with LED lens cleaner or soft tissue 3 Close the top cover ...
Страница 175: ...TROUBLESHOOTING 175 BEHIND THE FRONT COVER Open the front cover and remove any jammed paper then close the front cover ...
Страница 177: ...TROUBLESHOOTING 177 BEHIND THE REAR COVER Open the rear cover and remove any jammed paper then close the rear cover ...
Страница 206: ...SPECIFICATIONS 206 EXTERNAL DIMENSIONS ...

