OPERATION > 134
OVERLAY PRINTING
What are Overlays?
Overlays can be useful for tasks such as printing letterheads, forms,
or invoices, and should reduce the need for pre-printed stationery.
An Overlay can be a combination of graphics, fonts, or text that is
stored inside the printer's flash memory or hard disk, and printed
whenever required. The result is similar to the Watermark feature, but
with the ability to be much more elaborate.
An example of using Overlays:
Suppose that you have added several different files to the printer
using the Storage Device Manager. One file might contain your
company logo, a second file might contain the company address, and
a third file could contain the company mission statement. The Overlay
feature allows these items to be printed in various combinations,
depending on your requirements.
- For example, you could create an Overlay consisting of a single item
such as the file that prints the logo; this could add the company logo
to every document that you print.
- You could create an Overlay that combines all 3 files (the logo,
address and the mission statement), and this would allow all 3 items
to be printed together, similar to a pre-printed letter template.
An overview of the Steps required:
There are essentially 3 steps to using Overlays with the printer:
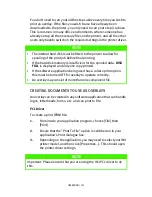
(a)
Create the document that you wish to use for Overlay
printing (e.g. a letterhead) and generate a PRN file (print
file) using the printer driver.
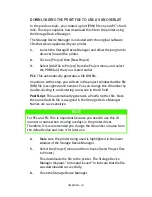
(b)
Use the Storage Device Manager utility to convert this
PRN file (print file) to a file, and download it to the
printer.
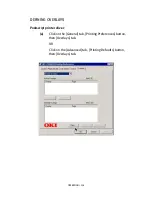
(c)
Use the file(s) you've downloaded to the printer to create
Overlays, and then print your documents.
Содержание C7300
Страница 1: ...C7100 C7300 C7500 USER S GUIDE WINDOWS 2000 l ...
Страница 20: ...SETTING UP 20 3 Remove the LED head restrainer from behind the LED heads in the top cover ...
Страница 22: ...SETTING UP 22 5 Remove the protective sheets from each of the four image drums ...
Страница 27: ...SETTING UP 27 LOADING PAPER 1 Remove the paper tray from the printer ...
Страница 82: ...PRINTER DRIVERS 82 6 Click on Paper Size and set the required paper size 7 Click on OK three times ...
Страница 98: ...OPERATION 98 1 Click on the Colour Management tab 2 Select Automatic or Manual setting for colour matching ...
Страница 116: ...OPERATION 116 2 Select Booklet from Pages per Sheet 3 Click on OK twice and close the printer dialogue box ...
Страница 158: ...MAINTENANCE 158 5 Remove the protective sheet from the new image drum ...
Страница 159: ...MAINTENANCE 159 6 Install the new image drum into its correct colour location in the printer 1 ...
Страница 168: ...MAINTENANCE 168 2 Gently wipe the LED head surface with LED lens cleaner or soft tissue 3 Close the top cover ...
Страница 175: ...TROUBLESHOOTING 175 BEHIND THE FRONT COVER Open the front cover and remove any jammed paper then close the front cover ...
Страница 177: ...TROUBLESHOOTING 177 BEHIND THE REAR COVER Open the rear cover and remove any jammed paper then close the rear cover ...
Страница 206: ...SPECIFICATIONS 206 EXTERNAL DIMENSIONS ...


