Option 1: If network discovery is enabled
If you have network discovery enabled on your laptop, you can complete system setup and configuration
using automatic cluster discovery.
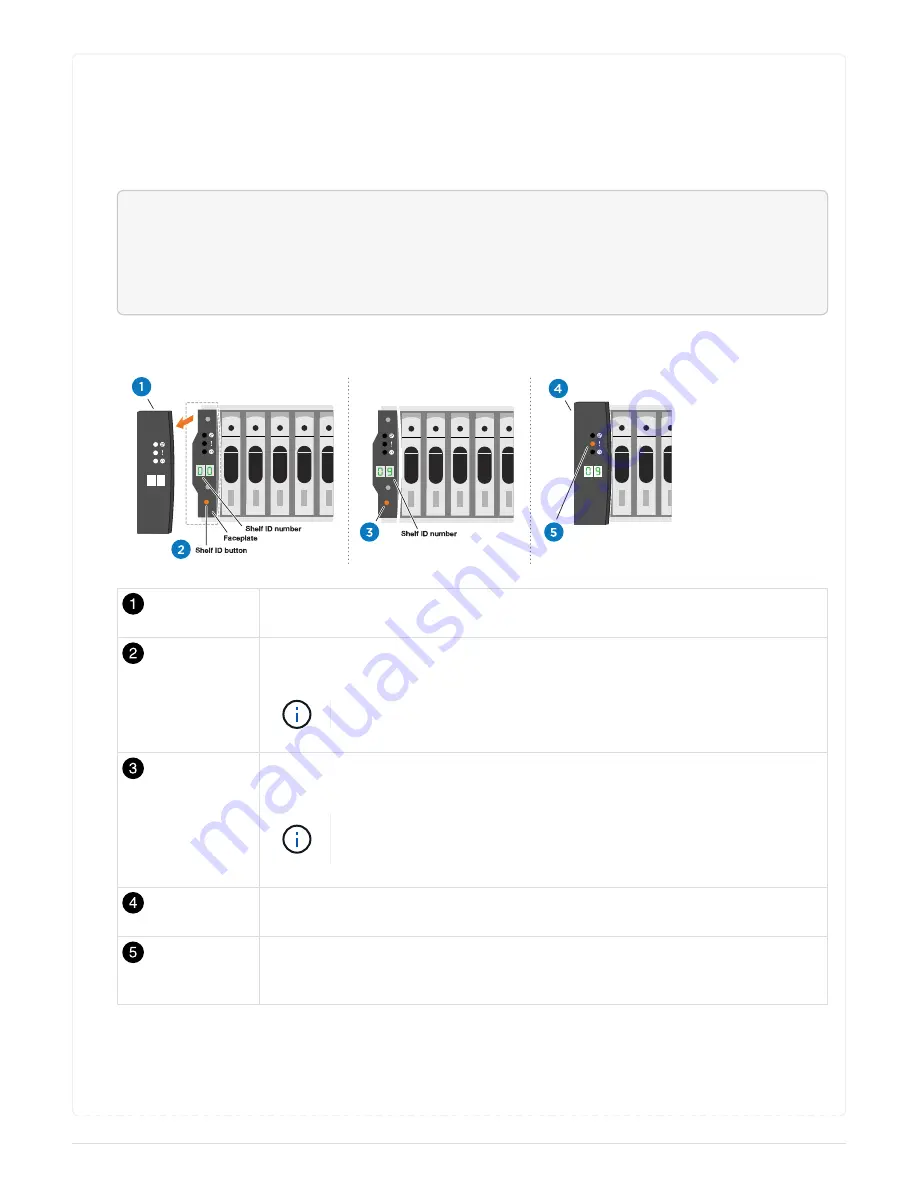
1. Use the following animation or drawing to set one or more drive shelf IDs:
<div class="aspect-ratio"><iframe frameborder="1" height="400"
scrolling="auto"
src="https://netapp.hosted.panopto.com/Panopto/Pages/embed.aspx?id=9
5a29da1-faa3-4ceb-8a0b-ac7600675aa6" width="711"> </iframe></div>
Animation - Setting your shelf ID’s
Remove the end cap.
Press and hold shelf ID button until first digit blinks, then push to advance to 0-
9.
The first digit continues to blink
Press and hold shelf ID button until second digit blinks, then push to advance to
0-9.
The first digit stops blinking, and the second digit continues to
blink.
Replace the end cap.
Wait 10 seconds for the Amber LED (!) to appear, then power-cycle the drive
shelf to set shelf ID.
2. Plug the power cords into the controller power supplies, and then connect them to power sources on
different circuits.
3. Turn on the power switches to both nodes.
695
Содержание FAS2600
Страница 24: ...7 Close the controller module cover and tighten the thumbscrew 22 ...
Страница 61: ...2 Close the controller module cover and tighten the thumbscrew 59 ...
Страница 550: ...548 ...
Страница 660: ...Select one of the following options for instructions on how to reassign disks to the new controller 658 ...


