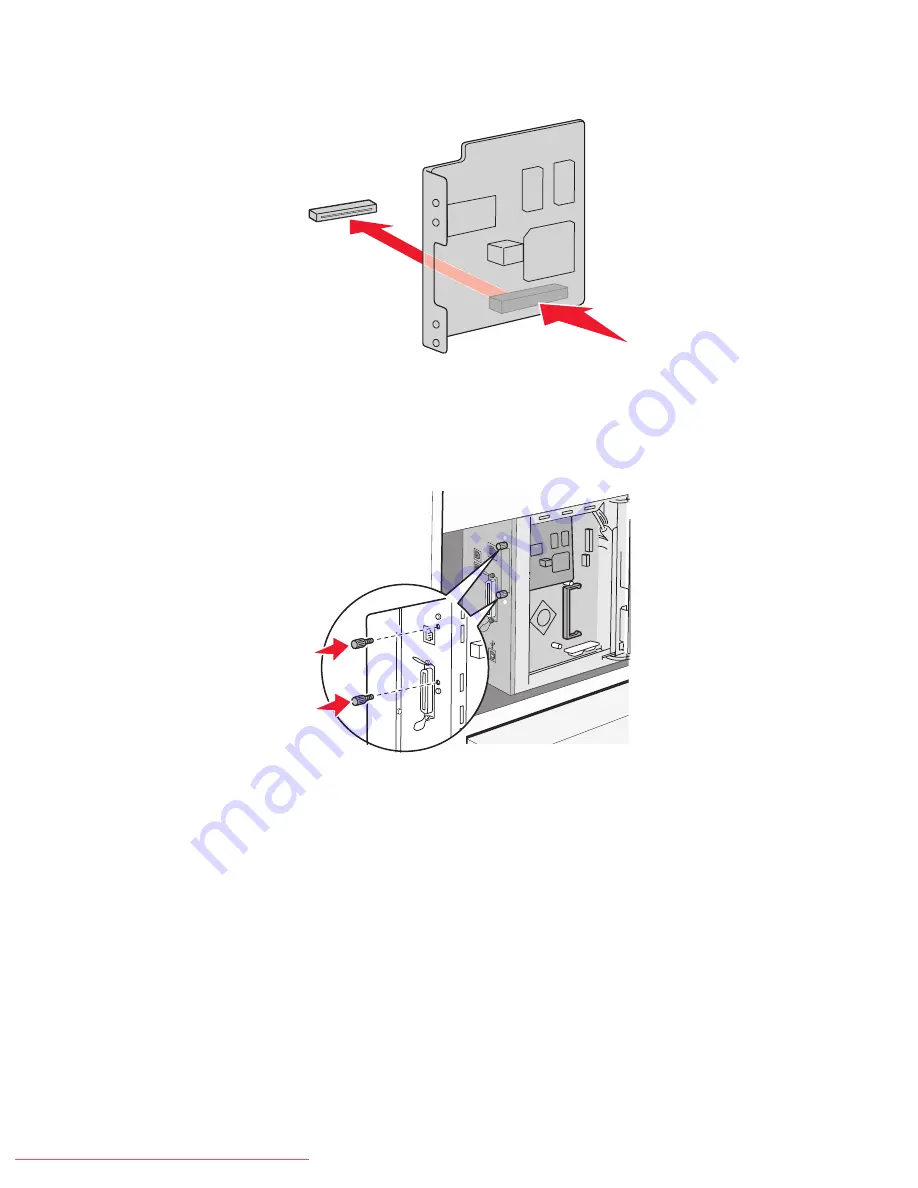
4
Push the card firmly into place.
Notes:
•
The entire length of the connector on the network card must touch and be flush against the system board.
•
Be careful not to damage the connectors.
5
Attach the screws to hold the network card in place.
Installing options
36
Downloaded From ManualsPrinter.com Manuals
Содержание X560(n)
Страница 2: ...Downloaded From ManualsPrinter com Manuals...
Страница 34: ...3 Align the tray and insert it Installing options 34 Downloaded From ManualsPrinter com Manuals...
Страница 41: ...1 2 3 1 Ethernet port 2 USB symbol 3 USB port Installing options 41 Downloaded From ManualsPrinter com Manuals...
Страница 107: ...5 Remove any jammed paper from inside the printer Clearing jams 107 Downloaded From ManualsPrinter com Manuals...
Страница 108: ...6 Close the front door Clearing jams 108 Downloaded From ManualsPrinter com Manuals...
Страница 111: ...5 Remove any jammed paper from inside the printer Clearing jams 111 Downloaded From ManualsPrinter com Manuals...
Страница 112: ...6 Close the front door Clearing jams 112 Downloaded From ManualsPrinter com Manuals...
Страница 115: ...5 Close the front door Clearing jams 115 Downloaded From ManualsPrinter com Manuals...
Страница 118: ...5 Close the transfer belt unit 6 Close the front door Clearing jams 118 Downloaded From ManualsPrinter com Manuals...


