2
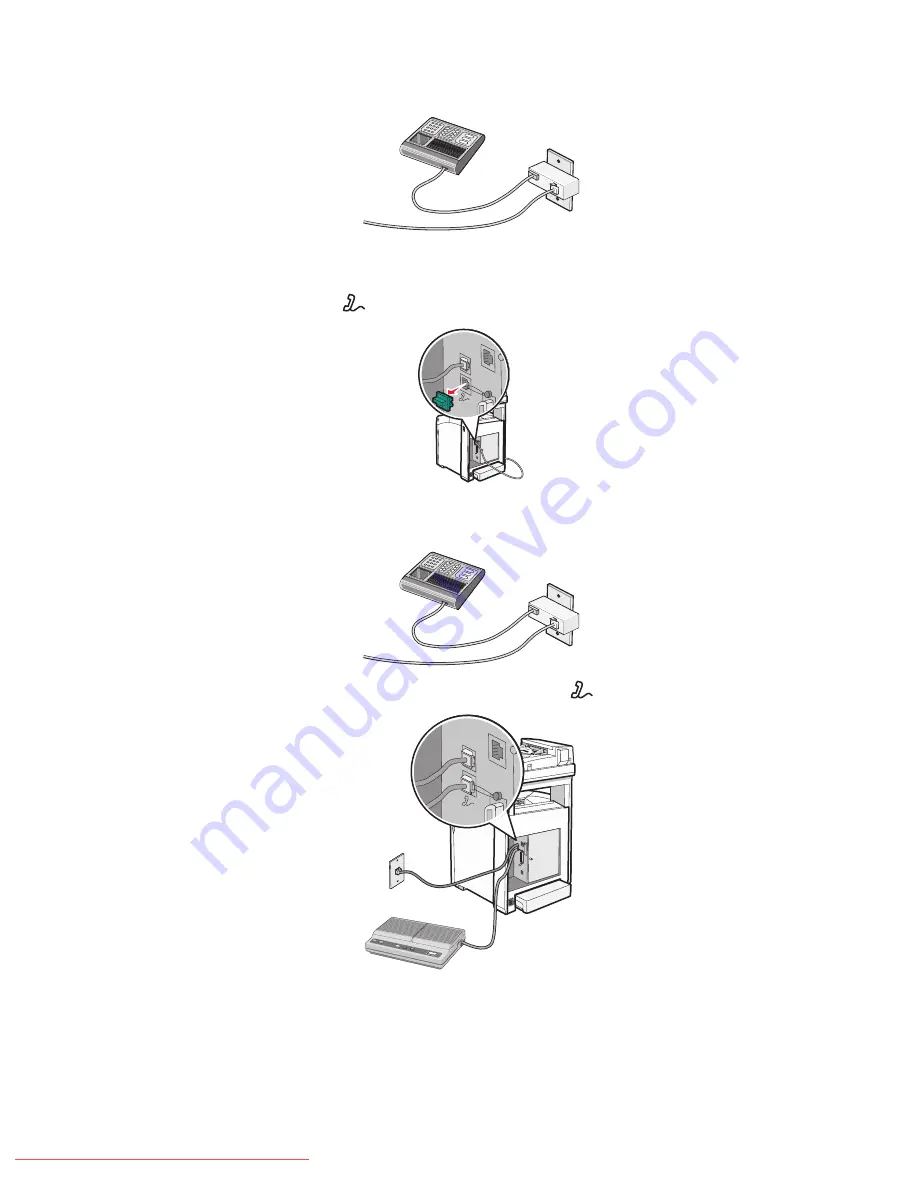
Connect the telephone line of your chosen telecommunications equipment to the left outlet of the adapter.
If your telecommunications equipment uses a US-style (RJ11) telephone line, follow these steps to connect the
equipment:
1
Remove the plug from the EXT port
on the back of the printer.
FA
X
Note:
Once this plug is removed, any country- or region-specific equipment you connect to the printer by the
adapter, as shown, will not function properly.
2
Connect your telecommunications equipment directly to the EXT port
on the back of the printer.
FA
X
Warning—Potential Damage:
Do not touch cables or the printer in the area shown while actively sending or
receiving a fax.
Learning about the printer
20
Downloaded From ManualsPrinter.com Manuals
Содержание X560(n)
Страница 2: ...Downloaded From ManualsPrinter com Manuals...
Страница 34: ...3 Align the tray and insert it Installing options 34 Downloaded From ManualsPrinter com Manuals...
Страница 41: ...1 2 3 1 Ethernet port 2 USB symbol 3 USB port Installing options 41 Downloaded From ManualsPrinter com Manuals...
Страница 107: ...5 Remove any jammed paper from inside the printer Clearing jams 107 Downloaded From ManualsPrinter com Manuals...
Страница 108: ...6 Close the front door Clearing jams 108 Downloaded From ManualsPrinter com Manuals...
Страница 111: ...5 Remove any jammed paper from inside the printer Clearing jams 111 Downloaded From ManualsPrinter com Manuals...
Страница 112: ...6 Close the front door Clearing jams 112 Downloaded From ManualsPrinter com Manuals...
Страница 115: ...5 Close the front door Clearing jams 115 Downloaded From ManualsPrinter com Manuals...
Страница 118: ...5 Close the transfer belt unit 6 Close the front door Clearing jams 118 Downloaded From ManualsPrinter com Manuals...


