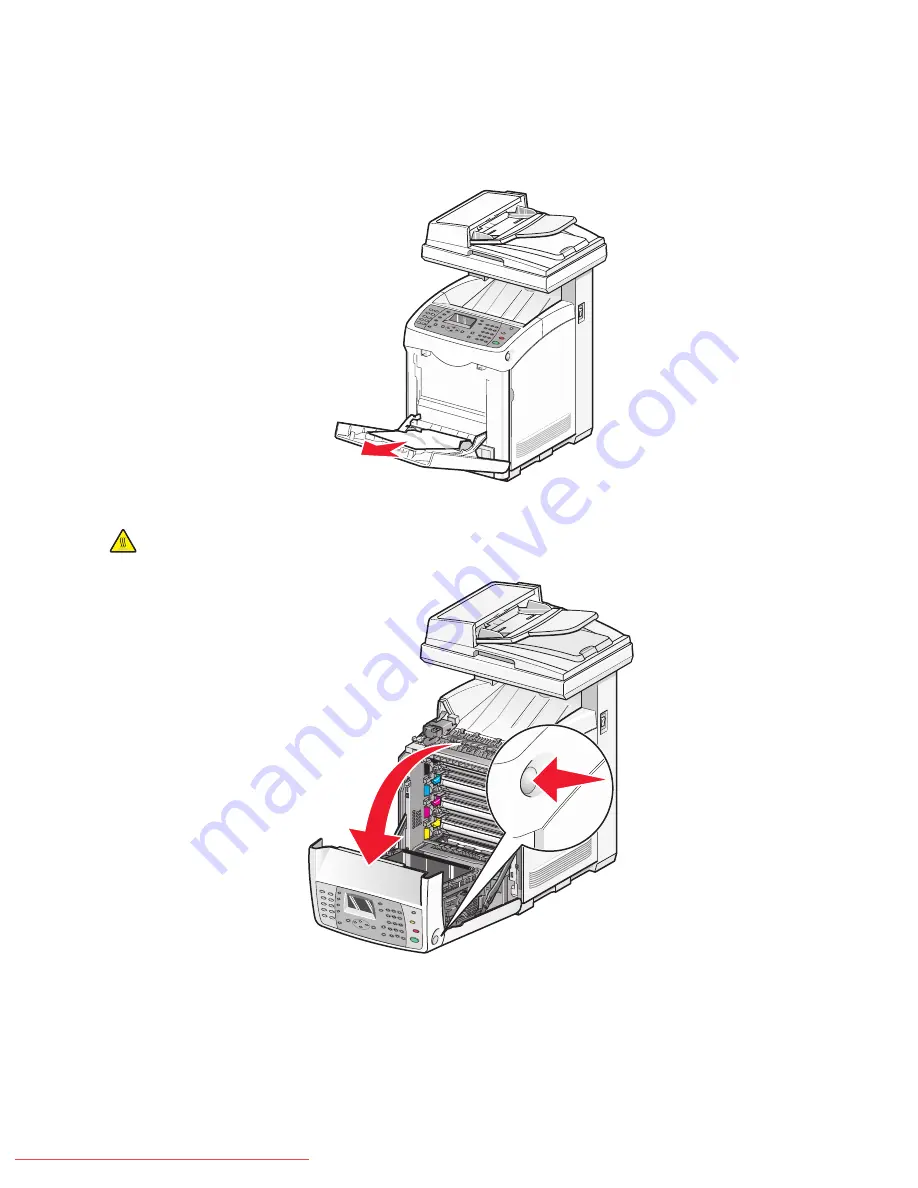
Clearing Tray 1 (MPT) jams
If the paper did not feed from the multipurpose feeder correctly,
Jam at Tray 1
appears.
1
Pull the jammed paper out of the multipurpose feeder tray, and then remove any remaining paper from the tray.
2
Push the release button, and gently lower the front door.
CAUTION—HOT SURFACE:
To reduce the risk of injury from a hot component, allow the surface to cool
before touching it.
Clearing jams
100
Downloaded From ManualsPrinter.com Manuals
Содержание X560(n)
Страница 2: ...Downloaded From ManualsPrinter com Manuals...
Страница 34: ...3 Align the tray and insert it Installing options 34 Downloaded From ManualsPrinter com Manuals...
Страница 41: ...1 2 3 1 Ethernet port 2 USB symbol 3 USB port Installing options 41 Downloaded From ManualsPrinter com Manuals...
Страница 107: ...5 Remove any jammed paper from inside the printer Clearing jams 107 Downloaded From ManualsPrinter com Manuals...
Страница 108: ...6 Close the front door Clearing jams 108 Downloaded From ManualsPrinter com Manuals...
Страница 111: ...5 Remove any jammed paper from inside the printer Clearing jams 111 Downloaded From ManualsPrinter com Manuals...
Страница 112: ...6 Close the front door Clearing jams 112 Downloaded From ManualsPrinter com Manuals...
Страница 115: ...5 Close the front door Clearing jams 115 Downloaded From ManualsPrinter com Manuals...
Страница 118: ...5 Close the transfer belt unit 6 Close the front door Clearing jams 118 Downloaded From ManualsPrinter com Manuals...


