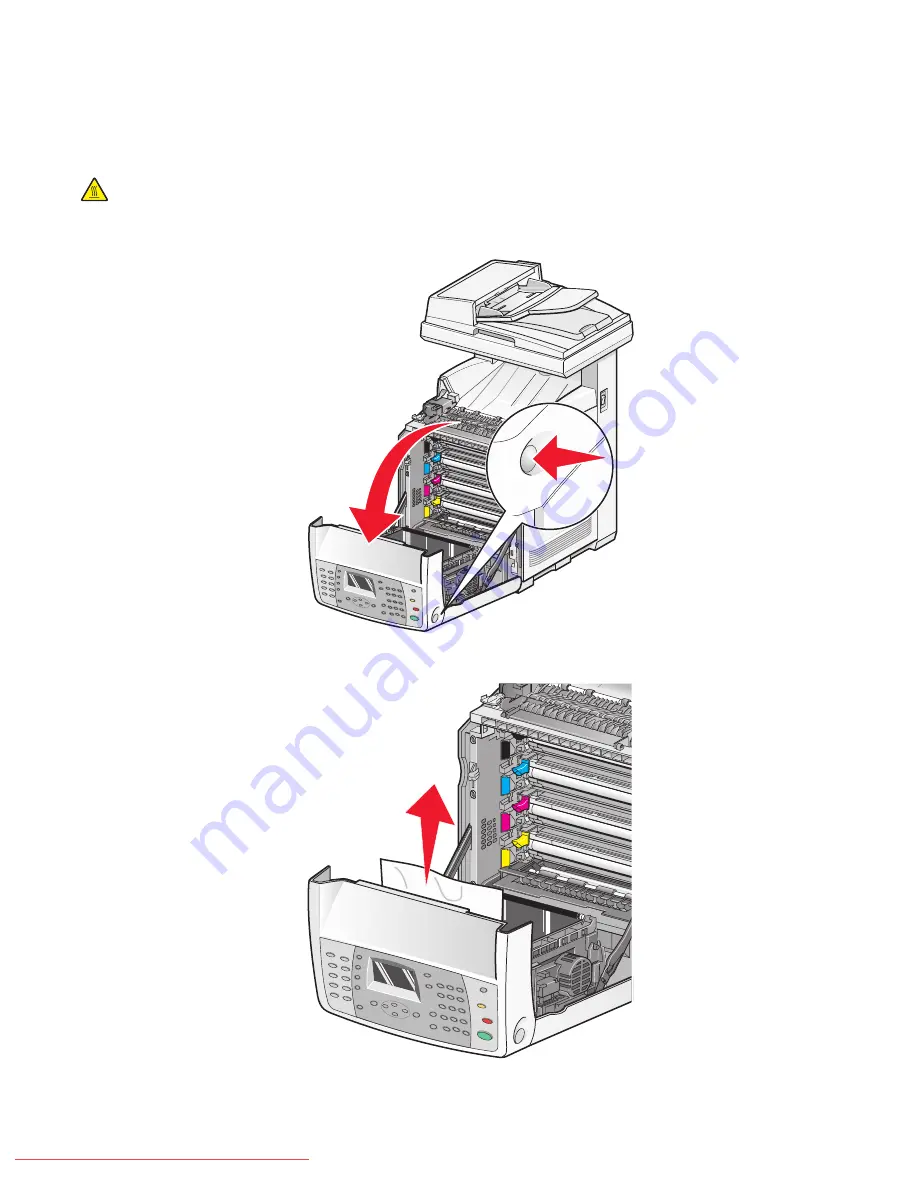
Clearing jams in the duplex unit
If the paper did not feed through the duplex unit correctly, the jam is in the duplex paper path.
Jam at
Duplexer
appears.
CAUTION—HOT SURFACE:
To reduce the risk of injury from a hot component, allow the surface to cool before
touching it.
1
Push the release button, and gently lower the front door.
2
Pull out the jammed paper from the duplex unit. If jammed paper cannot be found, go to the next step.
Clearing jams
116
Downloaded From ManualsPrinter.com Manuals
Содержание X560(n)
Страница 2: ...Downloaded From ManualsPrinter com Manuals...
Страница 34: ...3 Align the tray and insert it Installing options 34 Downloaded From ManualsPrinter com Manuals...
Страница 41: ...1 2 3 1 Ethernet port 2 USB symbol 3 USB port Installing options 41 Downloaded From ManualsPrinter com Manuals...
Страница 107: ...5 Remove any jammed paper from inside the printer Clearing jams 107 Downloaded From ManualsPrinter com Manuals...
Страница 108: ...6 Close the front door Clearing jams 108 Downloaded From ManualsPrinter com Manuals...
Страница 111: ...5 Remove any jammed paper from inside the printer Clearing jams 111 Downloaded From ManualsPrinter com Manuals...
Страница 112: ...6 Close the front door Clearing jams 112 Downloaded From ManualsPrinter com Manuals...
Страница 115: ...5 Close the front door Clearing jams 115 Downloaded From ManualsPrinter com Manuals...
Страница 118: ...5 Close the transfer belt unit 6 Close the front door Clearing jams 118 Downloaded From ManualsPrinter com Manuals...


