8-56
Setup and Registration (System Menu) > System Menu
Item
Description
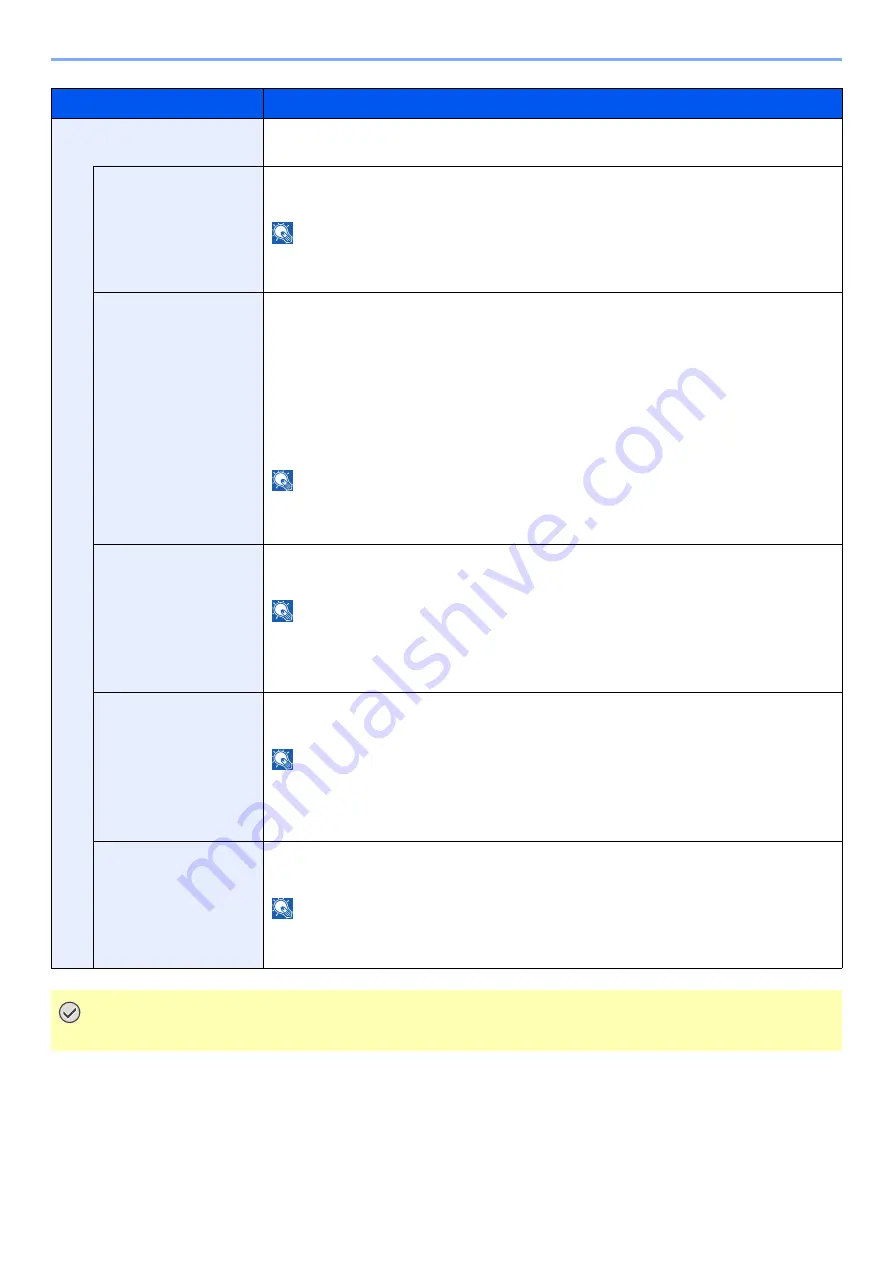
IPv6 Settings
Set up TCP/IP (IPv6) to connect to the network. This setting is available when [
TCP/
IP
] is [
On
].
IPv6
Select whether to use IPv6.
Value
: Off, On
NOTE
Selecting [
On
] displays IP address in [
IP Addr. (Link Local)
] after restarting the
network.
Manual Setting
Manually specify the IP address, prefix length, and gateway address of TCP/IP
(IPv6).
Value
IP Address (Manual)
: 128-bits address is expressed in eight groups consisting of
four-digit hexadecimal digits. The groups are separated by colon (:).
Prefix Length
: 0 to 128
Default Gateway
: 128-bits address is expressed in eight groups consisting of four-
digit hexadecimal digits. The groups are separated by colon (:).
NOTE
This function is displayed when [
IPv6
] is set to [
On
].
To enter "Default Gateway", set [
RA (Stateless)
] to [
Off
].
RA (Stateless)
Select whether to use RA (Stateless).
Value
: Off, On
NOTE
This function is displayed when [
IPv6
] is set to [
On
].
Selecting [
On
] displays IP address in [
IP Address 1 to 5 (Stateless)
] after restarting
the network.
DHCP
Select whether to use the DHCP (IPv6) server.
Value
: Off, On
NOTE
This function is displayed when [
IPv6
] is set to [
On
].
Selecting [
On
] displays IP address in [
IP Address (Stateful)
] after restarting the
network.
DNS Server Address
Set the IP address of DNS (Domain Name System) server.
Value
: Use DNS Server from DHCP, Use following DNS Server
NOTE
When [
Use following DNS Server
] is selected, you can enter static DNS server
information in the Primary and Secondary fields provided.
IMPORTANT
After changing the setting, restart the network or turn the machine OFF and then ON.
Содержание 358ci
Страница 1: ...kyoceradocumentsolutions com Operation Guide 508ci 408ci 358ci...
Страница 83: ...2 13 Installing and Setting up the Machine Touch Panel Example System Menu Screen Move the screen up and down...
Страница 233: ...5 23 Operation on the Machine Sending Document via E mail 6 Press the Start key Sending starts...
Страница 539: ...10 20 Troubleshooting Regular Maintenance 3 Empty the Punch Waste Box 4 Install the Punch Waste Box 5 Close the cover...
Страница 541: ...10 22 Troubleshooting Regular Maintenance 4 Install the Punch Waste Box 5 Close the cover...
Страница 586: ...10 67 Troubleshooting Clearing Paper Jams 4 Remove any jammed paper 5 Push Right Cover 2 and Cassette 3 back in...
Страница 592: ...10 73 Troubleshooting Clearing Paper Jams 8 Remove any jammed paper 9 Push Right Cover 1...
Страница 611: ...10 92 Troubleshooting Clearing a Staple Jam 4 Install the Staple Cartridge Holder 5 Close the front cover...
Страница 613: ...10 94 Troubleshooting Clearing a Staple Jam 4 Install the Staple Cartridge Holder 5 Close the front cover...
Страница 657: ...Index 10 X XPS Fit to Page 6 85 Default 8 34 Z Zoom 6 42 Default 8 32...
Страница 658: ......
Страница 661: ...is a trademark of KYOCERA Corporation 2019 KYOCERA Document Solutions Inc 2019 7 2WHKDEN200...


