2
Basic modules and servo power modules (continued)
17 of 70
Hardware R2.2.8 11.98.02 en
2.7
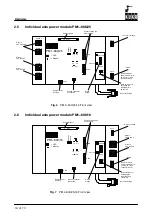
Connection diagram for PM 0 + PM2 (without PM6--600)
PM0--600
= Fuse
= LED
= Monitor
ENABLE
4 1 2 3
--15V
+15V
+5V
WATCHDOG
READY
U<>
26,5V 6A
26,5V 4A
24V 6A
26,5V 6A
27,1V 7,5A
27,1V
10AT
26,5V
10AT
26,5V
6,3AT
26,5V
6,3AT
24V
10AT
Bttry 10AF
F8
F7
F6
F5
F4
F1
X607
X606
X6
04
X610
X608
X2
02
X2
03
X101
X102
X103
X106
X1
05
U Int. circuit
1V = 100V
X6
05
Individual axis switch--off to plug X12
X101
Mains con-
nection 3x400V AC
S3
S2
X301H1
X301H2
X301M
X301L
X302M
X302L
X315
X316
X504
X508
X509
X505
SWITCH 1
SWITCH 2
BR
AKE
2
BR
AKE1
1Iw
2Iu
1Iu
2Iw
5V = Imax
PM2--600/25/16
= LED
= Monitor
X507
Motor 2
size B and C0
Motor 2
size C, D and E
Intermediate cir-
cuit voltage from
PM0 or previous
amplifier
S1
X609
DSEAT
X103
(Enable -- brake voltage)
Axis 1
Existing connections
Additional connections
X3
15
Plug X316 is used when
this cable is not connected
to a following amplifier.
X102
Ballast
resistor
X202
27V Supply
X203
Voltage to
open brakes
Control signals
for Power mo-
dule 2
Control signals
for Power mo-
dule 1
X106
Tempera-
ture sensor
X105
FE201
Internal connection
Axis 2
Fig. 8 Connection diagram for PM0 + PM2 (without PM6--600)
Содержание KR C1
Страница 1: ...Hardware R2 2 8 11 98 02 en 1 of 70 SOFTWARE KR C1 Hardware Release 2 2...
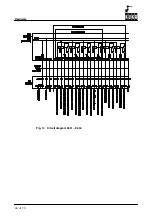
Страница 30: ...Hardware 30 of 70 Hardware R2 2 8 11 98 02 en Fig 13 Circuit diagram X931 X604...
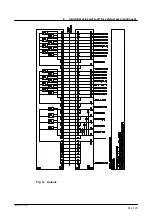
Страница 31: ...4 Individual axis switch off for external axes continued 31 of 70 Hardware R2 2 8 11 98 02 en Fig 14 Outputs...
Страница 32: ...Hardware 32 of 70 Hardware R2 2 8 11 98 02 en Fig 15 Inputs...
Страница 34: ...Hardware 34 of 70 Hardware R2 2 8 11 98 02 en...
Страница 35: ...35 of 70 Hardware R2 2 8 11 98 02 en...
Страница 55: ...55 of 70 Hardware R2 2 8 11 98 02 en...


