Hardware
12 of 70
Hardware R2.2.8 11.98.02 en
1.2.4
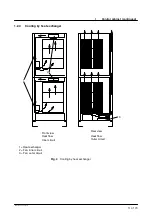
Cooling by air conditioner
See air conditioner (optional) 69--000--456
1.3
Peripheral interfaces, general
See peripheral interfaces (optional)
1.4
Power unit interfaces
The connector panel in the control cabinet is available in a variety of configurations depend-
ing on the version concerned.
1.5
Power unit equipment
When replacing the power modules it must be ensured that the motor
connectors are re--inserted in the correct positions (see LEERER MERKER,
LEERER MERKER).
1.6
Replacing the basic and power modules
Disconnect the mains cable before removal work is started and take measures to
prevent it from being reconnected.
Voltages of over 60 V can be present in the basic and power modules up to 5
minutes after they have been switched off!
Removing a module:
-- Check that the module is completely de--energized
-- Unplug connectors
-- Release 4 rotary locks
-- Pull out individual module towards the front
Installing a module:
-- Check that the seals on the heat sink are complete
-- Insert module together with the heat sink into the cut--out provided for this purpose in
the rear panel
-- Close 4 rotary locks
-- Re--insert connectors
Содержание KR C1
Страница 1: ...Hardware R2 2 8 11 98 02 en 1 of 70 SOFTWARE KR C1 Hardware Release 2 2...
Страница 30: ...Hardware 30 of 70 Hardware R2 2 8 11 98 02 en Fig 13 Circuit diagram X931 X604...
Страница 31: ...4 Individual axis switch off for external axes continued 31 of 70 Hardware R2 2 8 11 98 02 en Fig 14 Outputs...
Страница 32: ...Hardware 32 of 70 Hardware R2 2 8 11 98 02 en Fig 15 Inputs...
Страница 34: ...Hardware 34 of 70 Hardware R2 2 8 11 98 02 en...
Страница 35: ...35 of 70 Hardware R2 2 8 11 98 02 en...
Страница 55: ...55 of 70 Hardware R2 2 8 11 98 02 en...


