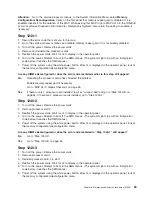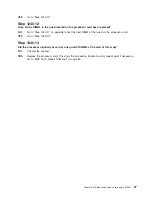
Step 0410-6
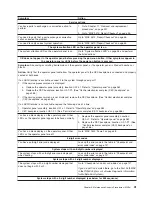
Exit service mode diagnostics, and reboot the system. Wait for the login prompt or until the activity on the
operator panel or display stops.
Did the login prompt display?
NO
Go to “MAP 1020: Problem Determination” on page 49.
YES
Go to “Step 0410-7”.
Step 0410-7
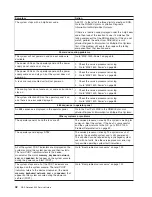
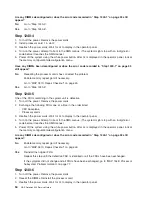
If the Resource Repair Action menu is already displayed, go to “Step 0410-9”. Otherwise, do the following:
1. Log in with root authority.
2. Enter the
diag -a
command and check for missing resources. Follow any instructions that display. If an
SRN displays, suspect a loose card or connection. If no instructions display, no resources were
detected as missing.
3. Enter the
diag
command.
4. Press
Enter
.
5. Select the
Advanced Diagnostics
option.
6. When the Diagnostic Mode Selection menu displays, select
System Verification
.
7. When the Advanced Diagnostic Selection menu displays, select the
All Resources
option or test the
FRUs you exchanged, and any devices that are attached to the FRUs you exchanged, by selecting the
diagnostics for the individual FRUs.
Did the Resource Repair Action menu (801015) display?
NO
Go to “Step 0410-8”.
YES
Go to “Step 0410-9”.
Step 0410-8
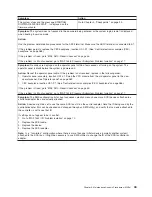
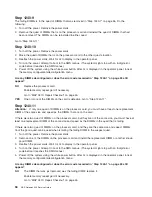
Did the Testing Complete, no trouble was found menu (801010) display?
NO
There is still a problem. Go to “MAP 1020: Problem Determination” on page 49.
YES
Use the
Log Repair Action
option, if not previously logged, in the Task Selection menu to update
the system error log. If the repair action was reseating a cable or adapter, select the resource
associated with that repair action.
If the resource associated with your action is not displayed on the Resource List, select
sysplanar0
.
Note:
On systems with a Fault Indicator LED, this changes the Fault Indicator LED from the
Fault
state to the
Normal
state.
Go to “Step 0410-11” on page 47.
Step 0410-9
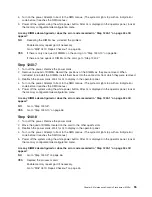
When a test is run on a resource in System Verification mode, and that resource has an entry in the
system error log, if the test on the resource was successful, the Resource Repair Action menu displays.
After replacing a FRU, you must select the resource for that FRU from the Resource Repair Action menu.
This updates the system error log to indicate that a system-detectable FRU has been replaced.
Note:
On systems with a Fault Indicator LED, this changes the Fault Indicator LED from the Fault state to
the Normal state.
46
NAS Gateway 500 Service Guide
Содержание TotalStorage NAS Gateway 500
Страница 1: ...IBM TotalStorage NAS Gateway 500 Service Guide GY27 0418 00 ...
Страница 2: ......
Страница 3: ...IBM TotalStorage NAS Gateway 500 Service Guide GY27 0418 00 ...
Страница 16: ...xiv NAS Gateway 500 Service Guide ...
Страница 20: ...xviii NAS Gateway 500 Service Guide ...
Страница 36: ...System logic flow Note Not all components are supported 16 NAS Gateway 500 Service Guide ...
Страница 52: ...32 NAS Gateway 500 Service Guide ...
Страница 58: ...38 NAS Gateway 500 Service Guide ...
Страница 68: ...Step 0410 13 This completes the repair return the system to the user 48 NAS Gateway 500 Service Guide ...
Страница 112: ...92 NAS Gateway 500 Service Guide ...
Страница 266: ...246 NAS Gateway 500 Service Guide ...
Страница 326: ...306 NAS Gateway 500 Service Guide ...
Страница 353: ...Chapter 11 Removal and replacement procedures 333 ...
Страница 392: ...372 NAS Gateway 500 Service Guide ...
Страница 394: ...System parts 1 5 6 9 10 11 12 8 7 13 4 15 16 17 18 19 20 14 3 2 374 NAS Gateway 500 Service Guide ...
Страница 396: ...System parts continued 1 12 13 3 10 12 8 15 14 14 16 18 19 17 7 9 11 4 4 5 6 2 376 NAS Gateway 500 Service Guide ...
Страница 402: ...382 NAS Gateway 500 Service Guide ...
Страница 412: ...392 NAS Gateway 500 Service Guide ...
Страница 440: ...420 NAS Gateway 500 Service Guide ...
Страница 446: ...426 NAS Gateway 500 Service Guide ...
Страница 448: ...428 NAS Gateway 500 Service Guide ...
Страница 466: ...446 NAS Gateway 500 Service Guide ...
Страница 469: ......
Страница 470: ... Printed in U S A GY27 0418 00 ...
Страница 471: ...Spine information IBM TotalStorage NAS Gateway 500 NAS Gateway 500 Service Guide GY27 0418 00 ...


