If the command is not successful, the iLO Service Port status changes to Error, and the UID flashes at
a rate of eight fast flashes then off for one second.
The file system is unmounted.
4.
Remove the USB flash drive.
The iLO Service Port status changes to Ready, and the UID stops flashing or flashes to indicate
another state such as Remote Console access or a firmware update in progress.
5.
Optional: Upload the file to the Active Health System Viewer.
For more information, see
http://www.hpe.com/servers/ahsv
Connecting a client to iLO through the iLO Service Port
Prerequisites
• The
iLO Service Port
and
USB Ethernet adapters
options are enabled on the
iLO Service Port
page.
• The client NIC is configured to support the Service Port feature.
• You have physical access to the server.
Procedure
1.
Use a supported USB to Ethernet adapter to connect a client to the Service Port (the USB port labeled
iLO
, on the front of the server).
The client NIC is assigned a link-local address. This process might take several seconds.
2.
Connect to iLO through a browser, the CLI, or a scripting utility by using the following IPv4 address:
169.254.1.2
.
The same IP address is used when you connect a client to any server through the Service Port. You
cannot change this address.
The Service Port status changes to Busy, and the UID flashes at a rate of four medium flashes then off
for one second.
3.
When you are finished, disconnect the client from the Service Port.
The Service Port status changes to Ready, and the UID stops flashing or flashes to indicate a state
such as Remote Console access or a firmware update in progress.
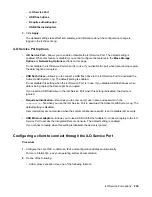
Configuring the iLO Service Port settings
Prerequisites
Configure iLO Settings privilege
Procedure
1.
Click
Security
in the navigation tree, and then click the
iLO Service Port
tab.
2.
Configure the following settings:
234
Connecting a client to iLO through the iLO Service Port

