


28_
menu setup
menu setup
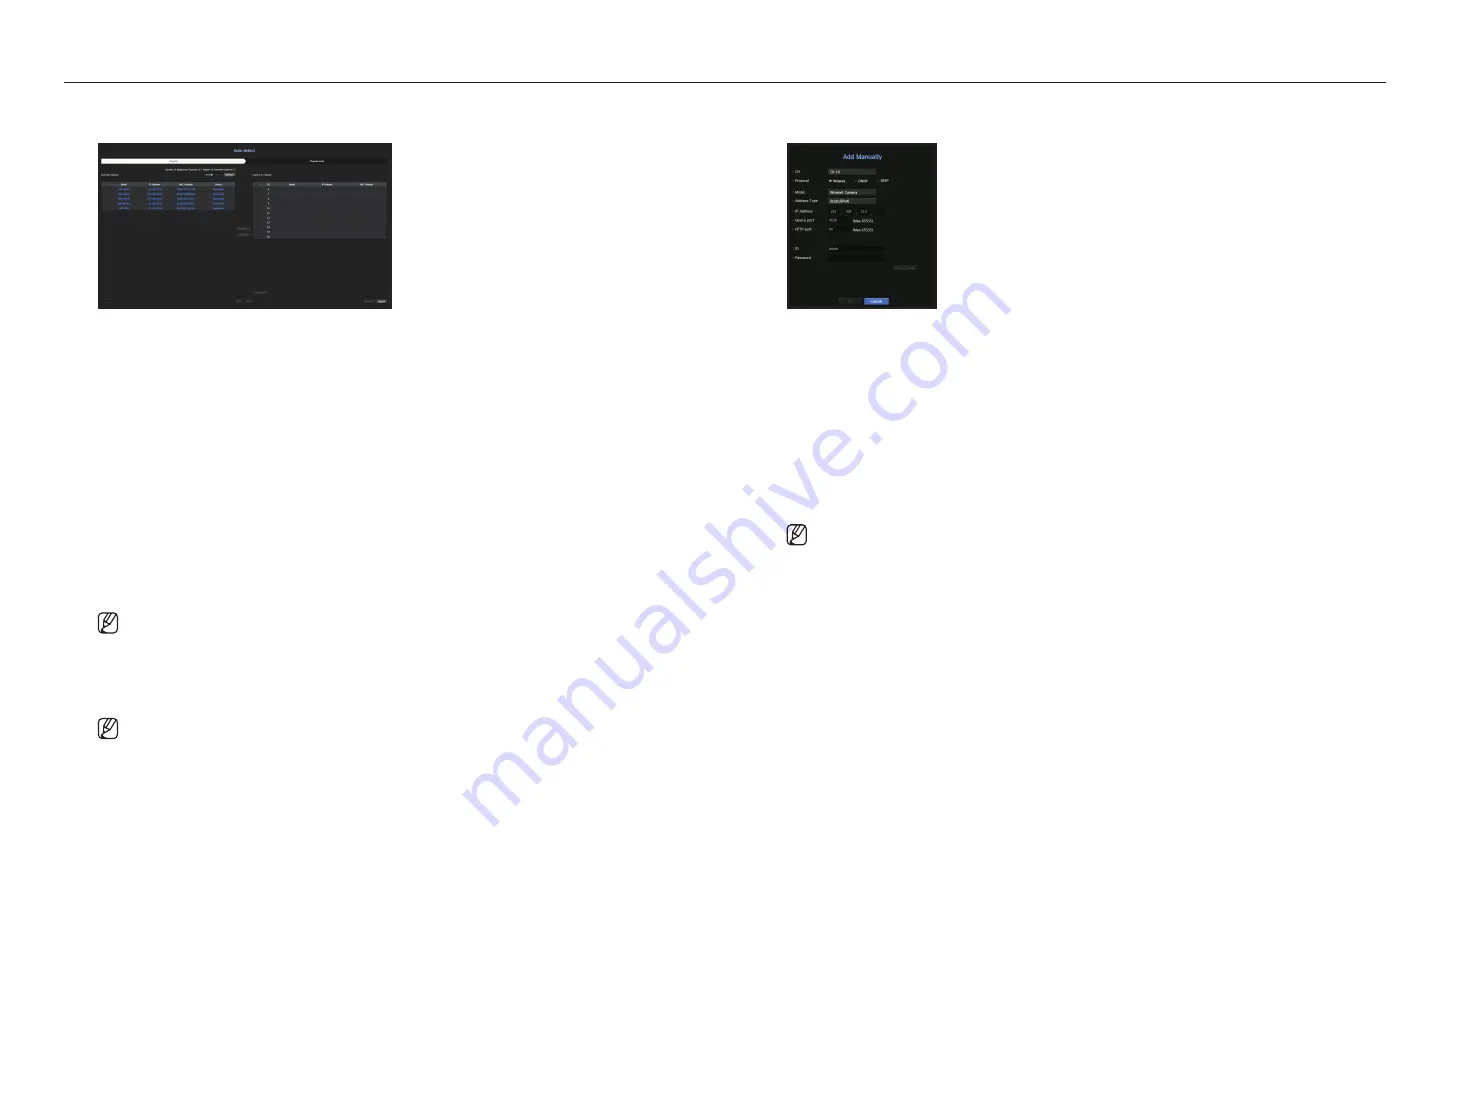
Registering a network Camera manually
1.
In the <
Channel Setup
> field, click on the <
manual
> button.
2.
The Add Manually pane will be displayed.
`
If you double-click a channel not registered on the live screen, the Add Camera Manually popup will appear that allows you to
manually register the camera.
3.
Select a channel and protocol used to connect to a camera.
The input items may differ depending on the selected protocol.
•
Wisenet : Wisenet camera's protocol can be used.
•
ONVIF : Means the camera supports ONVIF protocols. When connecting a camera that its name cannot be
found from the list, select <
OnVIF
>.
`
When a camera is registered with ONVIF, if the difference in system time between the camera and storage device is 2 minutes
or more, you won’t be able to register it. In this case, synchronize the camera and storage device time.
•
RTSP : Comply with RFC 2326, one of "Real Time Streaming Protocol (RTSP)" for real-time streaming.
4.
If you select the <
Wisenet
> protocol, check options as necessary.
•
Model : Select a camera model.
- Wisenet Camera : You can register Hanwha Vision's cameras and encoders.
- Wisenet Multi-Channel : You can register Hanwha Vision's multi directional cameras and multi-imager
cameras. A multi-channel camera is a camera that has multiple camera modules in one body.
Auto-registering your camera to Recorder lets you register multiple channels at once. However, if you want
to manually register it, you need to register one channel at a time.
Registering a network Camera
1.
In the <
Channel Setup
> field, click on the <
Auto detect
> button.
2.
Select a camera to register in the <
Searched Camera
> list and press the <
Register
> button.
You can check the selected camera in the <
Camera to register
> list.
`
An already registered camera will be marked in blue in the list.
`
If you search for the camera again or if the IP is an old IP that was not assigned by the DHCP server (such as -192.168.1.100), then
press the <
Refresh
> button to check if a new IP has been assigned.
`
<
Status
> shows the authentication status for registration.
`
Click a header at the top of the list to sort the list according to that header.
`
In the <
Channel Setup
> tab, you can set the channel order of cameras that are waiting to be registered by drag and drop.
3.
To change the IP address of the camera, select the desired camera from the <
Camera to register
> list and
press the <
Change Ip
> button.
4.
Press the <
Register
> button on the lower right of the screen to register the selected camera.
`
If you register a camera using a user account—not admin account—the camera features may be limited.
`
When you change the camera ID/password in the camera web viewer, if the camera is already registered in Recorder, you also
have to change the camera ID/password information registered in Recorder.
to register a camera in the product that supports poe
`
When the camera is factory reset, it defaults to the ID and password set in
Camera
>
Camera password
.
`
If the camera's ID and password have already been set, the registered information matches the ID and password set in the
Camera
>
Camera password
. (up to 3 sets)
`
Wisenet camera is registered via Wisenet protocol while a third party camera is registered via ONVIF protocol.
`
A device running a DHCP server should never be connected to a PoE port or a camera setup port. (e.g. router)
`
If your camera uses its own power supply unit, you need to manually register or auto-register the camera.
`
For products with PoE support, see “
Products supporting each feature
”. (See page 4 of the Product Specification Manual)
Содержание LRN-1610S
Страница 1: ...NETWORK VIDEO RECORDER User Manual Wisenet NVR...
Страница 83: ......


