


English
_15
● live
Zoom
This is activated only in Live Single mode.
1.
After right-clicking on the live screen, click <
Zoom
>.
You can also press the [
Zoom
] button on your remote controller or click < > in the launcher menu.The Zoom
in icon will appear at the bottom right.
2.
Click < > icons to magnify the selected area.
By adjusting the box at the bottom, you can adjust the position of the magnified screen.
3.
Click < > icons to zoom out the selected area.
4.
Click < > at the top right to close zoom.
If your product supports a remote controller, follow these steps to zoom in on the video screen:
1.
Press the [
Zoom
] button on your remote controller.
2.
Press the four directional keys (▲▼◄►) to designate an area to zoom in.
3.
In the selected area, press the [
enter
] button on your remote controller. The selected area can be magnified up
to 10 times.
4.
If you want to close the zoom, then press the [
Zoom
] button on your remote controller.
`
For products that support remote controls, see page 4 “
Products supporting each feature
” of the Product Specification Manual.
layout
In the live screen, you can set the layout for each channel.
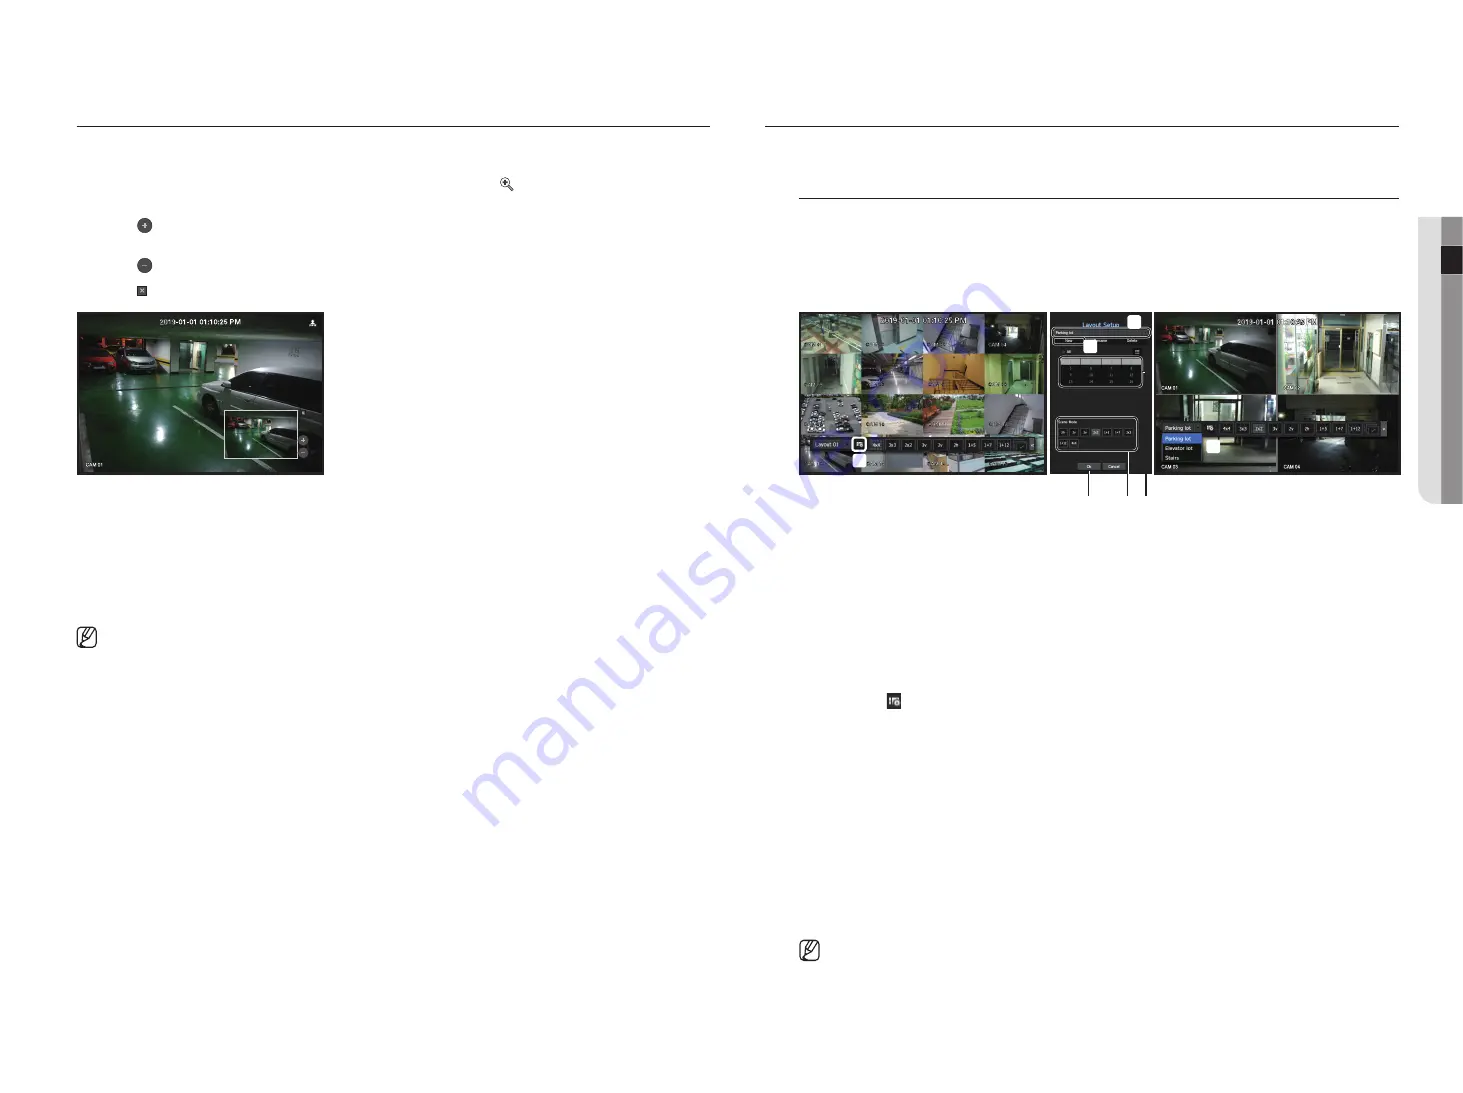
Setting up the live layout
This section outlines how to select a series of channels based on their purpose/accessibility and monitor them
in a single layout.
example)
Layout "Lobby" - Lobby camera 1, Lobby camera 2, Front entrance camera 2
Layout "VIP" - Directors' meeting room 1, Directors' meeting room 2, Directors' lounge 1, Corridor camera on
the 7th floor
d
e
f
c
a
b
g
To create a new layout, follow these steps:
a
Open the channel layout setup menu.
b
Click <
new
>.
c
Enter a name for the selected channels (e.g., Parking lot).
d
Select the channels that you want to add to the layout (e.g., 1, 2, 3, 4).
e
Choose a split mode to apply (e.g., 4-way split).
f
Click <
ok
>.
g
Choose a layout to view it on the screen (e.g., change to Parking lot).
1.
Select the <
>.
The layout setting screen will appear.
•
New : You can set the new layout.
•
Rename : You can make changes to the selected layout.
When the layout is changed, the channel order is initialized.
•
Delete : You can delete the selected layout.
•
Channel Table : You can select channels in the table to be registered in, or removed from the layout.
•
Channel List : You can select channels in the list to be registered in, or removed from the layout.
2.
Press the <
new
> button and enter the name of layout to add.
3.
In the channel table or channel list, click and select the channel to be displayed on the layout screen.
4.
Click on <
ok
> to save the selected layout.
`
The layout for each user is saved separately.
`
You can use a configured layout even in the Search Time function to facilitate search using the channel sequence and
combination that you have set.
See the "
Time Search
" page under "
Search & Play
>
Search
" in the Table of Contents
Содержание LRN-1610S
Страница 1: ...NETWORK VIDEO RECORDER User Manual Wisenet NVR...
Страница 83: ......


