


195
<System Date>:
Select the system date.
<System Time>:
Select the system time.
<Mouse Pointer Speed>:
Set the speed of mouse pointer; 4 levels are configurable.
<Enable Wizard>:
Enable/disable the Wizard when the device starts up.
<Enable Password>:
Enable/disable the use of the login password.
Note:
If you check the checkbox of <Enable Password> every time when you log in to the DVR, the
<Unlock Pattern> interface will pop up. If you uncheck the checkbox of <Enable Password>, when
you log in to the DVR, the <Unlock Pattern> interface will not pop up.
3.
Click the <Apply> button to save the settings.
17.2 Configuring the RS-232 Serial Port
Note:
The RS-232 serial port is supported by the GD-RT-AT5016N.
The RS-232 port can be used in two ways:
Parameters Configuration: Connect a PC to the DVR through the PC serial port. Device
parameters can be configured by using software such as
HyperTerminal
. The serial port
parameters must be the same as the NVR’s when connecting via the PC serial port.
Transparent Channel: Connect a serial device directly to the DVR. The serial device will be
controlled remotely by the PC through the network and the protocol of the serial device.
Steps:
1.
Go to
M
enu > Configuration > RS-232
.
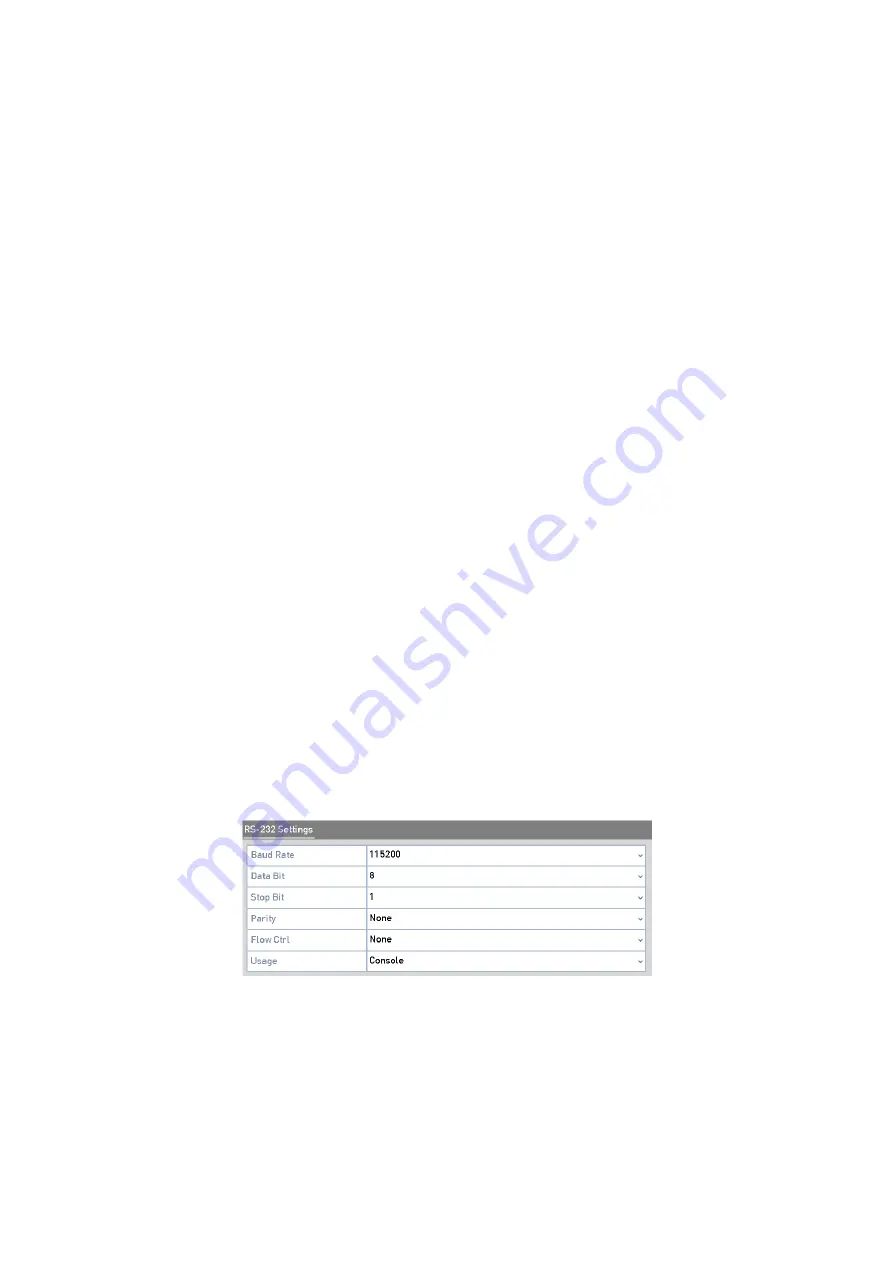
RS-232 Settings Interface
2.
Configure RS-232 parameters including the <Baud Rate>, the <Data Bit>, the <Stop Bit>,
<Parity>, <Flow Control> and <Usage>.
3.
Click the <Apply> button to save the settings.


