GE Multilin
F60 Feeder Protection System
5-191
5 SETTINGS
5.6 GROUPED ELEMENTS
5
•
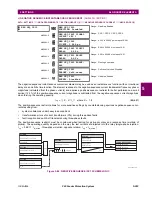
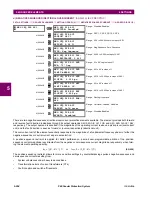
WATTMETRIC GND FLT 1 OV PKP
: This setting specifies the minimum zero sequence voltage supervising the direc-
tional power measurement. This threshold should be higher than possible unbalance during normal operation of the
system. Typically, this setting would be selected at 0.1 to 0.2 pu for the ungrounded or resonant grounded systems,
and at 0.05 to 0.1 pu for solidly or resistor-grounded systems. When using externally supplied voltage via the auxiliary
voltage channel, 1 pu is the nominal voltage of this channel as per VT bank settings. When using internally calculated
neutral voltage, 1 pu is the nominal phase to ground voltage as per the VT bank settings.
•
WATTMETRIC GND FLT 1 CURR
: The element responds to the neutral current (that is, three times zero-sequence
current), either calculated internally from the phase currents or supplied externally via the ground CT input from more
accurate sources such as the core balanced CT. This setting allows selecting the source of the operating current.
•
WATTMETRIC GND FLT 1 OC PKP
: This setting specifies the current supervision level for the measurement of the
zero-sequence power.
•
WATTMETRIC GND FLT 1 OC PKP DEL
: This setting specifies delay for the overcurrent portion of this element. The
delay applies to the
WATTMETRIC 1 PKP
operand driven from the overcurrent condition.
•
WATTMETRIC GND FLT 1 PWR PKP
: This setting specifies the operating point of the element. A value of 1 pu is a
product of the 1 pu voltage as specified for the overvoltage condition of this element, and 1 pu current as specified for
the overcurrent condition of this element.
•
WATTMETRIC GND FLT 1 REF PWR
: This setting is used to calculate the inverse time characteristic delay (defined
by
S
ref
in the following equations). A value of 1 pu represents the product of a 1 pu voltage (as specified in the overvolt-
age condition for this element) and a 1 pu current (as specified in the overcurrent condition for this element.
•
WATTMETRIC GND FLT 1 ECA
: This setting adjusts the maximum torque angle of the element. The operating power
is calculated as:
(EQ 5.19)
where * indicates complex conjugate. By varying the element characteristic angle (ECA), the element can be made to
respond to forward or reverse direction in inductive, resistive, or capacitive networks as shown in the
Wattmetric char-
acteristic angle response
diagram.
•
WATTMETRIC GND FLT 1 PWR PKP DEL
: This setting defines a definite time delay before the inverse time charac-
teristic is activated. If the curve selection is set as “Definite Time”, the element would operate after this security time
delay. If the curve selection is “Inverse” or one of the FlexCurves, the element uses both the definite and inverse time
timers simultaneously. The definite time timer, specified by this setting, is used and when expires it releases the
inverse time timer for operation (torque control).
•
WATTMETRIC GND FLT 1 CURVE
: This setting allows choosing one of three methods to delay operate signal once all
conditions are met to discriminate fault direction.
The “Definite Time” selection allows for a fixed time delay defined by the
WATTMETRIC GND FLT 1 PWR PKP DEL
setting.
The “Inverse” selection allows for inverse time characteristics delay defined by the following formula:
(EQ 5.20)
where
m
is a multiplier defined by the multiplier setting,
S
ref
is the multiplier setting, and
S
op
is the operating power at
the time. This timer starts after the definite time timer expires.
The four FlexCurves allow for custom user-programmable time characteristics. When working with FlexCurves, the
element uses the operate to pickup ratio, and the multiplier setting is not applied:
(EQ 5.21)
Again, the FlexCurve timer starts after the definite time timer expires.
S_op
Re
V
n
I
n
1 ECA
∠
×
(
)∗
(
)
=
t
m
S
ref
S
op
----------
×
=
t
FlexCurve
S
op
S
ref
----------
=
Содержание F60
Страница 10: ...x F60 Feeder Protection System GE Multilin TABLE OF CONTENTS ...
Страница 30: ...1 20 F60 Feeder Protection System GE Multilin 1 5 USING THE RELAY 1 GETTING STARTED 1 ...
Страница 138: ...4 28 F60 Feeder Protection System GE Multilin 4 2 FACEPLATE INTERFACE 4 HUMAN INTERFACES 4 ...
Страница 454: ...5 316 F60 Feeder Protection System GE Multilin 5 10 TESTING 5 SETTINGS 5 ...
Страница 500: ...7 14 F60 Feeder Protection System GE Multilin 7 1 COMMANDS 7 COMMANDS AND TARGETS 7 ...
Страница 508: ...8 8 F60 Feeder Protection System GE Multilin 8 2 FAULT LOCATOR 8 THEORY OF OPERATION 8 ...
Страница 522: ...10 12 F60 Feeder Protection System GE Multilin 10 6 DISPOSAL 10 MAINTENANCE 10 ...
Страница 660: ...B 116 F60 Feeder Protection System GE Multilin B 4 MEMORY MAPPING APPENDIX B B ...
Страница 706: ...E 10 F60 Feeder Protection System GE Multilin E 1 IEC 60870 5 104 APPENDIX E E ...
Страница 718: ...F 12 F60 Feeder Protection System GE Multilin F 2 DNP POINT LISTS APPENDIX F F ...
Страница 728: ...H 8 F60 Feeder Protection System GE Multilin H 2 ABBREVIATIONS APPENDIX H H Z Impedance Zone ...
Страница 730: ...H 10 F60 Feeder Protection System GE Multilin H 3 WARRANTY APPENDIX H H ...


