253
DWS-1008 User’s Manual
D-Link Systems, Inc.
Configuring and Managing Security ACLs
Security ACL Configuration Scenario
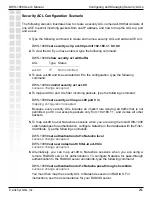
The following scenario illustrates how to create a security ACL named
acl-99
that consists of
one ACE to permit incoming packets from one IP address, and how to map the ACL to a port
and a user:
1.
Type the following command to create and name a security ACL and add an ACE to it.
DWS-1008#
set security acl ip acl-99 permit 192.168.1.1 0.0.0.0
2.
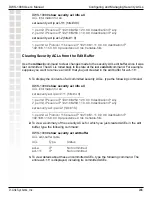
To view the ACE you have entered, type the following command:
DWS-1008#
show security acl editbuffer
ACL Type Status
-----------------------------------------------
acl-99
IP
Not committed
3.
To save
acl-99
and its associated ACE to the configuration, type the following
command:
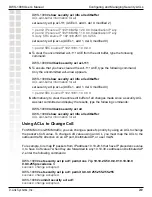
DWS-1008#
commit security acl acl-99
success: change accepted.
4.
To map
acl-99
to port 9 to filter incoming packets, type the following command:
DWS-1008#
set security acl map acl-99 port 9 in
mapping configuration accepted
Because every security ACL includes an implicit rule denying all traffic that is not
permitted, port 9 now accepts packets only from 192.168.1.1, and denies all other
packets.
5.
To map
acl-99
to user Natasha’s sessions when you are using the local DWS-1008
switch database for authentication, configure Natasha in the database with the Filter-
Id attribute. Type the following commands:
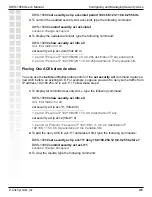
DWS-1008#
set authentication dot1x Natasha local
success: change accepted.
DWS-1008#
set user natasha attr filter-id acl-99.in
success: change accepted.
6.
Alternatively, you can map
acl-99
to Natasha’s sessions when you are using a
remote RADIUS server for authentication. To configure Natasha for pass-through
authentication to the RADIUS server
shorebirds
, type the following command:
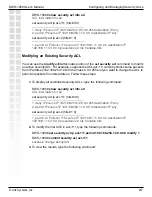
DWS-1008#
set authentication dot1x Natasha pass-through shorebirds
success: change accepted.
You must then map the security ACL to Natasha’s session in RADIUS. For
instructions, see the documentation for your RADIUS server.


