


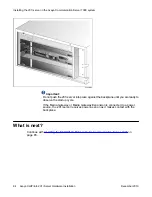

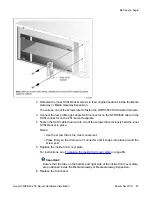


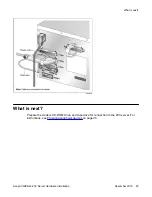


1. Insert the bottom tabs of the front cover plate inside the bottom rail.
2. Align the screw holes on the front cover plate over the screw heads on the Media
Gateway or Media Gateway Expansion.
3. Slide the front cover plate downward to the right, ensuring that the side tabs slide
behind the side rail.
4. Tighten the screws to secure the front cover plate.
5. Continue with "
on page 89," below.
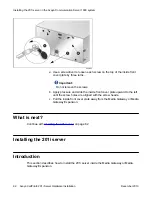
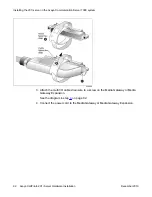
To replace the front bezel
1.
Warning:
Risk of eye injury
Avaya recommends that you operate the Media Gateway and Media Gateway
Expansion with their front bezels installed. When the blue LEDs inside these units
are lit, they are very bright.
To replace the inside front cover plate
Avaya CallPilot
®
201i Server Hardware Installation
December 2010 89
Содержание CallPilot 201i
Страница 1: ...Avaya CallPilot 201i Server Hardware Installation 5 0 NN44200 301 01 03 December 2010 ...
Страница 8: ...8 Avaya CallPilot 201i Server Hardware Installation December 2010 ...
Страница 28: ...About the 201i server 28 Avaya CallPilot 201i Server Hardware Installation December 2010 ...
Страница 106: ...Preparing peripheral devices 106 Avaya CallPilot 201i Server Hardware Installation December 2010 ...
Страница 128: ...Connecting peripheral devices to the 201i server 128 Avaya CallPilot 201i Server Hardware Installation December 2010 ...