


Result: The operating system boot sequence begins, and communication with the
switch occurs. The HEX display shows NT (for about 30 seconds), followed by OK.
Note:
The system reboots more than once. The HEX display repeats with each reboot.
Note:
Before OK appears, one of the following messages can appear, but not for more
than one second: CDLN, C:01, or C:02. This is normal operation.
If OK does not appear, refer to the CallPilot server maintenance and diagnostics
guide for your server for troubleshooting instructions.
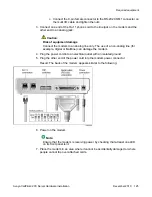
6. Ensure that the operating system logon window appears on the monitor.
If the logon window does not appear, refer to the CallPilot <server model> Server
Maintenance and Diagnostics guide for your server for troubleshooting instructions.
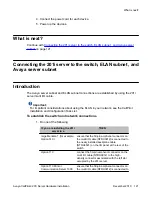
What is next?
Proceed with the Avaya CallPilot
®
<switch model> and Avaya CallPilot Server Configuration
guide for your switch and server to connect and configure the server and switch.
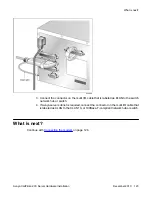
What is next?
Avaya CallPilot
®
201i Server Hardware Installation
December 2010 127
Содержание CallPilot 201i
Страница 1: ...Avaya CallPilot 201i Server Hardware Installation 5 0 NN44200 301 01 03 December 2010 ...
Страница 8: ...8 Avaya CallPilot 201i Server Hardware Installation December 2010 ...
Страница 28: ...About the 201i server 28 Avaya CallPilot 201i Server Hardware Installation December 2010 ...
Страница 106: ...Preparing peripheral devices 106 Avaya CallPilot 201i Server Hardware Installation December 2010 ...
Страница 128: ...Connecting peripheral devices to the 201i server 128 Avaya CallPilot 201i Server Hardware Installation December 2010 ...