


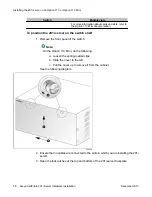


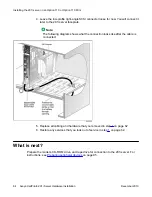


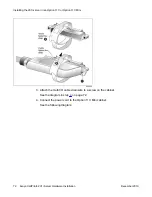


4. Leave the low-profile right-angle SCSI connector loose for now. You will connect it
later to the 201i server faceplate.
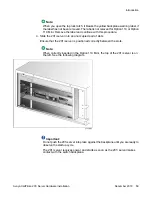
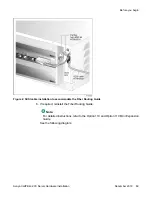
Note:
The following diagram shows what the connection looks like after the cable is
connected:
5. Replace all cabling and hardware that you removed in step
on page 62.
6. Restore any services that you took out of service in step
on page 62.
What is next?
Prepare the modem, CD-ROM drive, and tape drive for connection to the 201i server. For
instructions, see
Installing the 201i server in an Option 11C or Option 11C Mini
64 Avaya CallPilot
®
201i Server Hardware Installation
December 2010
Содержание CallPilot 201i
Страница 1: ...Avaya CallPilot 201i Server Hardware Installation 5 0 NN44200 301 01 03 December 2010 ...
Страница 8: ...8 Avaya CallPilot 201i Server Hardware Installation December 2010 ...
Страница 28: ...About the 201i server 28 Avaya CallPilot 201i Server Hardware Installation December 2010 ...
Страница 106: ...Preparing peripheral devices 106 Avaya CallPilot 201i Server Hardware Installation December 2010 ...
Страница 128: ...Connecting peripheral devices to the 201i server 128 Avaya CallPilot 201i Server Hardware Installation December 2010 ...