


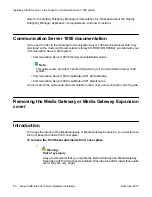


Installing the NTRH3502 SCSI cable for Communication
Server 1000
Introduction
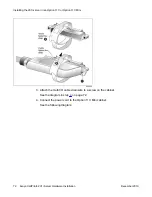
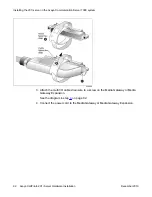
Before you can connect a CD-ROM or tape drive to the 201i server, you must install the
NTRH3502 SCSI cable. The NTRH3502 SCSI cable has a low profile right-angle connector
that allows the cable to be connected to the 201i server faceplate when the Media Gateway
or Media Gateway Expansion cover is installed. This allows the external SCSI device to remain
permanently connected to the 201i server.
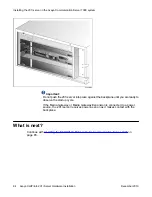
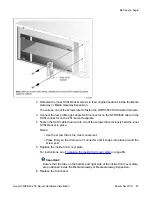
CD-ROM and tape drive cabling diagram
The following diagram shows how the intermediate SCSI cable, CD-ROM drive, and tape drive
are connected to the 201i server. The CD-ROM drive is the first device. The tape drive is the
last device:
Installing the NTRH3502 SCSI cable for Communication Server 1000
Avaya CallPilot
®
201i Server Hardware Installation
December 2010 85
Содержание CallPilot 201i
Страница 1: ...Avaya CallPilot 201i Server Hardware Installation 5 0 NN44200 301 01 03 December 2010 ...
Страница 8: ...8 Avaya CallPilot 201i Server Hardware Installation December 2010 ...
Страница 28: ...About the 201i server 28 Avaya CallPilot 201i Server Hardware Installation December 2010 ...
Страница 106: ...Preparing peripheral devices 106 Avaya CallPilot 201i Server Hardware Installation December 2010 ...
Страница 128: ...Connecting peripheral devices to the 201i server 128 Avaya CallPilot 201i Server Hardware Installation December 2010 ...