8 - 10
–
+
ELEC
IGNITION SYSTEM
EAS00737
TROUBLESHOOTING
Procedure
Check:
1. main and ignition fuses
2. battery
3. spark plugs
4. ignition spark gap
5. spark plug cap resistance
6. ignition coil resistance
7. crankshaft position sensor resistance
8. main switch
9. engine stop switch
10.neutral switch
11.sidestand switch
12.starting circuit cut-off relay
13.wiring connections
(of the entire ignition system)
NOTE:
@
• Before troubleshooting, remove the following
part(s):
1) Seat
2) Fuel tank and T-bar
3) Side cowlings
4) Front cowling assembly
5) Air filter case
• Troubleshoot with the following special
tool(s).
EAS00738
YES
NO
EAS00739
YES
NO
EAS00741
YES
NO
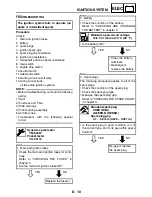
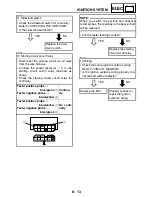
The ignition system fails to operate (no
spark or intermittent spark).
Dynamic spark tester
YM-34487
Pocket tester
YU-03112
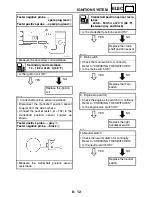
1. Main and ignition fuses
• Check the main and ignition fuses for conti-
nuity.
Refer to “CHECKING THE FUSES” in
chapter 3.
• Are the main and ignition fuses OK?
Replace the fuse(s).
2. Battery
• Check the condition of the battery.
Refer to “CHECKING AND CHARGING
THE BATTERY” in chapter 3.
Minimum open-circuit voltage
12.8 V or more at 20 °C (68 °F)
• Is the battery OK?
• Clean the battery
terminals.
• Recharge or
replace the battery.
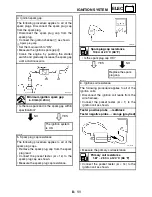
3. Spark plugs
The following procedure applies to all of the
spark plugs.
• Check the condition of the spark plug.
• Check the spark plug type.
• Measure the spark plug gap.
Refer to “CHECKING THE SPARK PLUGS”
in chapter 3.
Standard spark plug
CR8E (NGK)
U24ESR-N (DENSO)
Spark plug gap
0.7 ~ 0.8 mm (0.028 ~ 0.031 in)
• Is the spark plug in good condition, is it of
the correct type, and is its gap within speci-
fication?
Re-gap or replace
the spark plug.
Summary of Contents for FJR1300
Page 1: ...LIT 11616 16 18 5JW 28197 10 FJR1300R FJR1300RC SERVICE MANUAL ...
Page 6: ......
Page 82: ...2 22 SPEC TIGHTENING TORQUES Cylinder head tightening sequence Crankcase tightening sequence ...
Page 89: ...2 29 SPEC 1 Crankshaft 2 Main axle 3 Drive axle OIL FLOW DIAGRAMS ...
Page 90: ...2 30 SPEC 1 Oil nozzle 2 Main gallery bolt 3 Crankshaft OIL FLOW DIAGRAMS ...
Page 91: ...2 31 SPEC 1 Main axle 2 Drive axle 3 Oil delivery pipe OIL FLOW DIAGRAMS ...
Page 92: ...2 32 SPEC 1 Exhaust camshaft 2 Oil check bolt 3 Intake camshaft OIL FLOW DIAGRAMS ...
Page 94: ...2 34 SPEC 1 Crank pin 2 Crankshaft OIL FLOW DIAGRAMS ...
Page 97: ...2 37 SPEC 1 Main axle 2 Drive axle 3 Middle drive shaft OIL FLOW DIAGRAMS ...
Page 98: ...2 38 SPEC COOLING SYSTEM DIAGRAMS 1 Radiator COOLING SYSTEM DIAGRAMS ...
Page 99: ...2 39 SPEC 1 Water jacket joint 2 Oil cooler COOLING SYSTEM DIAGRAMS ...
Page 101: ...2 41 SPEC 1 Coolant reservoir 2 Radiator 3 Water pump COOLING SYSTEM DIAGRAMS ...
Page 107: ...2 47 SPEC CABLE ROUTING 1 Tail brake light lead ...
Page 196: ...3 80 CHK ADJ ADJUSTING THE HEADLIGHT BEAMS ...
Page 288: ...4 92 CHAS 3 Install bearing 1 to the swingarm Installed depth a 4 0 mm 0 16 in SWINGARM ...
Page 531: ...8 35 ELEC LIGHTING SYSTEM ...
Page 570: ......
Page 571: ...YAMAHA MOTOR CO LTD 2500 SHINGAI IWATA SHIZUOKA JAPAN PRINTED IN U S A ...

