4 - 85
CHAS
REAR SHOCK ABSORBER ASSEMBLY AND RELAY
ARM
EAS00686
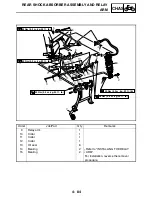
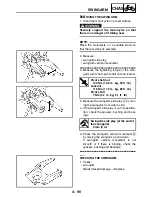
HANDLING THE REAR SHOCK ABSORBER
WARNING
@
This rear shock absorber contains highly
compressed nitrogen gas. Before handling
the rear shock absorber, read and make
sure you understand the following informa-
tion. The manufacturer cannot be held
responsible for property damage or per-
sonal injury that may result from improper
handling of the rear shock absorber.
• Do not tamper or attempt to open the rear
shock absorber.
• Do not subject the rear shock absorber to
an open flame or any other source of high
heat. High heat can cause an explosion
due to excessive gas pressure.
• Do not deform or damage the rear shock
absorber in any way. Rear shock
absorber damage will result in poor
damping performance.
EAS00688
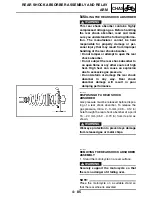
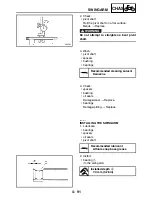
DISPOSING OF A REAR SHOCK
ABSORBER
Gas pressure must be released before dispos-
ing of a rear shock absorber. To release the
gas pressure, drill a 2 ~ 3-mm (0.08 ~ 0.12 in)
hole through the rear shock absorber at a point
15 ~ 20 mm (0.59 ~ 0.79 in) from its end as
shown.
WARNING
@
Wear eye protection to prevent eye damage
from released gas or metal chips.
EAS00694
REMOVING THE REAR SHOCK ABSORBER
ASSEMBLY
1. Stand the motorcycle on a level surface.
WARNING
@
Securely support the motorcycle so that
there is no danger of it falling over.
NOTE:
@
Place the motorcycle on a suitable stand so
that the rear wheel is elevated.
Summary of Contents for FJR1300
Page 1: ...LIT 11616 16 18 5JW 28197 10 FJR1300R FJR1300RC SERVICE MANUAL ...
Page 6: ......
Page 82: ...2 22 SPEC TIGHTENING TORQUES Cylinder head tightening sequence Crankcase tightening sequence ...
Page 89: ...2 29 SPEC 1 Crankshaft 2 Main axle 3 Drive axle OIL FLOW DIAGRAMS ...
Page 90: ...2 30 SPEC 1 Oil nozzle 2 Main gallery bolt 3 Crankshaft OIL FLOW DIAGRAMS ...
Page 91: ...2 31 SPEC 1 Main axle 2 Drive axle 3 Oil delivery pipe OIL FLOW DIAGRAMS ...
Page 92: ...2 32 SPEC 1 Exhaust camshaft 2 Oil check bolt 3 Intake camshaft OIL FLOW DIAGRAMS ...
Page 94: ...2 34 SPEC 1 Crank pin 2 Crankshaft OIL FLOW DIAGRAMS ...
Page 97: ...2 37 SPEC 1 Main axle 2 Drive axle 3 Middle drive shaft OIL FLOW DIAGRAMS ...
Page 98: ...2 38 SPEC COOLING SYSTEM DIAGRAMS 1 Radiator COOLING SYSTEM DIAGRAMS ...
Page 99: ...2 39 SPEC 1 Water jacket joint 2 Oil cooler COOLING SYSTEM DIAGRAMS ...
Page 101: ...2 41 SPEC 1 Coolant reservoir 2 Radiator 3 Water pump COOLING SYSTEM DIAGRAMS ...
Page 107: ...2 47 SPEC CABLE ROUTING 1 Tail brake light lead ...
Page 196: ...3 80 CHK ADJ ADJUSTING THE HEADLIGHT BEAMS ...
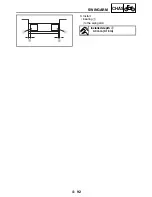
Page 288: ...4 92 CHAS 3 Install bearing 1 to the swingarm Installed depth a 4 0 mm 0 16 in SWINGARM ...
Page 531: ...8 35 ELEC LIGHTING SYSTEM ...
Page 570: ......
Page 571: ...YAMAHA MOTOR CO LTD 2500 SHINGAI IWATA SHIZUOKA JAPAN PRINTED IN U S A ...


