TCP/IP Configuration – 4-7
5.
Change the TCP/IP address class (fig. 4.4) if necessary (check with your System
Supervisor) and then click Change to the right of Network Class field. See
“TCP/IP Addresses” earlier in this chapter for class details.
6.
Change the printer’s default TCP/IP address (Network and Node IDs) to the
address assigned by your System Supervisor using the scroll arrows beside each
number (fig. 4.3 or 4.4); then, click Change to the right of the IP Address field.
7.
Change the Subnet Mask using the scroll arrows to the right of the numbers if
necessary; then, click Change to the right of the Subnet Mask field.
8.
Change the DHCP setting if necessary; then, click Change to the right of the
DHCP field.
9.
Close your browser; then, restart your printer to make the new TCP/IP address
take effect.
Ping the printer using DOS Ping to verify the IP address in a PC environment. If you do
not get full replies, verify that you have the correct IP address configured for your printer.
Using the Setip.ps File (Macintosh)
In a Macintosh environment, use Adobe Downloader to download the Setip.ps file to
your printer.
1.
Open the Setip.ps file in a text editor, such as SimpleText.
2.
Change the IP address in parentheses to your printer’s IP address and save the
file.
3.
Double-click the Adobe Downloader icon to open it.
4.
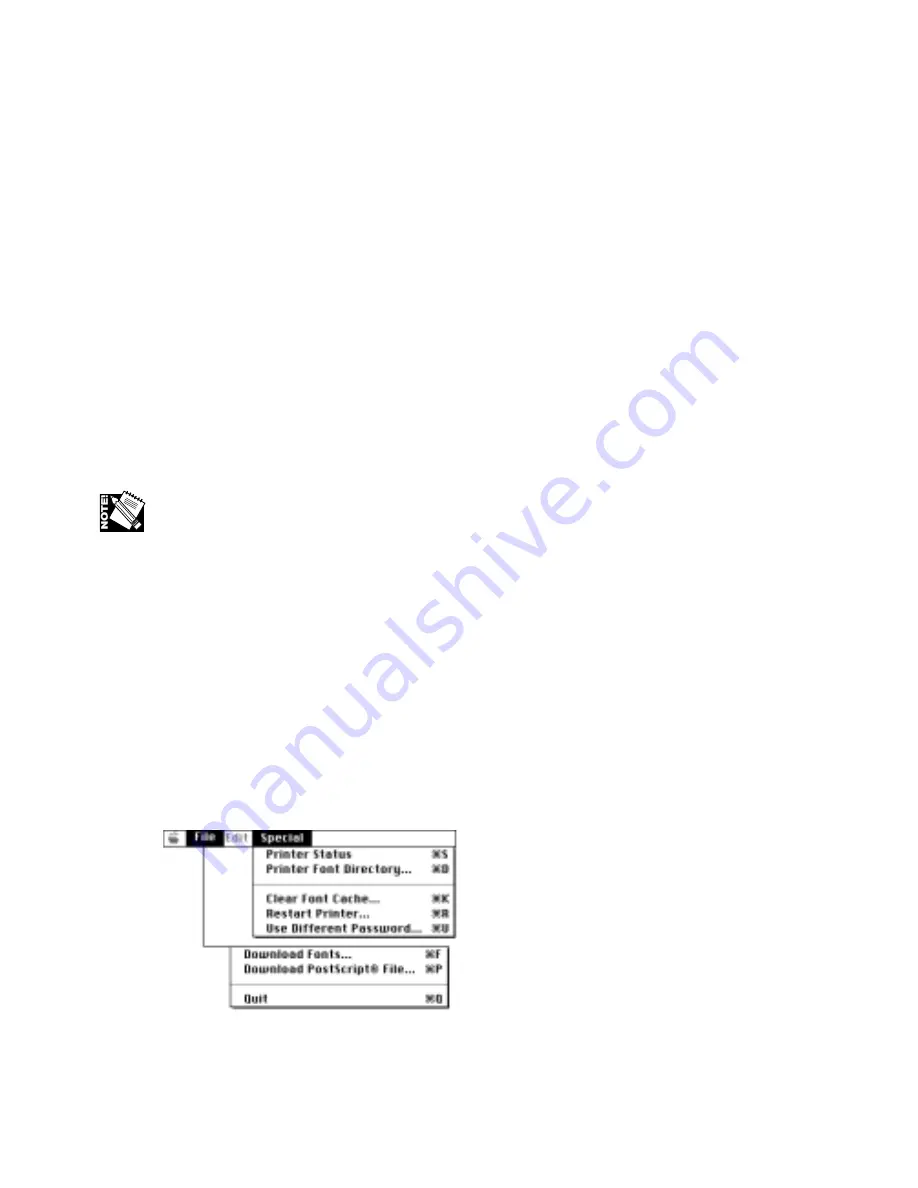
Select File: Download PostScript File (fig. 4.5).
Fig. 4.5 Adobe Downloader Menu
Summary of Contents for AW 1200
Page 5: ...3 2 PC Installing Utilities and Drivers...
Page 33: ...3 30 PC Installing Utilities and Drivers...
Page 34: ...2 2 Macintosh Installing Utilities and Drivers...
Page 55: ...1 2 Introduction and Installation...
Page 62: ...8 2 Troubleshooting...
Page 85: ...7 2 Maintenance Specifications and Warranty...
Page 94: ...6 2 Printing on Various Media and Options...
Page 118: ...6 26 Printing on Various Media and Options...
Page 141: ...5 24 XANT Utilities Macinstosh and PC...
Page 142: ...4 2 TCP IP Configuration...


