Page
178
of
244
6.2.4.
CEPH Ear-Rod Alignment
1. Run the Console Software.
2. Click
CEPH
>
High Resolution
>
Lateral
>
CONFIRM
and wait until
READY
button is enabled.
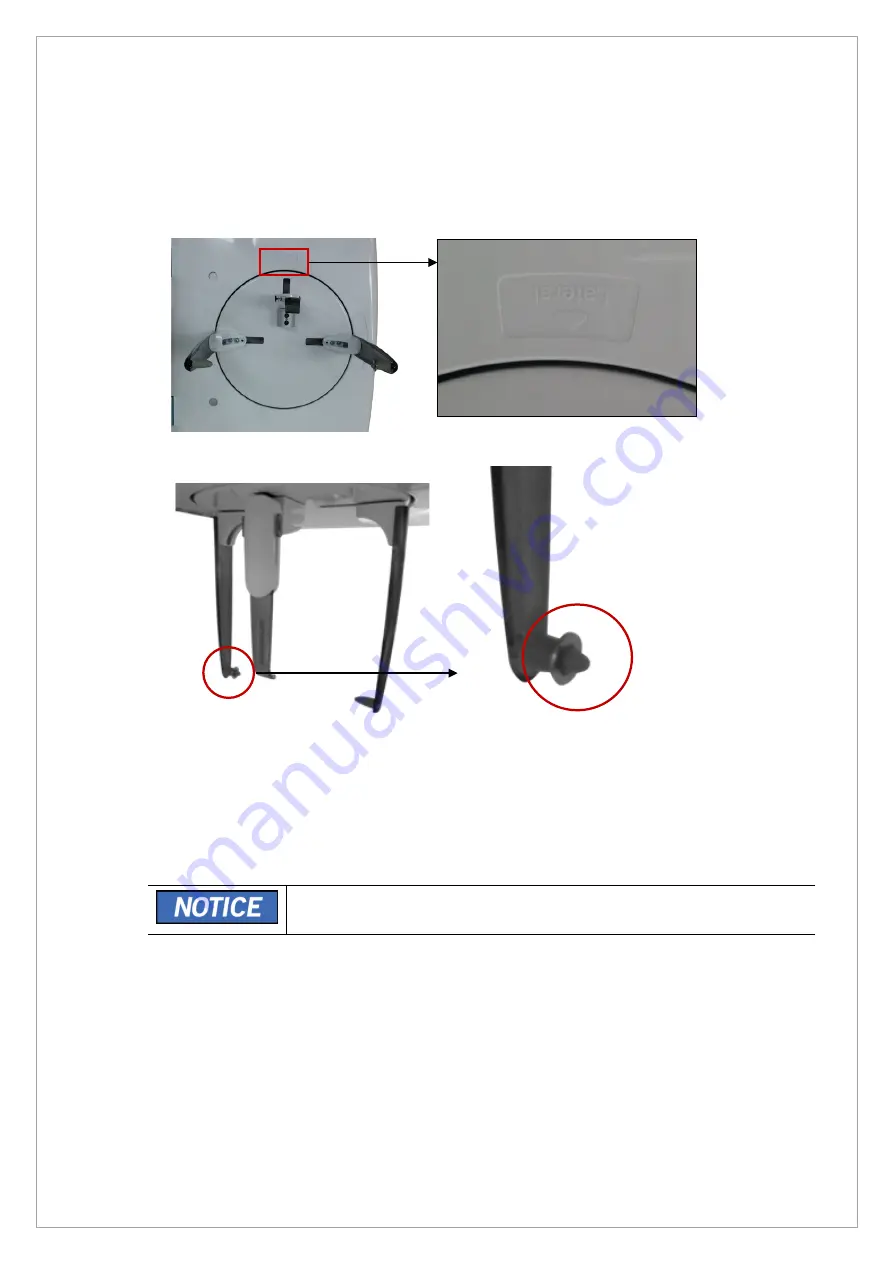
3. Turn CEPH Ear-Rod to the Lateral Mode position as shown in the figure.
4. Put a flat washer into the right Ear-Rod as shown below.
5. Click the
READY
button.
6. Perform the image acquisition according to the Console Software guidance.
7. When the image acquisition is completed, run the
VAKCAP.exe
file.
8. Click the
Panorama
tab >
V Pan
button to open the View16 program.
9. Click the
Brw
button and select the
Capture.raw
file to open the captured image
•
Capture.raw
file path :
C:\VCaptureSW\Acquisition\Ceph\AnyCeph\Fast\PAN
folder
Summary of Contents for A9 PHT-30CSS
Page 1: ...vatech A9 Technical manual Model PHT 30CSS Version 1 01 English...
Page 12: ...Page 11 of 244 1 2 1 Vertical Frame Part...
Page 22: ...Page 21 of 244 1 2 3 5 Generator DG 07E22T2...
Page 26: ...Page 25 of 244...
Page 27: ...Page 26 of 244...
Page 30: ...Page 29 of 244 1 3 3 Sensor Part Connection Diagram...
Page 31: ...Page 30 of 244 1 3 4 CEPH SENSOR Part Connection Diagram...
Page 32: ...Page 31 of 244 1 3 5 Connection Diagram Total assembly...
Page 43: ...Page 42 of 244 16 Loosen ten bolts as shown in the image below...
Page 112: ...Page 111 of 244 5 Click the V Vol button Click the Ready button...
Page 180: ...Page 179 of 244 10 Select 50 in the M box and click the center of the flat washer...
Page 209: ...Page 208 of 244 8 5 Appendix 8 5 1 Main MCU Board Parameters...
Page 244: ...vatech A9 www vatech com...


