


14
Getting Started
EdgeSwitch
™
Administration Guide
Ubiquiti Networks, Inc.
Command Buttons
Many UI pages also contain command buttons. These buttons, which typically appear at the bottom of a
page but can also appear in the configuration and status field area, are labeled with either text or icons. The
following table lists the common command buttons found throughout the UI pages.
Common Command Buttons
Button Text
1, 2
Icon
Function
Add
Adds a new entry to a table.
Clear
–
Removes all entries from a table, resets statistical counters to the default value, or clears all the statistics
counters and resets all switch summary and detailed statistics to default values.
Delete
Removes the selected entry from the running configuration.
Download
Downloads data.
Edit
Changes an existing entry.
Generate
Generates a security certificate, key, etc.
Initialize
Resets the 802.1X state machine on the associated interface to the initialization state.
Logout
–
Ends the session.
Re-Authenticate
Forces the associated interface to restart the authentication process.
Refresh
Refreshes the page with the most current information, or refreshes the DHCP lease.
Remove
–
Deletes the selected entries.
Reset
Resets a field to its default value.
Submit
–
Sends the updated configuration to the switch. Configuration changes take effect immediately, but
changes are not retained across a power cycle unless you save them to the system configuration file.
IMPORTANT:
To retain changes across a power cycle (reboot), you must save the configuration to
non-volatile memory, by navigating to
System
>
Configuration Storage
>
Save
and clicking
Save
.
Upload
Uploads data.
1
This is either the text label on a button, or the text that appears when hovering over a button labeled with an icon.
2
Button names may include additional text, such as:
Add Vendor Option
,
Clear Entries
,
Remove Last Rule
, etc.
Table Sorting
All tables on UI pages can be sorted by columns. By default, the information in a table is sorted in ascending
order, using the leftmost column as primary sort. To change the default sort order, click the heading above
the column you want to sort the table by. Successive clicks on the heading toggle between ascending and
descending order.
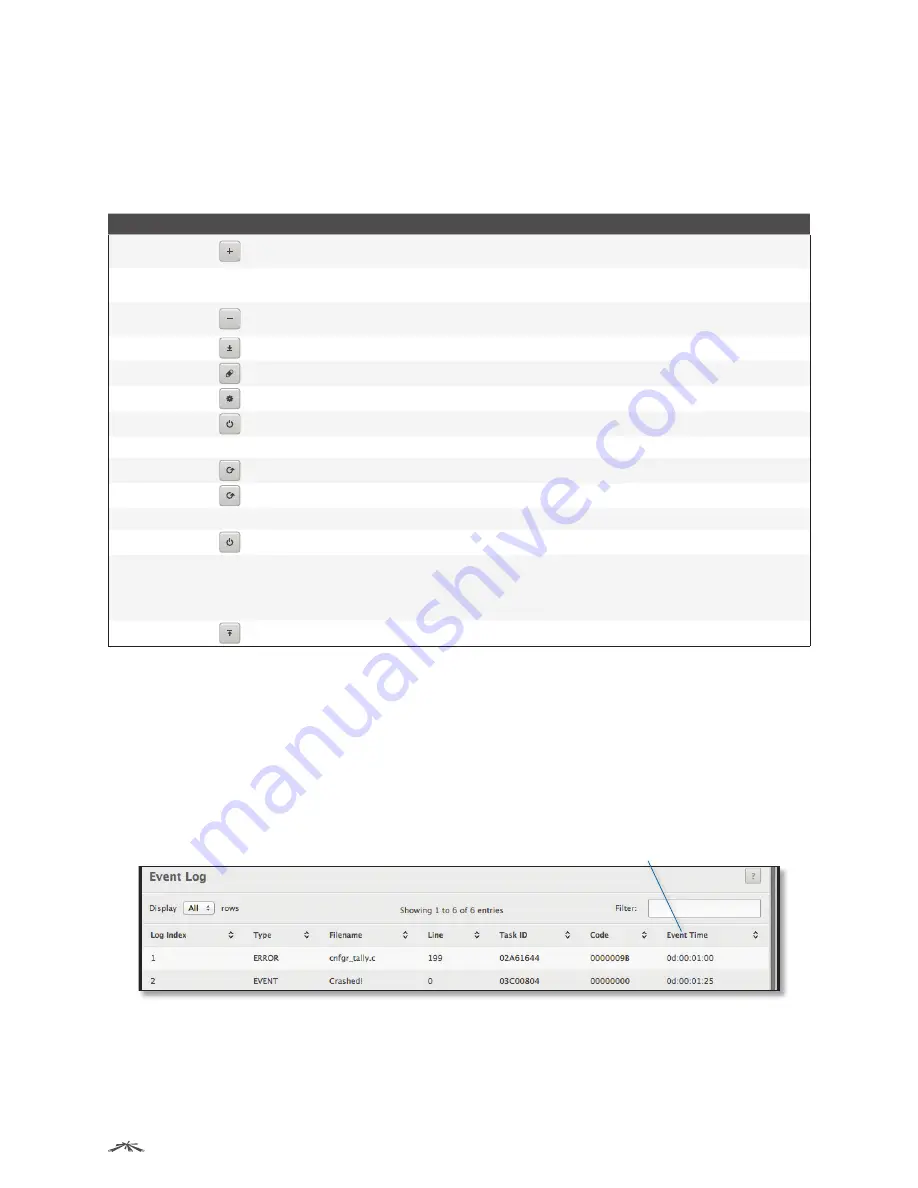
For example, the following illustration shows the
Event Log
page in its default sort order (sorted by
Log Index
).
To sort the table entries (rows) by the
Event Time
field, simply click the
Event Time
heading.
Click to sort by Event Time
Column Headings in Table


