- 84 -
MF 5990 - Agoris M943
12 -
PC Functions
3
Click on
Open
in the tool bar, switch the file filter to
*.fax and go to the directory C:\Program Files\Com-
panion Suite Pro LH2\Documents\FAX\Temporary
containing the background image you created in
the first step.
4
Click on the button
Fields
in the tool bar. A window
opens enabling you to add the fields to the back-
ground image.
5
Click on
Save
to save the cover page template and
exit this window.
6
The
New Fax
window opens. You can now select
the cover page template that you want to use. By
double clicking on the preview in the lower right-
hand corner, another window opens, displaying a
preview of the cover page with the fields completed
with the recipients contact details.
Creating a cover page
1
From the tab
Cover page
, click on
New
.
2
Select the cover page template you created from
the menu
File
.
>
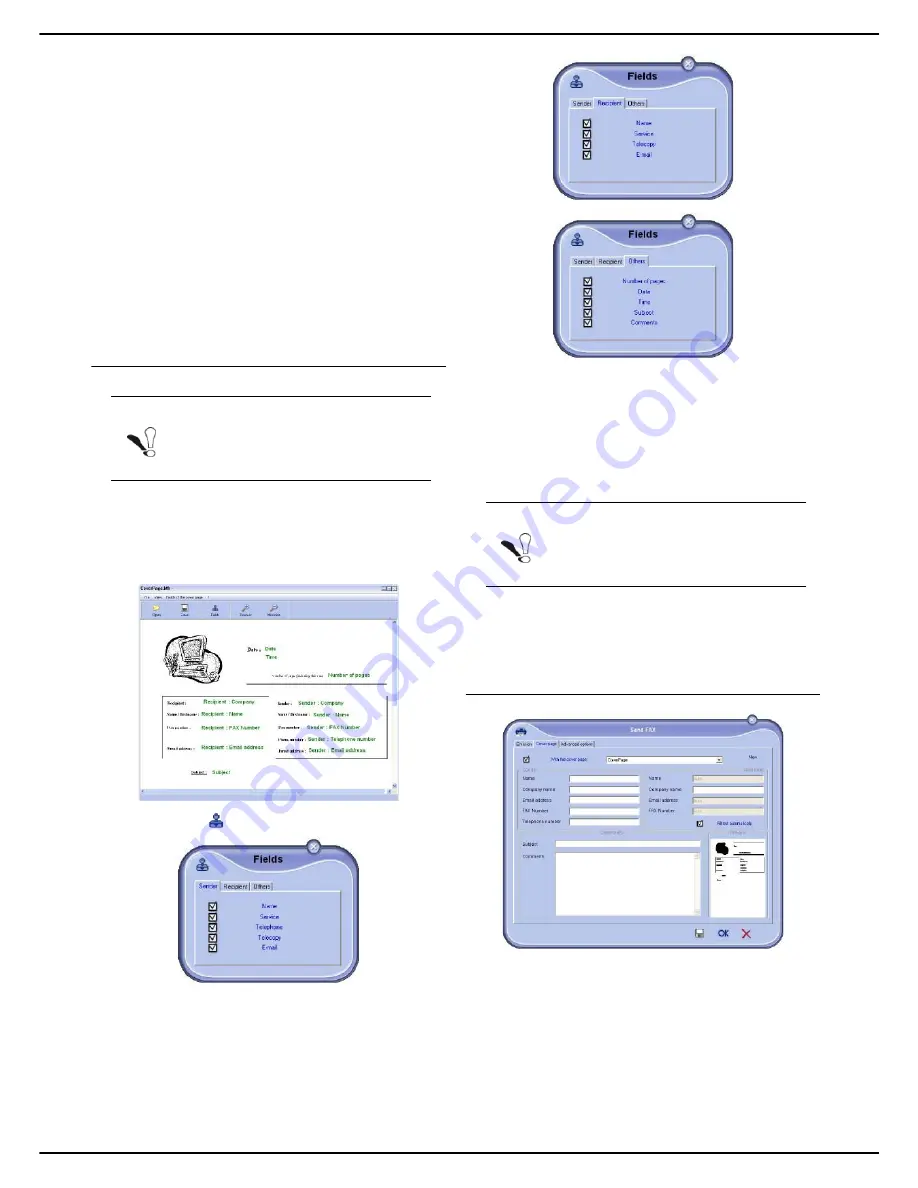
A window opens containing the cover page tem-
plate you created:
3
Click on the
icon to display the fields available.
4
To add a field:
- Select the field you want to insert by checking the
available fields. A stamp appears as the mouse
cursor.
- Click on the location in the template where you
want to insert the field.
- You can move or enlarge the field as required.
5
When the fields have been inserted, save the cover
page.
This cover page can then be selected in the tab
Cover
page
of the fax emission window.
Description of the Cover page tab
Note
A cover page template must be created be-
fore sending a fax using it.
Note
Adjust the size of your field boxes so that
the text is legible.


