4. Electronics & Lid
Original Prusa SL1 kit assembly
73
STEP 45
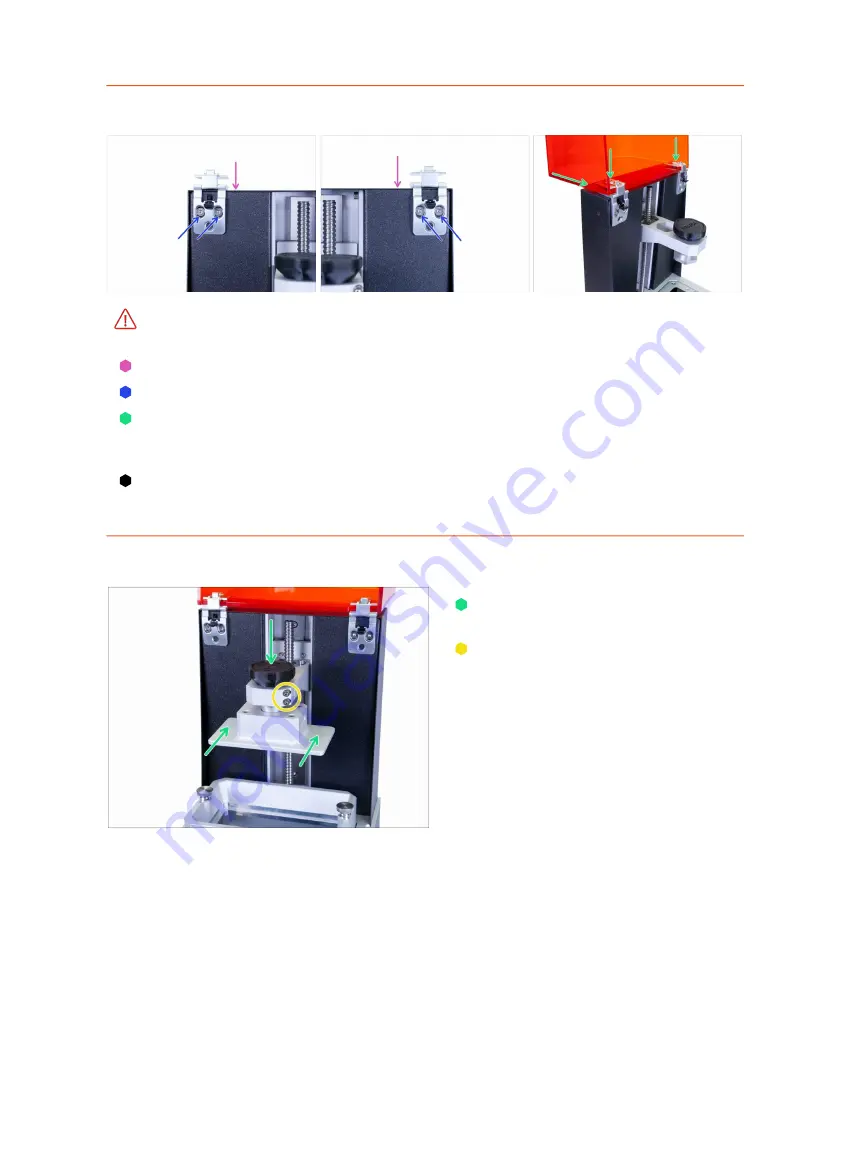
Mounting the acrylic lid
Make sure you won't drop the hinges during the assembly
. You can use any fabric
to protect the FEP film and the print display below the hinges.
Open the hinge and place it on the top of the printer.
Secure each hinge with prepared M4x8b countersunk screws.
Slide the lid all the way in and tighten the screws in the hinges to secure it (use
4mm Allen key). Don't over-tighten the screws or you might crack the lid and the
hinge.
Try closing the lid, in case you will find any significant gap, reseat the cover or the
hinges.
STEP 46
Returning the print platform
Slide the print platform back in and
secure it using the knob.
The platform is now still able to
move (wobble on the cantilever), it
is ok. Final tightening will be done
during the calibration process by
adjusting the marked screw(s).
Summary of Contents for Original Prusa SL1
Page 5: ...Original Prusa SL1 kit assembly 5 1 Introduction ...
Page 13: ...Original Prusa SL1 kit assembly 13 2 Base Tower ...
Page 32: ...32 Original Prusa SL1 kit assembly 3 Covers Platform ...
Page 51: ...Original Prusa SL1 kit assembly 51 4 Electronics Lid ...
Page 75: ...Original Prusa SL1 kit assembly 75 5 Preflight check ...
Page 84: ...84 Original Prusa SL1 kit assembly Manual changelog SL1 ...
Page 87: ...87 Notes ...
Page 88: ...88 ...
Page 89: ...89 Notes ...
Page 90: ...90 ...
Page 91: ...91 Notes ...
Page 92: ...92 ...


