18 | Ottobock
3R106, 3R106=KD, 3R106=ST, 3R106=HD
Attention
Deviating from the processing instructions and the recommended materials for the lami-
nation of the anchor can lead to a loosening or breaking of the adapter.
Attention!
After assembly, tighten the set screws (Fig. 1, (3) + (3a)) with the 710D1 Torque Wrench.
For trial fitting: Tighten the 506G3 Set Screws to
10 Nm
. For completion: Secure the
506G3 Set Screws with 636K13 Loctite and pre-tighten to
10 Nm
. Then complete as-
sembly by tightening to
15 Nm
.
4.3.2 Adjusting the knee joint during trial walking
As with other polycentric joints, swing phase flexion occurs when the weight is on the ball of the foot.
Alignment, foot design, condition of the residual limb, and the amputee’s activity level all influence
knee function. The pendulum effect from the weight of the foot and shin length are additional vari-
ables. Initial dynamic alignment should begin from the base setting and the function of the knee
should be explained to the patient.
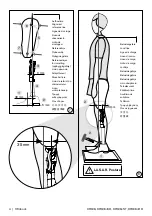
The knee is factory adjusted to a basic position for initial dynamic alignment.
Before changing the factory settings, the following guidelines must be observed:
4.3.2.1 Stance phase stability by positioning the joint
Polycentric knee joints are stable at heel strike.
Initiation of swing flexion depends on the position of the joint and thus of the location of the in
-
stantaneous center of rotation.
If stance phase stability is
too great
, and swing flexion can only be achieved with a great deal of
effort, the instantaneous center of rotation is placed too far posterior and the joint must be tipped
forward using the adjustment screws.
If stance phase stability is
insufficient
, please reverse the above procedure.
With the 3R106=KD and 3R106=ST, stance phase stability and initiation of flexion depend on
the position of the lamination anchor (See alignment). Later adjustments on the upper (proximal)
joint connector are not possible.
4.3.2.2 Adjusting the swing phase
The pneumatic swing phase control ensures a smooth gait. Movement resistances prevent the
prosthetic lower leg from swinging too far when flexing and guarantee dampened extension. Along
with the patient‘s habits, the foot weight and the length of the lower leg, which have a pendular
weight also have an influence on his or her gait.
Before changing the knee joint‘s factory settings, read the following instructions:
Upon delivery, the valve screw (Figure 4, Item E) for extension damping is turned out as far as
possible (set to the lowest resistance) and the valve screw (Figure 4, Item F) for flexion damping
is closed by 2 turns.
Adjusting flexion (F) on the left adjustment screw (from the posterior direction of view) (Fig. 4)
Valve screw of the pneumatic unit
to the right (+)
= greater resistance = less heel rise
Valve screw of the pneumatic unit
to the left (-)
= less resistance = more heel rise
Adjusting extension (E) on the right adjustment screw (from the posterior direction of view)
Valve screw of the pneumatic unit
to the right (+)
= greater resistance = more extension damping
Valve screw of the pneumatic unit
to the left (-)
= less resistance = less extension damping
Summary of Contents for 3R106
Page 3: ...Ottobock 3 3R106 3R106 KD 3R106 ST 3R106 HD 3 4 2 1 3 4 2 5 7 7a 6...
Page 133: ...Ottobock 133 3R106 3R106 KD 3R106 ST 3R106 HD 4 3 2 1 3R106 KD 3R106 ST 4 3 2 2 4 E 4 F F 4...
Page 152: ...152 Ottobock 3R106 3R106 KD 3R106 ST 3R106 HD 4 6 300 3 5 5 6 6 1 6 2 EU 2017 745 CE...
Page 159: ...Ottobock 159 3R106 3R106 KD 3R106 ST 3R106 HD 519L5 4 6 300 5 6 6 1 6 2 CE 2017 745 CE...
Page 160: ...160 Ottobock 3R106 3R106 KD 3R106 ST 3R106 HD...
Page 161: ...Ottobock 161 3R106 3R106 KD 3R106 ST 3R106 HD...

