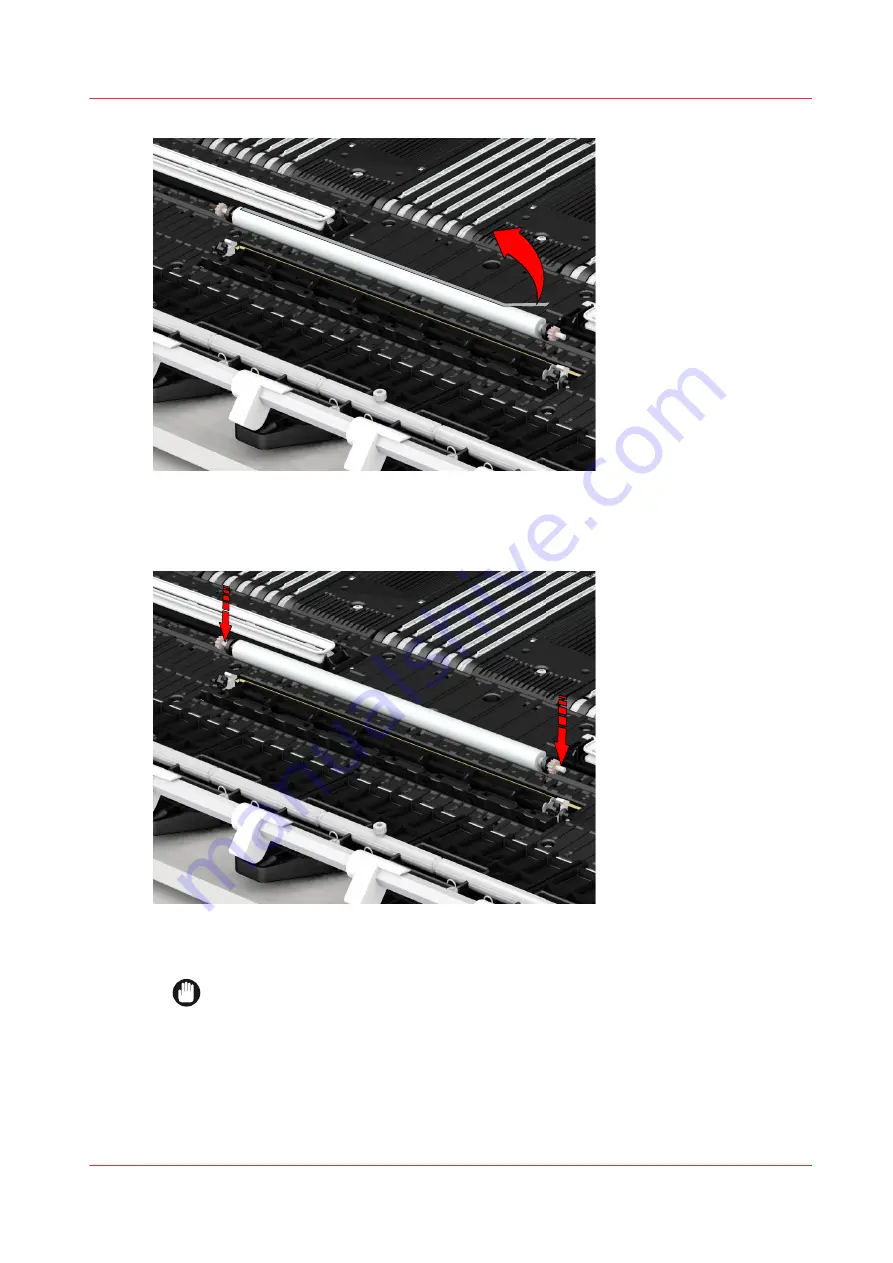
13.
Check that the end with the ratchet mounted to it is on the left side and place this side at the
entrance to the holder. Put the right side end of the wiper roller with the gear mounted to it into
position. Push firmly, inserting the two portions of the shaft into the spring-loaded holders.
14.
To test for the proper engagement use the gear (3) to rotate the wiper roller. The ratchet must
make a clicking sound.
IMPORTANT
Do not touch the micro-fiber surface of the wiper roller.
Replace wiper rollers
Chapter 9 - Maintain the print system
245
Summary of Contents for ColorWave 900
Page 1: ...Operation guide Oc ColorWave 900 User Manual...
Page 7: ...Chapter 1 Introduction...
Page 14: ...Available documentation 14 Chapter 1 Introduction...
Page 15: ...Chapter 2 Explore the print system...
Page 33: ...Ease of operation Chapter 2 Explore the print system 33...
Page 40: ...Status of the printer 40 Chapter 2 Explore the print system...
Page 41: ...Chapter 3 Getting started...
Page 56: ...Move the printer 56 Chapter 3 Getting started...
Page 57: ...Chapter 4 Media handling...
Page 78: ...Check the media compatibility with folding devices 78 Chapter 4 Media handling...
Page 79: ...Chapter 5 Configure the print system...
Page 101: ...The Preferences System settings Chapter 5 Configure the print system 101...
Page 136: ...Accounting workflow 136 Chapter 5 Configure the print system...
Page 137: ...Chapter 6 Plan jobs...
Page 149: ...Chapter 7 Print jobs...
Page 163: ...Chapter 8 Adjust the print quality and print productivity...
Page 175: ...Chapter 9 Maintain the print system...
Page 190: ...Align printheads Manual horizontal 190 Chapter 9 Maintain the print system...
Page 259: ...Chapter 10 Troubleshooting...
Page 287: ...Chapter 11 Support...
Page 294: ...Downloads and support for your product 294 Chapter 11 Support...
Page 295: ...Chapter 12 References...
Page 319: ......


