Recovery System
74
Service Manual – SC1500
Removal and Installation
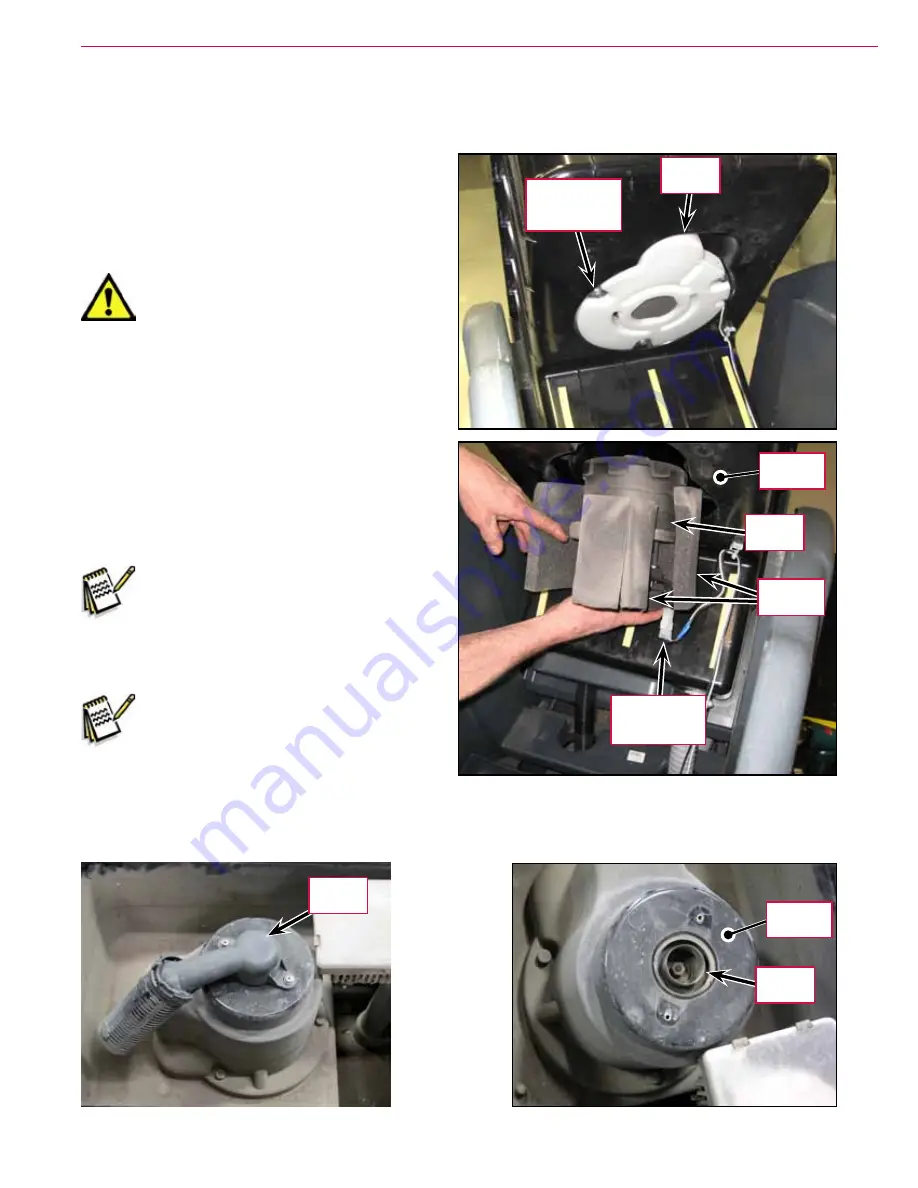
Vacuum Motor
1
Drain the recovery tank.
2
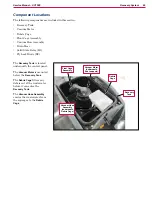
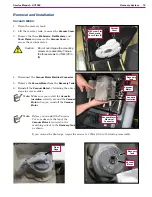
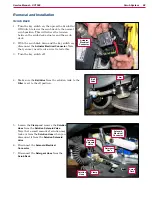
Lift the recovery tank to access the
Vacuum Cover
3
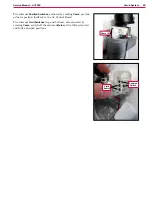
Remove the three
M6 Screws
,
Flat Washers
and
Cover Plates
and remove the
Vacuum Cover
to
access the vacuum motor.
Caution:
Do not over torque the mounting
screws on reassembly. Torque
the three screws to 3 NM (26 in
lb)
4
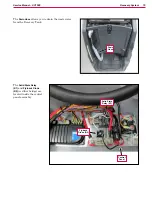
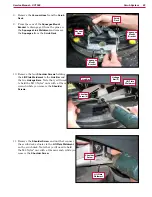
Disconnect the
Vacuum Motor Electrical Connector
5
Remove the
Vacuum Motor
from the
Recovery Tank
6
Reinstall the
Vacuum Motor
by following the above
steps in reverse order.
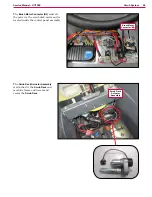
Note:
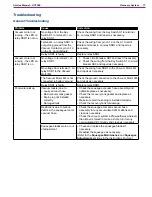
Make sure you install the
Acoustic
Insulation
correctly around the
Vacuum
Motor
when you reinstall the
Vacuum
Motor
.
Note:
Before you reinstall the Vacuum
Cover, make sure the top of the
Vacuum Motor
is centered in the
matching cutout in the
Recovery Tank
as shown.
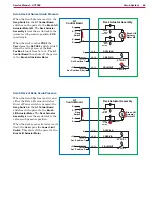
If you remove the float cage, torque the screws to 1.2Nm (10.6 in lb) during reassembly.
M6 Screw, Flat
Washer and
Cover Plate (3)
Vacuum
Cover
Vacuum Motor
Electrical
Connector
Vacuum
Motor
Recovery
Tank
Acoustic
Insulation
Float
Gage
Vacuum
Motor
Recovery
Tank

