


Using IP Scanner
10
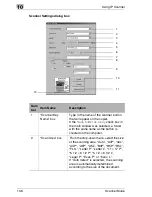
Scanner Mode
10-13
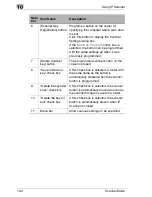
6
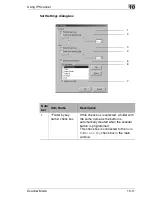
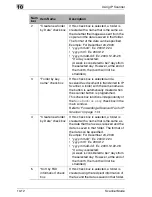
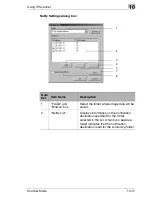
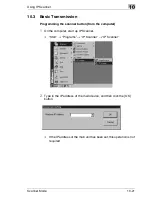
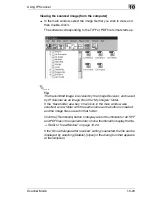
“Fax information” list Click the [Up] button and the [Down]
button to select the fax information that will
be used to classify the data.
From the selected items, the items at the
top of the list will be given priority when the
data is classified.
7
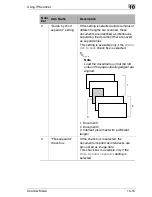
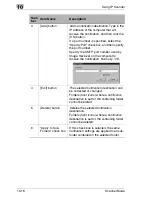
“Create a new
folder” check box
If this check box is selected and there is
no folder created with transmission source
information for the recipient’s fax, a folder
is created with the transmission source
information of a new fax and the document
(image data) is saved in that folder.
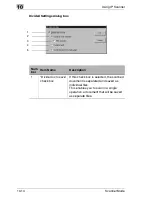
Num
ber
Item Name
Description
Summary of Contents for Scanner Mode
Page 1: ...User Manual 4514 7706 01 Scanner Mode ...
Page 19: ...1 Introduction 1 8 Scanner Mode ...
Page 33: ...2 Overview 2 14 Scanner Mode ...
Page 103: ...5 Performing a Scan to Server FTP Operation 5 12 Scanner Mode ...
Page 113: ...6 Performing a Scan to PC FTP Operation 6 10 Scanner Mode ...
Page 127: ...7 Performing a Scan to HDD Operation 7 14 Scanner Mode ...
Page 183: ...9 Performing a Scan to PC SMTP Operation 9 8 Scanner Mode Scan Area Select the scanning size ...
Page 185: ...9 Performing a Scan to PC SMTP Operation 9 10 Scanner Mode ...
Page 211: ...10 Using IP Scanner 10 26 Scanner Mode ...
Page 217: ...11 Distribution of Fax Documents 11 6 Scanner Mode ...
Page 219: ...12 Network Fax Transmission 12 2 Scanner Mode ...


