background image

Operating Instructions 

Administrator Reference 2

178

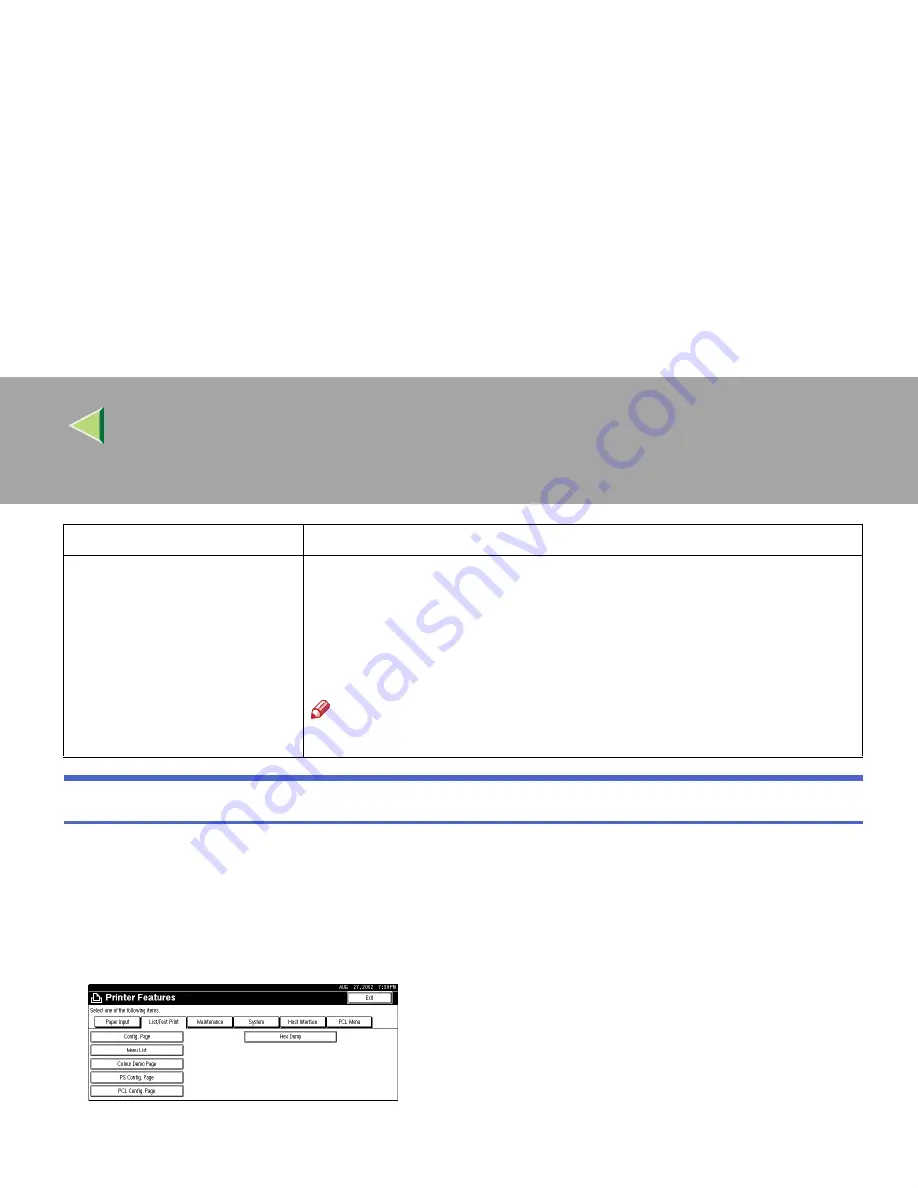
Changing the PCL Menu

The following example describes changing the setting for "Orientation".

AAAA

Press the 

{{{{

User Tools/Counter

}}}}

 key.

BBBB

Press 

[

Printer Features

]

.

CCCC

Press 

[

PCL Menu

]

.

Symbol Set

You can specify the set of print characters for the default font. The available op-
tions are as follows.

Roman-8, ISO L1, ISO L2, ISO L5, PC-8, PC-8 D/N, PC-850, PC-852, PC8-TK, 
Win L1, Win L2, Win L5, Desktop, PS Text, VN Intl, VN US, MS Publ, Math-
8, PS Math, VN Math, Pifont, Legal, ISO 4, ISO 6, ISO 11, ISO 15, ISO 17, ISO 
21, ISO 60, ISO 69, Win 3.0

Note

Default: Roman-8

Menu

Description

Summary of Contents for Copier System Edition

Page 1: ...NAVIGATION HELP TRAINING MENU SERVICE MENU PARTS MENU USER MENU...

Page 2: ...k environment and multi function operation Guide to the machine Preparation for using this machine Setup Guide for each printing environment Configuring the machine for the network Multi function oper...

Page 3: ...th the Network TWAIN Scanner Transmitting documents with the Network Delivery Scanner Using the Document Server Operating the Facsimile Function When the Facsimile Unit is installed Facsimile Referenc...

Page 4: ...Operating Instructions Maintenance Guide 1 Copier System Edition For safety please read this manual carefully before you use this product and keep it handy for future reference...

Page 5: ...can only be repaired in a factory or at a location with the requisite equipment The laser subsystem is replaceable in the field by a qualified Customer Engineer The laser chassis is not repairable in...

Page 6: ...name of Windows 95 is Microsoft Windows 95 The product name of Windows 98 is Microsoft Windows 98 The product name of Windows Me is Microsoft Windows Millennium Edition Windows Me The product name of...

Page 7: ...y Disconnect the power plug by pulling the plug not the cable if the power cable or plug becomes frayed or damaged To avoid hazardous electric shock or laser radiation exposure do not remove any cover...

Page 8: ...toner Keep toner used or unused and toner cartridge out of reach of children For environmental reasons do not dispose of the equipment or expended supplies at a household waste collection point Dispo...

Page 9: ...is not followed paper might be misfed originals might be damaged or data might be lost Be sure to read this Preparation This symbol indicates the prior knowledge or preparations required before op era...

Page 10: ...usting the Machine Cautions to Take When Cleaning 31 Cleaning the Registration Roller 32 Cleaning the Dustproof Glass 33 Cleaning the Exposure Glass 34 Cleaning the Exposure Glass 34 Cleaning the Cove...

Page 11: ...vi...

Page 12: ...dle at the top of the 2 Tray Finisher firmly with one hand and pull the 2 Tray Finisher straight out until it stops The 2 Tray Finisher is detached from the printer B B B B Use both hands to push it s...

Page 13: ...o the Duplex Reversal Unit B B B B Pull the upper tray of the PT460 Multi bin out and up to detach it C C C C Pull the lower tray of the PT460 Multi bin out and up to detach it as in step B B B B This...

Page 14: ...nit slowly until it stops Important Open the Duplex Reversal Unit after detaching the 2 Tray Fin isher from the printer See p 1 Detaching the SR770 2 Tray Finisher Note You do not have to remove the E...

Page 15: ...r right cover B B B B From the end the toner cartridges are installed in the order of magen ta M cyan C yellow Y and black K B B B B Remove the toner cartridge for the color you want to replace Note T...

Page 16: ...the new toner cartridge from the box Note The black toner cartridge con tains more than the other toner cartridges D D D D Shake the toner cartridge back and forth 5 6 times E E E E Holding the toner...

Page 17: ...al contact area Important Do not install and remove the toner cartridges over and over This could result in a toner leak G G G G Close the upper right cover Please wait a while Important Do not turn o...

Page 18: ...Duplex Reversal Unit Note If the PT460 Multi bin is at tached to the Duplex Reversal Unit detach it before opening the Duplex Reversal Unit Reference See p 3 Opening and Closing the Duplex Reversal Un...

Page 19: ...l not to touch the area other than that shown in the il lustration J J J J Take out the new Fusing Oil Unit from the bag remove seal A A A A and then remove seal B B B B as shown in the illustration N...

Page 20: ...B B B B to attach the Fus er Oil Unit to the Fusing Unit M M M M Holding the green handle with one hand use your other hand to push the front area of the handle to create a slight slant and push the...

Page 21: ...PT460 Multi bin is at tached to the Duplex Reversal Unit detach it before opening the Duplex Reversal Unit Reference See p 3 Opening and Closing the Duplex Reversal Unit R R R R If the 2 Tray Finisher...

Page 22: ...place the black Photoconductor Unit If yellow magenta cyan ap pears replace the three color CMY Photoconductor Units A A A A Turn off the power switch and then unplug the power cable B B B B Open the...

Page 23: ...conductor Unit you want to replace For black remove the upper left one and for color remove the three on the right A Move the green hook slowly to the right as shown in the illus tration The green hoo...

Page 24: ...tached to the bottom of the Photoconductor Unit at this time B Place the Photoconductor Unit in your hand and remove the adhesive tape at the tip of the unit C Match the green arrow at the tip of the...

Page 25: ...using the provided screwdriver Note Be sure to return the provided screwdriver to its original posi tion on the back of the front cov er K K K K Turn the light brown lever clock wise L L L L Close the...

Page 26: ...t Unit When re placing the black Development Unit also replace the dustproof fil ter See p 23 Replacing the Dust proof Filter When replacing the black Devel opment Unit clean the registration roller S...

Page 27: ...ove the Development Unit The procedure for removing the unit is the same for all four colors A Hook your finger on the green tab in front of the Develop ment Unit you want to replace and pull it out h...

Page 28: ...elopment Unit pull out the tape slowly in a level manner Important Be sure to pull out the tape to avoid printer malfunction during operation The removed tape is dirty Be careful not to let it get in...

Page 29: ...by pushing the two areas on the left and right M M M M Plug in the power cable and then turn on the power switch Please Wait appears on the panel display and initial adjustments begin Please wait unt...

Page 30: ...the PT460 Multi bin is at tached to the Duplex Reversal Unit detach it before opening the Duplex Reversal Unit Reference See p 3 Opening and Closing the Duplex Reversal Unit D D D D If the External Tr...

Page 31: ...Important Do not touch the inside of the Fusing Unit Be careful not to touch the oil J J J J Match U U U U on the front of the Fus er Oil Unit and the arrow on the Fusing Unit as shown in the illus tr...

Page 32: ...e hooks of the External Tray into the printer slits and lower it toward you P P P P If the Duplex Unit is installed close the Duplex Reversal Unit Note If the PT460 Multi bin is at tached to the Duple...

Page 33: ...he print settings for boxes A H on the Fuser Adjustment Sheet Note Check the printed Fuser Adjust ment Sheet to adjust the print settings A Compare box A of the pattern with the white square in the pr...

Page 34: ...ide of the printer shown in the il lustration A A A A Turn off the power switch and then unplug the power cable B B B B Push in the grips on both sides of the dustproof filter cover to pull it off Not...

Page 35: ...removed dustproof filters with care If you shake them the attached dust might scatter Be sure to remove the glove to attach the new dustproof filter F F F F Attach the new dustproof filters to the dus...

Page 36: ...C C C C Take out the new used toner bot tle from the bag D D D D Remove the used toner bottle slowly from inside the printer Important Be sure to remove the used ton er bottle in a level manner E E E...

Page 37: ...llus tration H H H H Push it in until it stops Important Be sure to insert the used toner bottle firmly to avoid toner leaking inside the printer I I I I Close the front cover slowly by pushing the tw...

Page 38: ...tant If you replace the paper feed rollers of the optional 2000 sheet Large Capacity Tray re move all paper from the tray C C C C Pull out all trays slowly while lift ing them up a little Note If you...

Page 39: ...A A A A and remove the paper feed roller B B B B H H H H Hold the new paper feed roller C with its gear towards the shaft In sert it into the rear shaft so that the roller gear is meshed with the shaf...

Page 40: ...A A A In sert the roller onto the front shaft until it clicks into place B B B B K K K K Slide all trays back into the print er slowly until they stop Note If you replaced the paper feed rollers of t...

Page 41: ...Replacing Consumables and Maintenance Kit 30 1...

Page 42: ...nner or spray insecticide on the printer If there is dust or grime inside the printer wipe with a clean dry cloth Do not remove any covers or screws other than those spec ified in this manual Some par...

Page 43: ...as shown in the illustration C C C C Wipe around the registration roll er by turning with a soft damp cloth Important Do not use chemical cleaner or organic solvent such as thinner or benzene D D D D...

Page 44: ...B B B Open the front cover and remove the cleaning brush There are four holes for cleaning the dustproof glass C C C C Slide the cleaning brush in and out slowly 8 to 10 times to clean all four areas...

Page 45: ...ne Wipe the machine with a soft damp cloth Then wipe it with a dry cloth to remove the water Important Do not use chemical cleaner or or ganic solvent such as thinner or benzene If they get into the m...

Page 46: ...th a soft damp cloth Then wipe it with a dry cloth to remove the water Important Do not use chemical cleaner or or ganic solvent such as thinner or benzene If they get into the ma chine or melt plasti...

Page 47: ...atic color adjustment A A A A Press the User Tools Counter key User Tools Counter appears on the panel display B B B B Press Maintenance C C C C Press Color Registration D D D D Press Auto Adjustment...

Page 48: ...Press Maintenance D D D D Press Color Registration E E E E Press At Unit Replacement Important When the toner cartridge is al most empty or Auto Adjust ment is not finished the following message appe...

Page 49: ...o H C After making all the settings press OK Note If Clear is not pressed for one of the boxes the follow ing display appears Press Exit and repeat the proce dure from step A I I I I After making all...

Page 50: ...he cur rent resolution G G G G To print the Fuser Adjustment Sheet make sure that A4 or larger paper is loaded in the Bypass Tray and then press Start Printing Fuser Adjustment Sheet II is print ed Se...

Page 51: ...ss Print Color Registration to print the Color Registration Sheet used for checking color registra tion The Color Registration Sheet is printed When printing finishes the Color Registration display ap...

Page 52: ...the 1 and 2 squares are the whitest enter 1 5 The color registration adjust ment range for each color is 7 to 7 There is an area on the Color Registration Sheet where you can write down the values fo...

Page 53: ...Clearing and Adjusting the Machine 42 2 Test Sheet Samples Following images are samples of the test sheet ColorRegistSheet...

Page 54: ...Adjusting the Color Registration 43 2 Fuser Adjust Sheet I...

Page 55: ...Clearing and Adjusting the Machine 44 2 Fuser AdjustSheet II...

Page 56: ...tomatically adjusts the printed high lights and mid tones Note The machine will not carry out Auto Color Calibration if the toner has almost run out Use the same type of paper for each test pattern p...

Page 57: ...be printed Important If the toner has almost run out the message Test Pat tern could not be printed Print it again appears on the control panel and the ma chine does not carry out Auto Color Calibrat...

Page 58: ...eet This is the test pattern sheet that is printed out when carrying out Auto Color Calibration Place the printed arrow of the sheet at the left corner of the exposure glass and scan the sheet to auto...

Page 59: ...Clearing and Adjusting the Machine 48 2 Test Pattern Sheet for Printer Mode...

Page 60: ...ting to the right of Printer Func tion If you have adjusted the color cali bration in copy mode go to step A If you have adjusted the color cali bration in printer mode the reso lution selection displ...

Page 61: ...adjust Tray 3 You can use the same procedure to adjust the other tray as well A A A A Press the User Tools Counter key User Tools Counter appears on the panel display B B B B Press Maintenance C C C C...

Page 62: ...Increase the value to shift the print area in the positive direc tion decrease it to shift the print area in the negative direction Pressing or increases or de creases the value by 1 0 mm step B Press...

Page 63: ...Clearing and Adjusting the Machine 52 2...

Page 64: ...Important Be sure to remove misfed paper following the procedure below only when Paper in duplex unit Open cover and remove paper appears on the panel display A A A A Turn off the power switch and th...

Page 65: ...ly and remove the misfed paper Important Do not open the Duplex Feed Unit by force It might damage the unit H H H H Close the Duplex Feed Unit I I I I Holding the Duplex Feed Unit with both hands inse...

Page 66: ...se the screw that was removed in step D D D D Note Be sure to return the provided screwdriver to its original posi tion on the inside of the front cover K K K K Close the front cover slowly by pushing...

Page 67: ...bove The average num ber of printable pages that can be expected from the toner cartridges in cluded in the printer are as follows Black toner cartridge about 10 000 pages Cyan magenta and yellow tone...

Page 68: ...unit needs extra idling thus reducing the unit s print life by half Name Consumables Average printable number of pages 1 Printer Maintenance Kit Type 3800A Color Photoconductor Unit 3 50 000 pages 2...

Page 69: ...aching the SR770 2 Tray Finisher 1 Duplex Reversal Unit Opening and Closing 3 E Exposure glass Cleaning 34 M Maintenance 34 R Removing Misfed Paper into the Duplex Feed Unit 53 Replacing Consumables a...

Page 70: ...ponsible for compliance could void the user s authority to operate the equipment Caution in case of 100BaseTX environment Properly shielded and grounded cables STP and connectors must be used for conn...

Page 71: ...UE USA G570 8884...

Page 72: ...cult to detect 9 Missing Image Area 10 2 Paper and Other Media Paper and Other Media Supported by This Machine 12 Paper Sizes 12 Paper Recommendations 23 Printable Area 29 Loading Paper 30 Loading Pap...

Page 73: ...her 69 Detaching the PT460 Multi bin 70 Opening and Closing the Duplex Reversal Unit 71 When Paper Misfeed A Appears 73 When Paper Misfeed B Appears 74 When Paper Misfeed R Appears 76 When Paper Misfe...

Page 74: ...d might be trademarks of their respective companies We disclaim any and all rights in those marks Notes Some illustrations in this manual might be slightly different from the machine Certain options m...

Page 75: ...lowed may re sult in minor or moderate injury or damage to property The statements above are notes for your safety Important If this instruction is not followed paper might be misfed originals might b...

Page 76: ...pier System Edition 5 Reference This symbol indicates a reference Keys that appear on the machine s panel display Keys and buttons that appear on the computer s display Keys built into the machine s c...

Page 77: ...ight range for originals in the Mixed Size mode is 52 81g m2 13 8 21 5 lb Where Original Is Placed Original Size Original Weight Exposure glass Up to A3 Document feeder 1 sided originals A3L B6KL 40 1...

Page 78: ...forated or torn originals Curled folded or creased originals Pasted originals Originals with any kind of coating such as thermal fax paper art paper aluminum foil carbon pa per or conductive paper Ori...

Page 79: ...e User Tools System Settings See Copy Reference Advanced Features Inch version Size A3L B4L A4K L B5K L A5K L 11 17 L 81 2 14 L 81 2 11 K L 51 2 81 2 K L 81 2 13 L 1 Location of the original Exposure...

Page 80: ...e sizes of the following originals so select the paper size man ually Originals with indexes tags or other projecting parts Transparent originals such as OHP transparencies or translucent paper Dark o...

Page 81: ...ions Maintenance Guide 2 Copier System Edition 10 Missing Image Area Exposure glass Document feeder A3 A3 A4 Horizontal size Vertical size Reference position Maximum Scanning area A3 297x420mm 11 x17...

Page 82: ...he exposure glass 3mm 0 1 margins on all four sides of the original might not be copied Make sure the original is placed correctly so that it is fed straight When placing paper 433mm or larger in the...

Page 83: ...nt of paper that can be loaded into each paper tray in this printer Note The following symbols and terminology are used to represent the feed direction Be careful of the paper feed direction The direc...

Page 84: ...Bypass Tray Paper Tray Tray 1 Paper Feed Unit Tray 2 3 4 2000 sheet Large Capacity Tray A3 L 297 420 B4 JIS L 257 364 A4 L 210 297 K 297 210 B5 JIS L 182 257 K 257 182 A5 L 148 210 K 210 148 B6 JIS L...

Page 85: ...76 K 276 184 Folio 81 4 13 L 210 330 Foolscap F4 81 2 13 L 216 330 F GL 8 13 L 203 330 Com 10 Env 41 8 91 2 L 104 8 241 3 C5 Env 6 38 9 02 L 162 229 C6 Env 4 49 6 38 L 114 162 DL Env 4 33 8 66 L 110 2...

Page 86: ...should be set with the control panel as a custom size means that the supported size is approximately 90 305 mm in width and approximately 148 458 mm in length The supported size may differ depending...

Page 87: ...Tray Paper Tray Tray 1 Paper Feed Unit Tray 2 3 4 2000 sheet Large Capacity Tray 11 17 L 11 17 Legal LG L 81 2 14 Letter LT L 81 2 11 K 11 81 2 51 2 81 2 L 51 2 81 2 Executive Exec L 71 4 101 2 K 101...

Page 88: ...automatically B6 JIS L 5 04 7 17 A6 L 4 13 5 63 Folio L 81 4 13 Foolscap F4 L 81 2 13 F GL L 8 13 Com 10 Env L 41 8 91 2 C5 Env L 6 38 9 02 C6 Env L 4 49 6 38 DL Env L 4 33 8 66 Monarch Env L 37 8 71...

Page 89: ...rted Paper weight and the maximum number of sheets 1 Confirm that the top of the stack is not higher than the limit mark inside the tray Supported paper weight Maximum number of sheets plain paper 1 T...

Page 90: ...direction Size mm Standard Tray Output Tray 2 Tray Finisher 4 bin Mailbox A3 L 297 420 B4 JIS L 257 364 A4 L 210 297 K 297 210 B5 JIS L 182 257 K 257 182 A5 L 148 210 K 210 148 B6 JIS L 128 182 A6 L 1...

Page 91: ...184 Folio 81 4 13 L 210 330 Foolscap F4 81 2 13 L 216 330 F GL 8 13 L 203 330 Com 10 Env 41 8 91 2 L 104 8 241 3 CA Env 6 38 9 02 L 162 229 C6 Env 4 49 6 38 L 114 162 DL Env 4 33 8 66 L 110 220 Monarc...

Page 92: ...Standard Tray Output Tray 2 Tray Finisher 4 bin Mailbox 11 17 L 11 17 Legal LG L 81 2 14 Letter LT L 81 2 11 K 11 81 2 51 2 81 2 L 51 2 81 2 Executive Exec L 71 4 101 2 K 101 2 71 4 A3 L 11 26 16 54 B...

Page 93: ...is no dial in the tray means that the size is not supported A6 L 4 13 5 63 Folio L 81 4 13 Foolscap F4 L 81 2 13 F GL L 8 13 Com 10 Env L 41 8 91 2 C6 Env L 4 49 6 38 C5 Env L 6 38 9 02 DL Env L 4 33...

Page 94: ...e Fusing Unit and cause a misfeed Print quality cannot be guaranteed if recommended paper is not used For details about recom mended paper contact your sales or service representative Do not use paper...

Page 95: ...that is already printed on you should load it on the Bypass Tray and select Plain Duplex Backside from Paper Type with the printer driver Thick Paper Use the Bypass Tray The Bypass Tray can hold pape...

Page 96: ...s Tray after you are finished printing Leaving them in the tray may cause them to stick together When printing on OHP transparencies you should select the OHP transparency mode with the printer driver...

Page 97: ...hape of the flaps When printing on envelopes use the Bypass Tray and select Thick Paper as the paper type in the Tray Paper Settings menu on the control panel See p 43 Specifying a paper type for the...

Page 98: ...m opposite to the paper feed direction Make the printer driver s setting for rotating the print image by 180 degrees For details see the Help file for the printer driver Confirm that there is no air i...

Page 99: ...d paper Torn paper Wrinkled paper Damp paper Paper that is dry enough to emit static electricity Paper that has already been printed onto except a preprinted letterhead Coated paper Special paper such...

Page 100: ...he printable area for this printer Be sure to set the print margins correctly by the application A Printable area Note The printable area may vary depending on the paper size printer language and prin...

Page 101: ...lusively Load only 11 8 1 2 paper at all times If you want to load A4 K paper in Tray 1 and optional 2000 sheet Large Capacity Tray contact your sales or service representative Reference See p 12 Pape...

Page 102: ...top of the stack is not higher than the limit mark inside the tray C C C C Carefully slide the paper tray into the printer until it stops Loading Paper in Tray 2 and the Optional Paper Feed Unit This...

Page 103: ...position C C C C Pushing the green lever of the side guide A A A A move the side guide toward you to open it B B B B D D D D Pinching both sides of the end guide A A A A move the end guide in the dire...

Page 104: ...G G G G Make sure the paper is fixed in place and then lock the side guide H H H H Pinching both sides of the end guide A A A A move the end guide toward the paper stack until it stops B B B B I I I...

Page 105: ...t your sales or service representative A A A A Pull out the paper tray slowly until it stops B B B B With the print side down align all four sides of two paper stacks and then load them next to each o...

Page 106: ...01 2 7 68 K Reference See p 31 Loading Paper in Tray 2 and the Optional Paper Feed Unit for details about how to load the paper Important Tray 1 uses 11 8 1 2 K paper exclusively Load only 11 8 1 2 pa...

Page 107: ...C When the Paper Bank PS470 2000 sheet Large Capacity Tray is installed E E E E Select the loaded paper size and feed direc tion and then press OK The set paper size and feed direction is dis played...

Page 108: ...Paper Preprinted Pa per Prepunched Paper Bond Paper Card Stock Important The paper type setting in the printer driver takes priority over the setting on the control panel A A A A Press the User Tools...

Page 109: ...supported by the Bypass Tray are 90 305 mm in width and 148 457 mm in length If you load custom size paper or special pa per select the paper size with the control pan el The RPCS printer driver can s...

Page 110: ...loaded in the Bypass Tray Duplex Print Collate Job Separation Staple Punch Auto Tray Select A A A A Open the Bypass Tray Note If you load A4 or larger size paper pull out the Bypass Tray extension and...

Page 111: ...op of the stack is not higher than the limit mark inside the tray Shuffle the paper before loading the stack onto the tray so multiple sheets are not fed in at one time D D D D Set the paper size usin...

Page 112: ...overrides the one selected with the control panel You do not have to make settings with the control panel if you already made them with the printer driver However when printing with a printer driver o...

Page 113: ...is highlighted press Vert to highlight Vert and then you can enter the value If you want to clear the displayed value press Clear B Enter the horizontal size of the paper in Horiz with the number keys...

Page 114: ...punched Labels Bond Paper Card Stock OHP Transparencies Thick Paper Plain Pa per Duplex Thick Paper Duplex Important Be sure to select the paper type when you load labels thick paper or OHP transpare...

Page 115: ...ce Guide 2 Copier System Edition 44 E E E E Press Paper Type Bypass Tray F F F F Select the paper type and then press OK The specified paper setting is displayed G G G G Press the User Tools Counter k...

Page 116: ...or a while Do not turn the main power switch off while the machine is being initial izing Loading Toner The printer is loading the toner Wait for a while Offline The printer is offline and cannot prin...

Page 117: ...is on If the message appears again contact your key operator sales or service representative Cannot connect with network Check settings of IP Address There is a problem with the Network settings Set...

Page 118: ...Cyan Open the part as shown and set the unit The indicated development Unit s is are not set correctly or is not set Set the indicated Development Unit s correctly See Replacing Consumables and Mainte...

Page 119: ...tion Please wait Optional 2 Tray Finisher is in use for another function Wait until the job will be completed Following output tray is full Remove the paper The indicated output tray is full Remove p...

Page 120: ...t It is time to replace the fusing oil unit Replace a fusing oil unit Depending on your service contract contact your sales or service repre sentative See Replacing Consumables and Maintenance Kit in...

Page 121: ...d disk is full Delete unnecessary files The maximum Hard disk drive area size has been exceeded Delete the unnecessary stored file Hole punch receptacle is full Empty it The punch waste box is full of...

Page 122: ...press Contin ue To cancel job press Reset Required xxx yyy The indicated paper input tray is out of paper tray number xxx paper size yyy paper type Load paper into the indicated paper input tray NV R...

Page 123: ...ve it There is a misfeed in the indicated point Remove misfed paper See p 68 Removing Misfed Paper Paper remains on staple tray Remove it There is still paper in the staple tray Remove paper from the...

Page 124: ...ols Required xxx yyy The paper size settings of the input paper tray is not the same as those of the printer driver tray number xxx paper size yyy paper type Load the required paper size into the pape...

Page 125: ...the main power switch off and then on If the message appears again contact your sales or service repre sentative Reference Before turning the main pow er switch see Turning Off the Main Power in Admi...

Page 126: ...service contract contact your sales or service repre sentative See Replacing Consumables and Maintenance Kit in Maintenance Guide 1 Reset duplex unit correctly The duplex paper feed unit is not set c...

Page 127: ...contact your sales or service representative Selected paper tray is in use for an other function Please wait The input paper tray selected by the printer driver is being used for anoth er function Wai...

Page 128: ...ace Toner Bottle The printer is almost out of indicated toner Replace the indicated toner car tridge s Transfer Unit Setting Error Transfer Unit is not set properly Open the part as shown and set the...

Page 129: ...Replacing Consumables and Maintenance Kit in Maintenance Guide 1 Used Toner Bottle Setting Error Used Toner Bottle is not set properly Open the part as shown and set the bottle The used toner bottle i...

Page 130: ...Media Supported by This Machine Can you print a configuration page If you cannot print a configuration page it probably indicates a printer malfunc tion You should contact your sales or service repre...

Page 131: ...to select the icon of the printer Next on the File menu click Properties C Click the Details tab D Check the Print to the following port box to confirm that the correct port is selected Windows 2000 A...

Page 132: ...IEEE 1394 interface cable is connected securely C Unplug the IEEE 1394 interface cable which is connected to the printer D Restart the computer If the error occurs even after executing above operatio...

Page 133: ...p for color printing PCL 5c PostScript Select Color for the Color Black and White under the printer driver s Setup tab RPCS Select Color for the Color Black and White under the printer driver s Print...

Page 134: ...ng PostScript Select Standard for Gradation under the Print Quality tab in the printer driver s dialog box Select Post Script optimize for speed for PostScript output format under the PostScript tab i...

Page 135: ...When using the Bypass Tray the size selected on the display panel might be different from actual paper size Select the correct paper size See p 12 Paper and Other Media Supported by This Machine When...

Page 136: ...iver s dialog box For more information see the printer driver s Help file Some parts of the print image are not clear Make the image density darker To adjust the image density press the User Tools Cou...

Page 137: ...en occurs on postcards so be sure to correct it before printing The printed image is different from the image on the computer When you use some functions such as enlargement and reduction the lay out...

Page 138: ...d contact your sales or service representative There are color differences in the color documents Press the User Tools Counter key and then select Color Registration from the Maintenance menu See Clea...

Page 139: ...ght cover Usually you can remove the misfed paper easily with this function Important When clearing misfeeds do not turn off the operation switch If you do your machine set tings are cleared To preven...

Page 140: ...h the 2 Tray Finisher A A A A Hold the handle at the top of the 2 Tray Finisher firmly with one hand pull the 2 Tray Finisher straight out until it stops The 2 Tray Finisher is detached from the print...

Page 141: ...Duplex Reversal Unit detach it before opening the Duplex Reversal Unit After closing the Du plex Reversal Unit reattach the optional PT460 Multi bin A A A A Raise the External Tray attached to the Du...

Page 142: ...he hooks on both sides of the upper tray of the PT460 Multi bin into the slots as in step E This completes the reattachment of the PT460 Multi bin to the Duplex Unit Opening and Closing the Duplex Rev...

Page 143: ...inisher from the print er Note You do not have to remove the output tray even if the 2 Tray Finisher is attached The Duplex Reversal Unit is opened C C C C Raise the Duplex Reversal Unit slowly with b...

Page 144: ...em Edition 73 When Paper Misfeed A Appears A A A A Open the right cover B B B B Move the blue lever up and down to feed the misfed paper and then pull out the pa per slowly C C C C Close the right cov...

Page 145: ...nstalled open the Du plex Reversal Unit Reference p 71 Opening and Closing the Duplex Reversal Unit C C C C If the output tray is attached to the printer raise it in the direction of the arrow A A A A...

Page 146: ...wly Important Always turn the blue dial in the direction of the arrow If you turn it in the reverse direc tion the paper feeds into the printer mak ing it difficult for you to take out the paper Do no...

Page 147: ...I I If the Duplex Unit is installed close the Du plex Reversal Unit Reference p 71 Opening and Closing the Duplex Reversal Unit J J J J If the 2 Tray Finisher was installed reat tach the 2 Tray Finis...

Page 148: ...uide 2 Copier System Edition 77 A Raise it vertically B Fold it along the printer body B B B B Open the top cover for the 2 Tray Finisher and pull out the misfed paper slowly C C C C Close the top cov...

Page 149: ...Tray Finish er Check to see if there is misfed paper in areas A B C and D E E E E Check area A of step D Lift the lever A A A A and while supporting it with your hand to keep it from lowering pull out...

Page 150: ...lever in the direction of the arrow A A A A and pull out the misfed paper slowly J J J J Lower the lever slowly to return it into place K K K K Close the front cover for the 2 Tray Finish er If the e...

Page 151: ...eturn the output tray back into place A Raise the tray B Lower it slowly When Paper Misfeed Y Appears A A A A Open the lower right cover for the Paper Feed Unit and pull out the misfed paper B B B B C...

Page 152: ...r Reference p 69 Detaching the 2 Tray Finisher B B B B Open the left cover for the Duplex Reversal Unit and remove the misfed paper Do not pull the paper out by force If you cannot remove the paper pr...

Page 153: ...lex Reversal Unit and then hold it in place D D D D Lower the Duplex Reversal Unit slowly un til it stops and remove the misfed paper E E E E Raise the Duplex Reversal Unit slowly and insert until it...

Page 154: ...ion 83 When Original Misfeed P Appears A A A A Pull up the lever A A A A and then open the up per cover B B B B B B B B Lift the part in the illustration while squeezing its blue part C C C C Hold the...

Page 155: ...emove the misfed paper go to step E E E E E Turn the dial in the direction of the arrow feed the misfed paper and then slowly re move the paper If you cannot remove the paper go to step F F F F F Hold...

Page 156: ...ve the misfed paper go to step I I I I I Hold the ADF external cover A A A A and then slowly remove the misfed paper B B B B J J J J Lower the ADF external cover back into place K K K K Close the uppe...

Page 157: ...Guide 2 Copier System Edition 86 N N N N Pull the white cover toward you and slowly remove the misfed paper O O O O Hold the middle part on the left of the white cover until it clicks into place P P...

Page 158: ...l dis play or when the printer does not staple even af ter it is instructed to the staples might be jammed A A A A Open the front cover of the 2 Tray Finish er The stapler is attached to the position...

Page 159: ...ridge to un lock it D D D D Remove the jammed staples E E E E Close the face plate of the cartridge until it clicks into place F F F F Slant and insert the cartridge A A A A and push in until it click...

Page 160: ...Add Staples appears on the panel dis play add a new staple refill A A A A Open the front cover of the 2 Tray Finish er The stapler is attached to the position shown in the illustration B B B B Remove...

Page 161: ...located on both sides of the stapler The case cover at top floats up D D D D Pull the case cover up E E E E Hook your finger in the hole of the empty refill case to pull it out F F F F Insert the new...

Page 162: ...e case cover down until it clicks into place H H H H Pull out the ribbon used for bundling the staples Note I I I I Slant and insert the cartridge A A A A and push in until it clicks into place B B B...

Page 163: ...eps to remove paper chips Note The same message appears when the punch waste box is not installed correctly A A A A Open the front cover of the 2 Tray Finish er The punch waste box is attached to the...

Page 164: ...after removing the Punch hole chips If the Hole punch receptacle is full Empty it message appears on the control panel even when the punch waste box is not full Punch hole Chips might be stuck around...

Page 165: ...26 Error 45 Error indicator 59 Exposure glass 7 L Loading Paper 23 30 Optional Paper Feed Unit 31 Tray 1 30 Tray 2 31 Loading paper Bypass Tray 38 Paper Bank PS470 34 paper size 35 paper type 37 M mes...

Page 166: ...System Edition 95 R Remove Misfed Paper Duplex Unit 81 Finisher 76 Fusing Unit 74 Internal Path 73 Paper Tray 80 Removing Jammed Staples 87 Removing Misfed Paper 68 Removing Punch hole Chips 92 S Sto...

Page 167: ...96 Operating Instructions Maintenance Guide 2 Copier System Edition UE USA G570 8835...

Page 168: ...Operating Instructions Administrator Reference 1 Copier System Edition For safety please read this manual carefully before you use this product and keep it handy for future reference...

Page 169: ...can only be repaired in a factory or at a location with the requisite equipment The laser subsystem is replaceable in the field by a qualified Customer Engineer The laser chassis is not repairable in...

Page 170: ...name of Windows 95 is Microsoft Windows 95 The product name of Windows 98 is Microsoft Windows 98 The product name of Windows Me is Microsoft Windows Millennium Edition Windows Me The product name of...

Page 171: ...y Disconnect the power plug by pulling the plug not the cable if the power cable or plug becomes frayed or damaged To avoid hazardous electric shock or laser radiation exposure do not remove any cover...

Page 172: ...toner Keep toner used or unused and toner cartridge out of reach of children For environmental reasons do not dispose of the equipment or expended supplies at a household waste collection point Dispo...

Page 173: ...is not followed paper might be misfed originals might be damaged or data might be lost Be sure to read this Preparation This symbol indicates the prior knowledge or preparations required before op era...

Page 174: ...ection 16 Connection to IEEE 1394 Interface 17 Turning On Off the Power 19 Turning On the Main Power 19 Turning On the Power 20 Turning Off the Power 20 Tuning Off the Main Power 21 Configuring the Ne...

Page 175: ...Server 40 Interrupt the Operating Function and Start Storing 41 Facsimile Mode 42 Changing to Facsimile Mode 42 Printer Mode 43 Changing to Printer Mode 43 Printing 43 Scanner Mode 44 Changing to Sca...

Page 176: ...he printer from overheating Do not block or obstruct the ventilators A mal function may occur due to overheating 5 Main Power Switch Use this switch to turn the main power on and off When the main pow...

Page 177: ...Tray Output is stacked here with the print side down Note If printed A3 short edge feed or 11x17 short edge feed papers fall off the standard tray raise the fence to pre vent them from falling 11 Fron...

Page 178: ...ory units and interface unit 4 Parallel Port Use a parallel cable to connect the printer to the host computer 5 Ethernet Port Use a network interface cable to connect the printer to the network 6 Byp...

Page 179: ...ctor option Appendix Connecting the Machine to a Telephone Line and Telephone in the Facsimile Reference Advanced Fea tures 5 Duplex Unit Port Connect the cable for the Duplex Rever sal Unit to this p...

Page 180: ...5 Photoconductor Unit The printer comes with one black Photo conductor Unit and three color yellow cyan magenta Photoconductor Units When Replacement of Photoconductor Unit is required appears on the...

Page 181: ...color Copy Reference Basic Features 4 Display panel Shows operation status error messages and function menus 5 Check Modes key Press to check the entered settings 6 Program key Press to select the pro...

Page 182: ...e a number entered Stop Press to stop a job in progress 15 key Press to enter a value 16 Number keys Use to enter the desired number of copies and data for selected modes 17 Color Selection key When u...

Page 183: ...he display to printer priority For more information see Us er Tools System Settings in Administrator Reference 2 Copier System Edi tion Initial Printer Display Press Printer to display initial printer...

Page 184: ...nput buffer Note When the machine is offline the key is lightly shaded 3 Job Reset key Press this key to cancel the current print job 4 View Sample Print jobs key Press this key to specify Sample Prin...

Page 185: ...ta left in the printer s input buffer 4 Paper Tray Status Shows the input tray and paper sizes which is selected on the panel display Note If you cannot turn the machine offline set Signal Control to...

Page 186: ...all screens Key explanations OK Acknowledges a selected function or entered values and then returns to the previous screen Cancel Deletes a selected function or entered values and then returns to the...

Page 187: ...e Copy Document Server Facsimile or Printer Scanner key to use each function Limitation You cannot switch modes in any of the following cases When scanning in a fax message for transmission During imm...

Page 188: ...SE T 100BASE TX This is the connector inserting a 10BASE T 100BASE TX cable Use this to connect to a network 3 IEEE 1394 Ports option This is the connector inserting an IEEE 1394 interface cable Use t...

Page 189: ...s The Network Interface Board can be installed to allow direct connection to an Ethernet network The Network Interface Board supports 10BASE T or 100BASE TX connections You can use the machine in the...

Page 190: ...89 336 EEC emission guidelines Connection to a Network A A A A Turn off the main power switch B B B B Loop the network interface cable and attach the ferrite core Note The network interface cable loop...

Page 191: ...face cable is not provided with the printer Note Printer s parallel connection is a standard bidirectional interface It requires a standard 36 pin parallel cable compliant with IEEE 1284 and a paralle...

Page 192: ...rface ca ble to the machine Important To avoid electrical interference use a shielded cable Limitation The IEEE 1394 interface can be used only with Windows 2000 A A A A Turn off the computer power B...

Page 193: ...n stall the printer driver Reference For more information about installation of Windows 2000 see Printer Cli ent Reference 1 Note If a printer driver installation dialog appears when you start a compu...

Page 194: ...power switch Important If you leave the main power switch off for more than one hour all fax files in memory are deleted Operation switch on the control panel Press this switch to activate the machin...

Page 195: ...registered user code and then press the key See User Code in Administrator Reference 2 Copier System Edition Turning Off the Power A A A A Make sure that the exposure glass or the document feeder is...

Page 196: ...r memory Be sure to turn off the main power switch before unplugging the power cord This may cause problems in the hard disk or memory Make sure that 100 is shown on the display before you turn the ma...

Page 197: ...describes the basic operation procedure For more information about the settings see Interface Settings Network in Administrator Reference 2 Copier System Edition For a network environment that uses T...

Page 198: ...Settings Setting Name Value IP Address 011 022 033 044 Subnet Mask 000 000 000 000 Gateway Address 000 000 000 000 Access Control 000 000 000 000 Access Mask 000 000 000 000 Network Boot None Effectiv...

Page 199: ...tings Network in Ad ministrator Reference 2 Copier System Edition A A A A Press the User Tools Counter key User Tools Counter appears B B B B Press System Settings C C C C Press Interface Settings The...

Page 200: ...ective for each protocol C Press OK The following operation will be different according to each protocol When Using TCP IP A Make sure that Network is selected and then press IP Address B Use the numb...

Page 201: ...See Appendix in Administra tor Reference 2 Copier System Edition Use the default IP address A Make sure that Network is selected and then press Network Boot B Press DHCP and then press OK When using...

Page 202: ...then press OK F F F F Press Exit Returns to the User Tools Counter display G G G G Press List Test Print to print out the settings A Press Printer Features B Press List Test Print C Press Config Page...

Page 203: ...em Settings in Administra tor Reference 2 Copier System Edition A A A A Press the User Tools Counter key User Tools Counter appears B B B B Press System Settings C C C C Press File Transfer The proced...

Page 204: ...machine will be overwritten by the Delivery Server IP address set on ScanRouter V2 Lite Professional A Press Delivery Server IP Address B Use the number keys to enter the Delivery Server IP address N...

Page 205: ...s as required Setting per Line Print at Delivery File to Deliver Delivery Failure File C Press OK Setting the Recall Interval Time A Press Recall Interval Time B Use the number keys to enter the Recal...

Page 206: ...lls appears Note To not resend files press No and go to step D C Use the number keys to enter the Number of Recalls Note To correct the entered Number of Recalls press Clear and then enter the correct...

Page 207: ...panel display B B B B Press Printer Features C C C C Press List Test Print D D D D Press Config Page The configuration page is printed Note If printing is not normal check to see if an error message...

Page 208: ...e printer Windows 2000 Configuration and Windows NT 4 0 Configuration in Administrator Reference 2 Copier System Edition D D D D Install the printer driver and SmartNetMonitor for Client Windows 2000...

Page 209: ...Print Server A dedicated NetWare print server is not required because the printer can be con figured as a print server A A A A Configure the printer for NetWare with the control panel p 23 Configuring...

Page 210: ...er should be config ured as a remote printer A A A A Configure the printer for NetWare with the control panel B B B B Configure NetWare The procedure may vary depending on the NetWare version NetWare...

Page 211: ...t Using a Print Server A A A A Choose a protocol for the printer and print server B B B B Configure a protocol you want to use with the control panel p 23 Configuring the Network with the Control Pane...

Page 212: ...A A A Press the Copy key The copier display appears on the panel display Reference For more information see the Copy Reference Basic Features Interrupt copying to make urgently needed copies You can i...

Page 213: ...ies E E E E Press the Interrupt key again The display shown before interrupt copying started reappears F F F F Replace the previous original and then press the Start key The previous job settings will...

Page 214: ...about the Document Server see Document Server in Administrator Reference 2 Copier System Edition Copying by Using the Document Server You can print from the Document Server while using other functions...

Page 215: ...ppears on the panel display C C C C Press Store File and then press OK D D D D Press the Start key Both copying and storing documents will be started Storing Documents from the Fax Display You can sel...

Page 216: ...in the Facsimile Reference Advanced Features Interrupt the Operating Function and Start Storing Even if another function is operating you can use the Document Server Refer to the following procedure...

Page 217: ...splay appears on the panel display Note The Memory Transmission Reception function is performed automatical ly even when another function is being used You need not switch the dis play When data is re...

Page 218: ...s on the panel display Printing The machine can receive print data while another mode is functioning Note If Function Priority in the System Settings is not set as Printer printing is done after the c...

Page 219: ...copying While scanning a fax message for transmission During Immediate Fax transmission Using the Network TWAIN Scanner A A A A Place originals B B B B Configure the scan options using the computer C...

Page 220: ...leted press the Copy key and restart copying Scanning while scanning a fax message for memory transmission Usually you cannot use the Scanner function until scanning a fax message for memory transmiss...

Page 221: ...nt For more information see User Tools System Settings in Administrator Reference 2 Copier System Edition A A A A Press Clear Stop key The immediate fax transmission is interrupted Note Previously sca...

Page 222: ...Tray Finisher or PT460 Multi bin is installed on the machine you can specify an output tray to which to deliver documents For more information see User Tools System Settings in Administrator Refer en...

Page 223: ...ry transmission Immediate transmission Receive Reception Print a received file Printer Data in Print Print Print with collating Print with stapling Scanner Operation Scan Current Operation Copy Operat...

Page 224: ...1 1 The software of this product except the expat 1 1 is licensed to the product manufacturer under separate agree ment s The source code of the expat 1 1 is available at ftp ftp jclark com pub xml e...

Page 225: ...SS FOR A PARTICULAR PURPOSE ARE DIS CLAIMED IN NO EVENT SHALL THE FOUNDATION OR CONTRIBUTORS BE LIABLE FOR ANY DIRECT INDIRECT INCIDENTAL SPECIAL EXEM PLARY OR CONSEQUENTIAL DAMAGES INCLUDING BUT NOT...

Page 226: ...product includes software developed by Paul Kranenburg This product includes software developed by Adam Glass This product includes software developed by Jonathan Stone This product includes software...

Page 227: ...option 13 Interrupt Copying 37 M Main power switch 19 Multi Access 47 N Network Connections 14 O Operation switch 19 P Parallel Connection 16 Parallel Port 13 Printer Mode 43 Printing without Using a...

Page 228: ...ponsible for compliance could void the user s authority to operate the equipment Caution in case of 100BaseTX environment Properly shielded and grounded cables STP and connectors must be used for conn...

Page 229: ...UE USA G570 8450...

Page 230: ...12 Configuring TCP IP and IPP for Printing 12 Configuring NetBEUI for Printing 14 Installing Software 16 Installing by Network installation 16 Changing Port Settings 19 Printing with a Standard TCP I...

Page 231: ...tion 32 Changing Port Settings 35 Configuring LPR Port Printing 36 Installing the Printer Driver 36 Setting Up Options 38 Setting the Printer Shared 41 3 NetWare Configuration NetWare 3 x Advanced Set...

Page 232: ...s 65 On Demand Printing 65 File Merge Printing 67 Facsimile Resend 69 Operation from a Computer 70 Scanning Originals 71 Scanning in Document Server Mode 71 Printing Saved Documents 77 Sample Copy 81...

Page 233: ...y Paper Settings 1 3 105 Paper Size Settings 2 3 108 Paper Size Settings 3 3 110 Timer Setting 111 Interface Settings Network 1 2 2 2 114 Interface Settings Parallel Interface 117 File Transfer 119 Ke...

Page 234: ...paper size 157 List Test Print Menu 160 List Test Print Parameters 160 Printing a Configuration Page 161 Interpreting the Configuration Page 163 Maintenance Menu 166 Maintenance Menu Parameters 166 Ch...

Page 235: ...g SmartNetMonitor for Admin 188 Changing the Network Interface Board Configuration 189 Locking the Menus on the Printer s Operating Panel 190 Changing the Paper Type 191 Managing the Number of Copies...

Page 236: ...rface Board 230 Message List 233 System Log Information 233 Precautions 239 Connecting a Dial Up Router to a Network 239 PostScript Printing from Windows 240 NetWare Printing 241 When Using DHCP 242 O...

Page 237: ...ial damages as a result of handling or operating the machine Software Version Conventions Used in This Manual NetWare 3 x means NetWare 3 12 and 3 2 NetWare 4 x means NetWare 4 1 4 11 and IntranetWare...

Page 238: ...nies We disclaim any and all rights in those marks Note The product name of Windows 95 is Microsoft Windows 95 The product name of Windows 98 is Microsoft Windows 98 The product name of Windows Me is...

Page 239: ...moderate injury or damage to property The statements above are notes for your safety Important If this instruction is not followed paper might be misfed originals might be damaged or data might be lo...

Page 240: ...uctions Administrator Reference 2 11 Keys that appear on the machine s panel display Keys and buttons that appear on the computer s display Keys built into the machine s control panel Keys on the comp...

Page 241: ...protocol Reference For more information about how to make the above settings see Windows 2000 Configuration in Printer Client Reference 1 that comes with this printer If DHCP is used to assign IP addr...

Page 242: ...Confirm that Internet Protocol TCP IP is selected in the Components checked are used by this connection box under the General tab Note If the check box of TCP IP protocol is not selected select the bo...

Page 243: ...col is set to be active The factory default is active Reference For more information about how to make the above settings see Windows 2000 Configuration in Printer Client Reference 1 that comes with t...

Page 244: ...tocol is not selected select the box If the NetBEUI protocol is not installed click Install under the General tab and install it For more information about installing the NetBEUI protocol see Windows...

Page 245: ...nstall SmartNetMonitor for Client separately Installing by Network installation A A A A Close all applications that are running B B B B Insert the CD ROM into the CD ROM drive Auto Run will start the...

Page 246: ...inter not listed here click Specify Address and then type the IP address or host name NetBEUI A Click NetBEUI A list of printers that can be printed by the NetBEUI protocol appears B Select the printe...

Page 247: ...ter URL will be set as the IPP port name Example IP address is 192 168 15 16 http 192 168 15 16 printer D If using a proxy server and IPP user name click Detailed Settings and configure the nec essary...

Page 248: ...tion al transmissions Changing Port Settings Follow the steps to change SmartNetMonitor for Client settings such as the proxy server settings or IPP URL Note There are no settings for the NetBEUI prot...

Page 249: ...nto the CD ROM drive Auto Run will start the installer Important Never have two versions of the same printer driver installed on your system at the same time When upgrading to a new version of the pri...

Page 250: ...n the Digital Signature Not Found dialog box may appear In this case click Yes to continue the installation K K K K Click Finish Note You can specify the User Code with the printer properties after in...

Page 251: ...CD ROM drive Auto Run will start the installer Important Never have two versions of the same printer driver installed on your system at the same time When upgrading to a new version of the printer dri...

Page 252: ...the Digital Signature Not Found dialog box may appear In this case click Yes to continue the installation K K K K Restart the computer after the installation is complete L L L L Set up the options wit...

Page 253: ...n by default When you set up options log on using an account that has Manage Printers permission A A A A Click Start on the taskbar point to Settings and then click Printers The Printers window appear...

Page 254: ...supports the bidirectional transmission and update the printer status auto matically The PCL 5c printer driver supports the bidirectional transmission you can update the printer status manually The Po...

Page 255: ...with the network SmartNetMonitor for Client and the TCP IP protocol are used On Windows 2000 the Enable bidirectional support is selected and Enable printer pooling is not selected under the ports tab...

Page 256: ...Users groups have Manage Printers permission by default When you set up options log on using an account that has Manage Printers permission A A A A Click Start on the taskbar point to Settings and the...

Page 257: ...l Reference For more information about how to make the above settings see Windows NT 4 0 Configuration in Printer Client Reference 1 that comes with this printer If DHCP is used to assign IP addresses...

Page 258: ...d under the Protocols tab and install it For more information about installing the TCP IP protocol see Windows NT Help file B B B B Configure the TCP IP protocols with the appropriate IP address subne...

Page 259: ...in Printer Client Reference 1 that comes with this printer Configuring a Windows NT computer Install the NetBEUI protocol on the Windows NT computer and change the LAN adapter number La na Number A A...

Page 260: ...Edit D D D D Type 0 as the Lana Number Note If the other protocol s Lana Number is configured with 0 you must change the Lana Number a number other than 0 E E E E Click OK F F F F Click Close and clo...

Page 261: ...nstall SmartNetMonitor for Client separately Installing by Network installation A A A A Close all applications that are running B B B B Insert the CD ROM into the CD ROM drive Auto Run will start the...

Page 262: ...here click Specify Address and then type the IP address or host name NetBEUI A Click NetBEUI A list of printers that can be printed by the NetBEUI protocol appears B Select the printer you want to us...

Page 263: ...ter URL will be set as the IPP port name Example IP address is 192 168 15 16 http 192 168 15 16 printer D If using a proxy server and IPP user name click Detailed Settings and configure the nec essary...

Page 264: ...tion al transmissions Changing Port Settings Follow the steps to change SmartNetMonitor for Client settings such as the proxy server settings or IPP URL Note There are no settings for the NetBEUI prot...

Page 265: ...CD ROM drive Auto Run will start the installer Important Never have two versions of the same printer driver installed on your system at the same time When upgrading to a new version of the printer dri...

Page 266: ...the Digital Signature Not Found dialog box may appear In this case click Yes to continue the installation K K K K Restart the computer after the installation is complete L L L L Set up the options wit...

Page 267: ...ion by default When you set up op tions log on using an account that has Full Control Access permission A A A A Click Start on the taskbar point to Settings and then click Printers The Printers window...

Page 268: ...upports the bidirectional transmission and update the printer status auto matically The PCL 5c printer driver supports the bidirectional transmission you can update the printer status manually The Pos...

Page 269: ...ith the network SmartNetMonitor for Client and the TCP IP protocol are used On Windows NT 4 0 the Enable bidirectional support is selected and Enable printer pooling is not selected under the ports ta...

Page 270: ...trol Access permission Use the Printers window to set up the printer A A A A Click Start on the taskbar point to Settings and then click Printers The Printers window appears B B B B Click the icon of...

Page 271: ...NetWare printing environment by using SmartNetMonitor for Admin Note If you configure NetWare printing environment by using SmartNetMonitor for Admin under fol lowing environment NetWare Client which...

Page 272: ...he printer differ depending on whether the Network Interface Board is configured as a print server or as a remote printer This section describes how to configure it in the NetWare 3 x environment Note...

Page 273: ...Custom installation and then click Next E E E E Remove the check mark from the RPCS Printer Driver and PCL 5c Printer Driver F F F F Click to select SmartNetMonitor for Admin and then click Install G...

Page 274: ...161 Printing a Configuration Page If no printer name appears in the list match the frame types of the IPX SPX protocol between the computer and printer Use the Network dialog box of Windows to change...

Page 275: ...into the Print Queue Name box and then click Next In the Print Server Name box type the name of the NetWare print server within 47 characters In the Printer Name box type the name of the NetWare prin...

Page 276: ...ist match the frame types of the IPX SPX protocol between the computer and printer Use the Network dialog box of Windows to change the frame type of the computer For more information about changing th...

Page 277: ...ue as follows Note If you use a currently defined print queue go to step J A From the Available Options menu select Print Queue Information and press ENTER B Press INSERT and type a print queue name C...

Page 278: ...l LPT1 The IRQ Buffer size Starting form and Queue service mode are automatically configured H Press the ESC key and click Yes in the confirmation dialog box I Press the ESC key to return to Print Ser...

Page 279: ...the print server by typing the following from the console of the NetWare Server If it is running restart it after exiting it To exit CAREE unload pserver To start CAREE load pserver print_server_name...

Page 280: ...ter This section describes how to configure it in the NetWare 4 x 5 environment To use NetWare 5 If you use Pure IP use the printer as a print server You cannot use the printer as a remote printer whe...

Page 281: ...Custom installation and then click Next E E E E Remove the check mark from the RPCS Printer Driver and PCL 5c Printer Driver F F F F Click to select SmartNetMonitor for Admin and then click Install G...

Page 282: ...n Page see p 161 Printing a Configuration Page If no printer name appears in the list match the frame types of the IPX SPX protocol between the computer and printer Use the Network dialog box of Windo...

Page 283: ...xample if you want to create a print server into NET under DS type NET DS I I I I Type the print server name into the Print Server Name box printer name into the Printer Name box print queue name into...

Page 284: ...environment A A A A Log on to the file server as an Admin or an Admin equivalent B B B B Run SmartNetMonitor for Admin C C C C Click Property Sheet and click OK The NIB Setup Tool dialog box appears D...

Page 285: ...box As a context object names are typed from a lower object and divided by a period For example if you want to create a print server into NET under DS type NET DS D In the Print Server Operation Mode...

Page 286: ...match the frame types of the IPX SPX protocol between the computer and printer Use the Network dialog box of Windows to change the frame type of the computer For more information about changing the fr...

Page 287: ...ick As Remote Printer E In the Remote Printer No box type the number of the printer Important Use the same number as that of the printer to be created in the print server F Click OK to close the prope...

Page 288: ...name of the printer D Click Define additional properties to check a box and click Create K K K K Assign print queues to the created printer as follows A Click Assignments and click Add in the Assignm...

Page 289: ...ts group B In the Available objects box click the queue created in the step J and click OK C In the Printers group click the printer assigned in step B B B B and click Printer Number D Type the printe...

Page 290: ...and print them as you want You can save the following Data from documents scanned using the document feeder Data from documents scanned using the exposure glass With the Printer Function storing docum...

Page 291: ...g Instructions Administrator Reference 2 62 Data sent from a computer Scanner Facsimile Transmission Copy Printing Except Scanner Sending stored facsimile documents Transferring Document data for PC Z...

Page 292: ...it off during an operation the memory or hard disk might be damaged Avoid any strong shocks to the machine This could damage the hard disk drive or delete stored files For precautionary reasons files...

Page 293: ...Facsimile function see Using Document Server in Sending a Stored File in Advanced Features of the Facsimile Ref erence For information about storing and manipulating files when using the scanner funct...

Page 294: ...required Your current situation might be Are you wasting time always looking for the same document because you regularly make copies of that document When you need to print multiple sets of documents...

Page 295: ...neces sary print settings such as duplex and stapling You can store fax documents and document data so that you can print them whenever necessary Note Stapling require the installation of the optiona...

Page 296: ...n combine multiple scanned documents to print them in one set Your current situation might be You want to combine several originals that are different in density size and paper weight Scrapped and pas...

Page 297: ...scanning you can mix documents fed from the ADF with documents placed on the Exposure Glass Note You can check the print result by printing a sample set before making a large print run by press ing t...

Page 298: ...g a Stored File in the Facsimile Reference Advanced Features You current situation might be When you need to retransmit multiples sets of the same documents you have to scan them again and again With...

Page 299: ...tasks on data stored in the Document Server from your computer rather than from the machine Note You can perform the following operations from your computer Search by File Name and User Name Indicate...

Page 300: ...cuments stored in the Document Server af ter a set number of days The factory default is set to delete after one day To change the setting see p 122 Key Operator Tools You can change the file names th...

Page 301: ...y assigned To change the file name A Press File Name The Change File Name display appears B Press Delete All to delete the old file name Note You can also use Backspace to delete unnecessary character...

Page 302: ...tered user name from the list and then press OK This has changed to the User Name that has been set To change your user name to an unregis tered user name go to the next step Reference For more inform...

Page 303: ...laced see the Copier Reference E E E E Make any desired settings Note Press Scanning Finished to cancel the file name password or print settings and re turn to the Select Files to Print display Refere...

Page 304: ...or which the user name file name or password is to be changed If no password is set for the document the line for the selected document is highlighted If a password has already been set for the docume...

Page 305: ...password using the letter keys or number keys and then press OK Reference For more information about changing the file name see p 72 To change the file name For more information about changing the us...

Page 306: ...sword is set for the document the line for the selected document is highlighted If a password has been set for the document the password entry dialog box appears Enter the password and then press OK T...

Page 307: ...le to print if the size or the resolution of each file is different To change the print order press the high lighted lines to cancel their selection and then select them again in the order you want to...

Page 308: ...ep C by scrolling through the list with T T T T or U U U U Press Select File to return to the Select Files to Print display E E E E Enter the required number of prints using the number keys Note Up to...

Page 309: ...To cancel printing from being stopped press Print in the confirmation dialog box Printing then continues for the remaining part of the document Changing the number of copies during printing You can ch...

Page 310: ...ction you can check if the print order or the print set tings are correct by printing out only the first set using the Sample Copy key Limitation This function can be used only when the Sort function...

Page 311: ...er Code Management You can sort document names in the list by the user names file names or dates To sort the documents press User Name File Name or Date You can scroll up or down the file names listed...

Page 312: ...elected document is highlighted If a password has been set for the document the password entry dialog box appears Enter the password and then press OK The selected line is highlighted Note You can sea...

Page 313: ...ns Administrator Reference 2 84 C C C C Press Print 1st Page The following confirmation dialog box ap pears D D D D Press the Start key The first page is printed out Note To cancel printing of the fir...

Page 314: ...e maximum will be less than 1 000 When there are more than 2 000 pages in a file When more than 2 000 pages have been stored When there is less disk space available to files in the Document Server bec...

Page 315: ...ey you want to sort by If the desired file name is not shown see the next or previous screen using T T T T Next or U U U U Prev If you cannot find the desired document using the names you can print th...

Page 316: ...details about Desk Top Binder V2 Lite Professional see the manual or the Help file of Desk Top Binder V2 Lite Professional Search by File Name You can search the documents stored in the Document Serve...

Page 317: ...les saved in the Docu ment Server press File List To Search by User Name This searches for documents on the Document Server that match a user name A A A A Press the Document Server key B B B B Press S...

Page 318: ...pears Enter the unreg istered user name in the entry dialog box and then press OK Reference For more information about how to enter characters see p 149 Entering Text E E E E Press OK Only the files b...

Page 319: ...a password has been set for the docu ment the password entry dialog box ap pears Enter the password and press OK The selected name is highlighted Note You can search for a desired document by the user...

Page 320: ...oses To do this select the document to be checked and then Press Print 1st Page To cancel document selection press the highlighted line for the selected document C C C C Press Detail The detailed info...

Page 321: ...ation switch is turned off or the Ener gy Saver key is pressed Depending on whether options are installed or not the illustrations may differ Changing the Settings A A A A Press the User Tools Counter...

Page 322: ...he User Tools A A A A After changing the User Tools settings press Exit on the User Tools Main Menu Changing the User Tools is finished and the machine is ready for copying or printing Note You can al...

Page 323: ...Operating Instructions Administrator Reference 2 94 User Tools Menu System Settings General Features p 101...

Page 324: ...Operating Instructions Administrator Reference 2 95 Tray Paper Settings1 3 p 105 Paper Size Settings 2 3 p 108 Paper Size Settings 3 3 p 110...

Page 325: ...Operating Instructions Administrator Reference 2 96 Timer Setting p 111...

Page 326: ...Operating Instructions Administrator Reference 2 97 Interface Settings Network 1 2 2 2 p 114...

Page 327: ...Operating Instructions Administrator Reference 2 98 Interface Settings Parallel Interface p 117...

Page 328: ...Operating Instructions Administrator Reference 2 99 File Transfer p 119...

Page 329: ...Operating Instructions Administrator Reference 2 100 Key Operator Tools p 122...

Page 330: ...py Document Server function only Specify whether the beeper sounds when the machine becomes ready for copying after Energy Saver mode is deactivated or the power is turned on Note If the Panel Tone se...

Page 331: ...sure glass sensor Auto Paper Select or Auto Reduce Enlarge can be used for F size originals based on this setting You ll find it very convenient to use the ma chine with the F size setting Note Defaul...

Page 332: ...al Tray Finisher Shift Tray 1 Finisher Shift Tray 2 Left Tray 1 Left Tray 2 Output Document Server You can specify a tray to which documents are delivered Standard Tray External Tray Finisher Shift Tr...

Page 333: ...o which documents are delivered Standard Tray External Tray Finisher Shift Tray 1 Finisher Shift Tray 2 Left Tray 1 Left Tray 2 Note For details about output trays refer to p 103 Output Copier Output...

Page 334: ...paper from Finisher Tray 2 regardless of the output setting Tray Paper Settings 1 3 Paper Tray Priority Copier for Copy Document Server function only You can specify the output tray for delivery Tray...

Page 335: ...fy the Priority Paper Tray when copying or printing The Priority Paper Tray is the tray selected when the machine is turned on and also the tray initially used by Auto Paper Select and Auto Tray Switc...

Page 336: ...Auto Detect A3L B4JIS L A4K A4L B5JIS K B5JIS L A5 K 11 17 L 8 1 2 14 L 8 1 2 11 K 8 1 2 11 L 8 13 L 8 1 2 13 L 8 1 4 13 L 7 1 4 10 1 2 K 8K L 16K K 16K L The paper sizes you can set for tray 3 is as...

Page 337: ...aper Type Bypass Tray Sets the display so you can see what type of paper is loaded in the bypass tray The paper types you can set for the bypass tray are as follows No Display Recycled Paper Special P...

Page 338: ...displayed next to the paper tray if No is selected Letterhead is not available for printer function When you set the same size and type of paper on the different trays and set each tray as 2 Sided Cop...

Page 339: ...played when the cover function or slip sheet function is selected You can only set the Copying Method in Duplex setting when At Mode selected is selected Slip Sheet Tray for Copy Document Server funct...

Page 340: ...Auto Off Timer specify the time to elapse before the Auto Off function is activated The Time can be set from 10 seconds to 240 minutes Note Default 60 minute Enter numbers with number keys Use the an...

Page 341: ...o the Panel Off Timer is not used This setting is only used if the Auto Off Timer setting is set to a longer in terval than the Panel Off Timer setting The default 1 minute Enter a time interval betwe...

Page 342: ...et from 10 to 999 seconds Facsimile Auto Reset Timer Specifies the time to elapse before the facsimile function is reset Note Default 30 seconds The time can be set from 30 999 seconds Press Clear if...

Page 343: ...ss the and keys Press Clear if you enter the wrong value Interface Settings Network 1 2 2 2 IP Address Before using this machine with the network environment you must configure the IP address When usi...

Page 344: ...address for the router or host computer used as a gateway Note Default 000 000 000 000 To get the address contact your network administrator Access Control and Access Mask You can control the client a...

Page 345: ...t your network administrator Effective Protocol Select the protocol to use in the network Note Default TCP IP Effective NetWare Effective NetBEUI Effective AppleTalk Effective NW Frame Type Select the...

Page 346: ...ming setting for the parallel interface Under normal circumstances you will not need to change this setting Note Default ACK outside Parallel Communication Speed Specifies the communication speed for...

Page 347: ...inter s response mode and so forth for a status request when using the parallel inter face If you experience problems when using other manufacturers printers set this to Off How ever if this is set to...

Page 348: ...s Delivery Server IP Address Specifies the IP address of the ScanRouter V2 Lite Professional delivery server for distributing doc uments or data from the machine Note Default 000 000 000 000 Press the...

Page 349: ...time Note Default No File to Deliver Specifies whether all received fax documents or only received fax documents that include deliv ery codes documents with an ID and F code should be sent to ScanRout...

Page 350: ...one second intervals with the number keys Press Clear if you enter the wrong number Number of Recalls When sending documents or data stored in this machine to ScanRouter V2 Professional again you can...

Page 351: ...ol who uses the machine by setting user codes for users To use function selected with User Code Management you must enter a registered user code User codes must be registered for user code management...

Page 352: ...e access limit If you selected Partial A key operator code is only required for the Timer Setting and Key Operator Tools for initial settings Menu Protect will be set for Maintenance in the Printer Fe...

Page 353: ...sociated with it are also automatically cleared Program Change This registers new user codes and changes the functions that can be used with user codes and user names Delete Deletes a user code Delete...

Page 354: ...l of the user codes Clear Counter all User Code Sets the counter value for all of the user codes to 0 Print Counter per User Code Prints the counter values for each of the user codes Clear Counter per...

Page 355: ...set the time interval from 1 to 180 days by one day steps The factory setting for the time interval is 1 Day With this factory setting documents are delet ed one day 24 hours after being stored on the...

Page 356: ...r Code Management settings p 122 Document Server Limits the users who can use the Document Server function and manages the use of each user code Note Specify ON for Document Server in the User Code Ma...

Page 357: ...e Management settings p 122 Important The functions associated with each user code are the same If you change or delete user codes the management data and limits associated with that user code will be...

Page 358: ...ss the key for the classification you want to use from Title Select Note The keys you can select are as follows Freq Added to the page that is displayed first AB CD EF GH IJK LMN OPQ RST UVW XYZ Added...

Page 359: ...top key and then enter the code again H H H H Select the functions to be used with the user code from Available Functions Note The functions that can be selected are as follows Copier Full Colour Sing...

Page 360: ...for the user code see p 149 Entering Text This can be used to attach the user name to documents in the Document Server You do not need to enter a user code for this For more information about Document...

Page 361: ...Changing the User Code Important This operation also deletes a user code registered for multiple functions Current be specific using the deleted user code will be disabled A A A A Press the User Tool...

Page 362: ...s and then select For Available Functions highlighted buttons indicate the currently available functions To dis able an available function select the corresponding button so that it is not highlighted...

Page 363: ...Operating Instructions Administrator Reference 2 134 G G G G Press OK H H H H Press Exit The display returns to the initial settings screen...

Page 364: ...letes a user code registered for multiple functions Current be specific using the deleted user code will be disabled To clear a user code A A A A Press the User Tools Counter key B B B B Press System...

Page 365: ...F F F F Select the user code you want to delete Note Press All on The Page when you want to select all the user codes displayed on the page G G G G Press OK H H H H Press Yes in the confirmation scre...

Page 366: ...delete all user codes Important Using Print Counter you can check the user code for each print job for the Copy Document Server function Printer function and Facsimile function A A A A Press the User...

Page 367: ...Operating Instructions Administrator Reference 2 138 E E E E Press Delete F F F F Press Delete All G G G G Press Yes in the confirmation screen Note If you don t want to quit deleting press No...

Page 368: ...e counter for each user code for the Copy Document Server function Using Print Counter you can check the counter for each user code for the Printer function and Fac simile function Using Transmission...

Page 369: ...nistrator Reference 2 140 D D D D Press Display Clear Print Counter per User Code E E E E Press Print Counter or Transmission Counter The individual function counters for each user code are displayed...

Page 370: ...Prints Counter for Each User Code Using Copy Counter you can print the counter list for each user code for the Copy Document Server function Using Print Counter you can print the counter list for each...

Page 371: ...2 142 D D D D Press Display Clear Printer Counter per User Code E E E E Select a User Code from the left side of the display Note Press All on The Page if you want to select all user codes on the page...

Page 372: ...e You can select both Copy Counter Print Counter and Transmission Counter at the same time H H H H Press Print Printing the Number of Prints Counter for All User Codes A A A A Press the User Tools Cou...

Page 373: ...erence 2 144 E E E E Press Print All Codes of All User Code F F F F Press either Copy Counter Print Counter or Transmission Counter Note You can select Copy Counter Print Counter and Transmission Coun...

Page 374: ...r Each User Code A A A A Press the User Tools Counter key B B B B Press System Settings C C C C Press Key Operator Tools D D D D Press Display Clear Print Counter per User Code E E E E Select a User C...

Page 375: ...Per User Code G G G G Press Copy Counter Print Counter or Transmission Counter Note You can select Copy Counter Print Counter and Transmission Counter at the same time H H H H Press OK The user code...

Page 376: ...learing the Number of Prints Counter for All User Codes A A A A Press the User Tools Counter key B B B B Press System Settings C C C C Press Key Operator Tools D D D D Press Display Clear Print Counte...

Page 377: ...F F Press Copy Counter Print Counter or Transmission Counter Note You can select Copy Counter Print Counter and Transmission Counter at the same time G G G G Press OK All user code counters will be cl...

Page 378: ...characters When you enter a character it is shown at the position of the cursor If there is a character at the cursor position the entered character is shown before the char acter Available Characters...

Page 379: ...Operating Instructions Administrator Reference 2 150 Keys Note When entering uppercase or lowercase continuously use Shift Lock to lock the case...

Page 380: ...Reference 2 151 How to Enter Text Entering letters A A A A Press Shift to switch between uppercase and lowercase B B B B Press the letter you want to enter Deleting characters A A A A Press Backspace...

Page 381: ...o change the default settings of the printer and provides information on the parameters included in each menu Category Function menu Paper Input p 156 Bypass Paper Size List Test Print p 160 Config Pa...

Page 382: ...Error Report Auto Continue Memory Overflow Sub Paper Size Page Size Duplex Job Separation Resolution PCL PS Toner Saving B W Page Detect Host Interface p 174 I O Buffer I O Timeout PCL Menu p 176 Orie...

Page 383: ...A A A A Press the User Tools Counter key B B B B Press Printer Features C C C C Select the desired item by pressing the tab and change the settings Note OK Press to set the new settings and return to...

Page 384: ...2 155 Exiting from the Printer Features A A A A After changing Printer Features press Exit to return to the User Tools Counter menu B B B B Press Exit Note You can also exit from the User Tools Count...

Page 385: ...1 menu item in the Paper Input menu Bypass Size Reference For more information about loading paper in the tray see Maintenance Guide 2 Paper Input Parameter Menu Description Bypass Paper Size The pap...

Page 386: ...custom paper size To use paper of a custom size follow the procedure below to specify the custom paper size A A A A Press the User Tools Counter key B B B B Press Printer Features C C C C Press Paper...

Page 387: ...key and then press Note When Horiz is highlighted press Vert to highlight Vert and then you can enter the value If you want to clear the displayed value press Clear B Enter the horizontal size of the...

Page 388: ...Operating Instructions Administrator Reference 2 159 C Press OK The set paper size is displayed G G G G Press the User Tools Counter key The initial display is shown...

Page 389: ...g Page Menu List Color Demo Page PS Config Page PCL Config Page Hex Dump List Test Print Parameters Menu Description Config Page You can print the current configuration of the printer See p 161 Printi...

Page 390: ...ting method is the same for printing other lists Important The configuration page is printed in A4 or Letter 8 1 2 11 Set A4 or Letter 8 1 2 11 in the input paper tray or the Bypass Tray Reference For...

Page 391: ...Operating Instructions Administrator Reference 2 162 D D D D Press Config Page In a short time the printing a configuration page will start...

Page 392: ...ontroller firmware System Version Shows the system version of the machine NIB Version Shows the version number of the Network Interface Board IEEE 1394 Shows Installed when the IEEE 1394 Interface Uni...

Page 393: ...nel version of the machine Total Memory Shows the total amount of memory SDRAM installed on the printer Hard Disk Drive Shows Installed when the Printer Hard Desk Drive is installed properly Paper Inp...

Page 394: ...PCL Menu Host Interface Shows the settings made under the Host Interface menu When DHCP is active on the network the actual IP Address Subnet Mask and Gateway Address ap pear in parentheses on the co...

Page 395: ...ensity You can select the print image density for each color 3 to 3 4 Color Graphic Mode You can select 4 color graphic mode Photo Priority Text Priority Menu Protect You can protect menu settings aga...

Page 396: ...ference 2 167 Changing the Maintenance Menu A A A A Press the User Tools Counter key B B B B Press Printer Features C C C C Press Maintenance D D D D Press 4 Color Graphic Mode E E E E Select item tha...

Page 397: ...ter as the factory default settings or change the settings to suit your printing environment The changed settings in the System Settings is saved even the printer s power is turned off There are 11 me...

Page 398: ...g On Off Note Default On Print Error Report You can select whether or not to have a error report printed when a printer error or memory error occurs On Off Note Default Off Auto Continue You can set p...

Page 399: ...Auto the printer substitutes the paper of a certain size which is to be an alternative if the paper cur rently specified is not loaded When you select Off the printer uses the paper in the current spe...

Page 400: ...he optional Duplex Unit is installed Job Separation You can set whether to separate output trays and output alternately by each job Off On Note Default Off This menu appears only when the optional 2 T...

Page 401: ...ode if the print job is black and white In this case the consumables needed in the Color Mode will not be used Off On Note Default On If the print job contains a color page the remaining pages will be...

Page 402: ...System Menu The following examples changing the settings for Misfeed Recovery A A A A Press the User Tools Counter key B B B B Press Printer Features C C C C Press System D D D D Press Misfeed Recove...

Page 403: ...can set the size of the I O Buffer Normally it is not necessary to change this setting 128 KB 256 KB 512 KB Note Default 128 KB I O Timeout You can set how many seconds the printer should wait before...

Page 404: ...nterface Menu The following example describes changing the setting for I O Timeout A A A A Press the User Tools Counter key B B B B Press Printer Features C C C C Press Host Interface D D D D Press I...

Page 405: ...rientation Form Lines Font Source Font Number Point Size Font Pitch Symbol Set PCL Parameters Menu Description Orientation You can set the page orientation Portrait Landscape Note Default Portrait For...

Page 406: ...can set the ID of the default font you want to use 0 to 50 Note Default 0 Point Size You can set the point size you want to use for the default font 4 to 999 75 by 0 25 Note Default 12 00 This settin...

Page 407: ...Features C C C C Press PCL Menu Symbol Set You can specify the set of print characters for the default font The available op tions are as follows Roman 8 ISO L1 ISO L2 ISO L5 PC 8 PC 8 D N PC 850 PC...

Page 408: ...Operating Instructions Administrator Reference 2 179 D D D D Press Orientation E E E E Select item that you want to specify and then press OK...

Page 409: ...SmartNetMonitor for Admin from the CD ROM that comes with the printer For more information about installing SmartNetMonitor for Admin see p 52 Installing SmartNetMonitor for Admin Web Browser Allows...

Page 410: ...up Tool The NIB Setup Tool starts up E E E E Select Property Sheet and then click OK TCP IP A Click the General tab and then type the name into the Device Name box and comment into the Comment box In...

Page 411: ...lt name consists of RNP and the last 3 bytes of the MAC address of the network interface board For example when the MAC address is 00 00 74 62 7D D5 the factory default name is RNP627DD5 A maximum of...

Page 412: ...is password E E E E Change names and comments TCP IP A Click the General tab and then type the name into the Printer Name box and comment into the Comment box In the Printer Name box type the name of...

Page 413: ...ytes of the MAC address of the network interface board For example when the MAC address is 00 00 74 62 7D D5 the factory default name is RNP627DD5 A maximum of 13 charac ters of capital English letter...

Page 414: ...B B B B Click the Group menu point to Open LAN and select TCP IP or IPX SPX The status of printers is indicated with an icon in the list Note For more information about the status icons see the Help f...

Page 415: ...nd check if the desired printer is config ured on the pop up menu that appears If it is configured see p 187 Displaying the Status of Printers C C C C If the desired printer is not configured click Op...

Page 416: ...status right click the SmartNetMonitor for Client icon and click the desired printer The status of the printer is displayed on a dialog box Note For more information about each item on the dialog box...

Page 417: ...network interface board configuration OS Protocol Stack Microsoft Windows 95 98 Me TCP IP provided with Windows 95 98 Me IPX SPX provided with Windows 95 98 Me NetWare network client provided with Win...

Page 418: ...t click to select the printer you want to change the configure D D D D From the Tools menu select NIB Setup Tool The NIB Setup Tool starts up E E E E Select Wizard or Property Sheet and then click Nex...

Page 419: ...nter you want to change the configuration C C C C Click to select the desired printer D D D D From the Tools menu select Lock Menu of Device Option Panel The Web browser starts up and the screen that...

Page 420: ...want to change the configuration C C C C On the list click to select the printer whose paper type you want to change D D D D From the Tools menu select Paper Type Settings The Web browser starts up a...

Page 421: ...Group menu point to Open LAN and then select TCP IP or IPX SPX A list of printer appears Note Select the protocol of the printer you want to change the configuration C C C C On the list click to selec...

Page 422: ...p menu point to Open LAN and select TCP IP or IPX SPX A list of printer appears Note Select the protocol of the printer you want to change the configuration C C C C Click Group point to Energy Save Mo...

Page 423: ...the TCP IP protocol it will be possible to adjust the settings using a Web Browser Reference For more information about configuring the printer to use the TCP IP protocol see Printer Client Reference...

Page 424: ...or netprinter com In order to do this you must the register the IP address and host name of the Network Interface Board with the DNS server Consult the network administrator for in formation about how...

Page 425: ...the Help button You can link the address URL of the Help button to the Help files on the computer or on a Web serv er A Copy the Help files on the CD ROM to the desired location The Help files are lo...

Page 426: ...u can get information about the printer The factory default community names are public and admin You can get MIB information using these community names Reference For more information about configurin...

Page 427: ...maintenance Using telnet The following is a sample procedure in using telnet Limitation Only one person at a time can be logged on to do remote maintenance A A A A Using the IP address or host name o...

Page 428: ...n not write NVRAM information message appears the changes are not saved Repeat the steps above The Network Interface Board is reset automatically when the settings are changed When the Network Interfa...

Page 429: ...is an example for configuring an IP address of 192 168 15 16 msh ifconfig naf0 192 168 15 16 The following is an example for configuring a subnet mask of 255 255 255 0 msh ifconfig naf0 netmask 255 2...

Page 430: ...ult Gateway Address A gateway is a connection or interchange point that connects two networks A gateway address is for the router or host computer used as a gateway Note To get the above addresses con...

Page 431: ...the masked result of the IP address computer attempt ing to print print jobs from that IP address will be accepted by the Network Interface Board For example if you assign 192 168 15 16 as the Access...

Page 432: ...t command to configure the boot method msh set parameter on off on means active and off means inactive Note When you use DHCP the server also needs to be configured DHCP takes precedence over all othe...

Page 433: ...mote access using TCP IP and then log out you cannot use remote access If this was a mistake you can use the printer operation panel to allow access by TCP IP When you prevent access via TCP IP you ar...

Page 434: ...nt job is displayed when the ID number is added after the prnlog com mand Reference For more information about the meaning of the data returned with these commands see p 228 Print Job Information Comm...

Page 435: ...he show command to have the information displayed one screen at a time Reference For more information about the meaning of the data returned with this command see p 230 Con figuring the Network Interf...

Page 436: ...ws Display Shows the SNMP information and available protocols msh snmp msh snmp p registered_number Note If the p option is added you can view the settings one by one Omitting the number displays all...

Page 437: ...col to inactive all access settings set to use that protocol are disabled msh snmp ip ipx on off on means active and off means inactive To change the protocol of an access settings use the following c...

Page 438: ...ntax msh snmp number ip ipx address Note To specify the TCP IP protocol type ip followed by a space and then the IP address To specify the IPX SPX protocol type ipx followed by a space and then the IP...

Page 439: ...indicates the user authorization mode IPP timeout configuration Specify how many seconds to wait before canceling a print job if it has been interrupted for some reason The range of time can be change...

Page 440: ...the settings the following message appears User configuration changed SMB Use the smb command to configure or delete the computer name or workgroup name for NetBEUI msh smb parameter Parameter Settin...

Page 441: ...teway Adds a host network route to destination and a gateway address to gateway in the table Host becomes the default setting route delete host net destina tion Deletes a host network route from the t...

Page 442: ...ault value of TTL is 1 A search is executed only within a local segment If the router does not support multi cast the settings are not available even if the TTL value is increased The acceptable TTL v...

Page 443: ...s Upper and lower case characters are considered unique For example R is different from r The password is the same as that used in the configuration of the Network Interface Board using a Web Browser...

Page 444: ...ervice representa tive Cover Open Duplex Unit The cover of the optional Duplex Unit is open Close the cover of the optional Du plex Unit Cover Open Front Cover Close the front cover Close the front co...

Page 445: ...vice representa tive Error HDD Board An error has occurred in the optional Hard Disk Drive First turn the power switch off and then on If the message appears again call your sales or service represent...

Page 446: ...Punch Receptacle from the Finisher Full Mailbox All output trays of the optional Mail box are full Remove paper from the Mailbox Full Mailbox Tray 1 The output tray 1 of the optional Mailbox is full...

Page 447: ...Toner The toner cartridge is not set correct ly or toner is almost running out Set the toner cartridge correctly Low Yellow Toner The toner cartridge is not set correct ly or toner is almost running o...

Page 448: ...appears again call your sales or service representa tive Malfunction Stapler An error has occurred in the optional Staple Unit First turn the power switch off and then on If the message appears again...

Page 449: ...See Paper and Other Media in Maintenance Guide 2 Mismatch Paper Type The paper type setting of the tray dif fers from that of actual paper type in the tray Load paper of the indicated paper type into...

Page 450: ...selected tray Load paper into the selected tray See Setup Guide Not Detected Duplex Unit The optional Duplex Unit is not set correctly Set the optional Duplex Unit correct ly If the message appears ag...

Page 451: ...correctly If the message appears again call your sales or service representative Not Detected Tray 2 The paper tray Tray 2 is not set cor rectly Set the paper tray Tray 2 correctly If the message app...

Page 452: ...ide 2 Paper Misfeed Duplex Unit There is misfeed in the Duplex Unit Remove the misfed paper See Main tenance Guide 2 Paper Misfeed Front Cover There is misfeed in the printer Remove the misfed paper S...

Page 453: ...m Description Input Tray No Name PaperSize Status ID number of the paper tray Name of the paper tray 1 Paper size loaded in the paper tray 2 Current status of the paper tray 3 Output Tray No Name Stat...

Page 454: ...ity Tray Bypass Tray Bypass Tray Paper Size Description A3 297 420 mm A3 297 420 L B4JIS 257 364 mm B4 257 364 L A4 297 210 mm A4 297 210 K A4 210 297 mm A4 210 297 L B5JIS 257 182 mm B5 257 182 K B5J...

Page 455: ...2 L 8 1 4 13 8 1 4 13 L 8 1 2 13 8 1 2 13 L 4 1 8 9 1 2 4 1 8 9 1 2 L 3 7 8 7 1 2 3 7 8 7 1 2 L DL 110 220 mm DL 110 220 L C5 Env 162 229 mm C5 Env 162 229 L 8 13 8 13 L C6 Env 114 162 mm C6 Env 114 1...

Page 456: ...er in the paper tray Name Description Standard Tray Standard Tray External Tray External Tray Mailbox Tray X Name of Mailbox tray X is the number fo tray Finisher Tray 1 Finisher Tray 1 Finisher Tray...

Page 457: ...The status of the print job can be viewed using the following commands telnet Use the status command p 205 Printer status Item name Meaning Rank Status of print job Active Printing or preparing for p...

Page 458: ...n be displayed with the following commands telnet Use the prnlog command p 199 Commands List Name Meaning ID Print request ID User Print request user name Page The number of pages that is printed Time...

Page 459: ...lnet Use the show command p 199 Commands List Item name Meaning Common Mode Protocol Up Down AppleTalk TCP IP NetWare NetBEUI Ethernet interface NVRAM version Device name Comment Location Contact Soft...

Page 460: ...teway AccessCtrl AccessMask Time server Home page URL Home page link name Help page URL SNMP protocol Up means active Down means inactive Frame type Network boot IP address Subnet mask Broadcast addre...

Page 461: ...r name Name of the connect file server Context of print server Active mode this value is fixed Time of the job timeout NetBEUI Switch Mode Direct print Notification Workgroup name Computer name Commen...

Page 462: ...on the file serv er If a password is specified for the print server delete it add_sess community community name already de fined The same community name already exists Use another community name add_s...

Page 463: ...r The number of file server users may exceed the maximum number that the file server can han dle Cannot find rprinter print server name printer number The printer having the number displayed on the pr...

Page 464: ...e current IPX address DHCP lease time expired DHCP lease time has expired The printer tries to discov er the DHCP server again The IP address used up to now becomes invalid DHCP server not found The D...

Page 465: ...HCP server is in seconds The renewal time is also in seconds Login to fileserver file server name NDS BIND ERY In print server mode Logged in to the file server with NDS or BINDERY mode multid start D...

Page 466: ...t be serviced by printer 0 print server name In print server mode The print queue name cannot be serviced Make sure that print queue volume exists on the specified file server Print server print serve...

Page 467: ...NetWare server Set context to NDS context name A NDS context name has been set shutdown signal received network service rebooting Rebooting the network service smbd start NetBEUI An smbd SMB Server Me...

Page 468: ...ncrease Because the packet transmission is a specification of NetWare you need to change the configuration of the router If the network you are using does not allow you to configure the router configu...

Page 469: ...istrator Reference 1 that comes with the printer Configuring the printer without NetWare A A A A While not printing the Network Interface Board sends packets on the network Set the Net Ware to inactiv...

Page 470: ...heck box under the NetWare Settings tab in the printer properties dialog box With Windows NT 4 0 clear the Form feed check box under the NetWare Settings tab in the print er properties dialog box Bann...

Page 471: ...lay If you use DHCP See Administrator Refer ence 1 for more information Configure the printer with a reserved IP address To always assign the same IP address configure a reserved IP address using the...

Page 472: ...1 22 33 44 as a temporary IP address You can confirm the printer s IP address on the network configuration page Because 11 22 33 44 is a special IP address you cannot print using this address When usi...

Page 473: ...A A A Press the User Tools Counter key User Tools Counter appears on the panel display B B B B Press Francais The display language is changed to French Displaying the Total Counter You can display the...

Page 474: ...Administrator Reference 2 245 B B B B Press Counter The totals are displayed C C C C To print a counter list Press Print Counter List A confirmation dialog box appears D D D D Press the Start key A c...

Page 475: ...inting Can be printed Guarantee Can be printed Guarantee 600 600 dpi A3 11 17 192 MB Standard 192 MB Standard 192 MB Standard 192 MB Standard B4 81 2 11 81 2 14 A4 81 2 11 B5 A5 1200 600 dpi A3 11 17...

Page 476: ...200 dpi A3 11 17 192 MB Standard 320 MB 64 256 MB 192 MB Standard B4 81 2 11 81 2 14 A4 81 2 11 192 MB Standard 320 MB 64 256 MB B5 A5 192 MB Standard Resolution Paper Size Non Duplex Printing Duplex...

Page 477: ...pages per minute A4K 11 81 2K Color Maximum 28 pages per minute A4K 11 81 2K Parallel Interface Interface Standard 36 pin printer cable and a parallel port on the host computer IEEE 1284 I F Compatibl...

Page 478: ...le 31 fonts PostScript 3 136 fonts Type 2 24 Type 14 112 Paper size See Paper and Other Media in Maintenance Guide 2 Paper Weight See Paper and Other Media in Maintenance Guide 2 Power Source 120V 60H...

Page 479: ...idge and power cord included Warm up Time Less than 120 seconds 23 C 73F Paper Input Capacity 1 Paper weight 60 105 g m2 16 28 lb 2 You can load up to 10 envelopes at the same time Mainframe only Duri...

Page 480: ...ernet 10BASE T 100BASE TX Protocol TCP IP NetBEUI IPX SPX AppleTalk Supported paper weight Maximum number of sheets plain paper Tray 1 60 105 g m2 16 28 lb 550 80 g m2 20 lb Tray 2 60 105 g m2 16 28 l...

Page 481: ...D H 540 600 172 mm 21 3 23 7 6 8 Paper Weight 60 105 g m2 16 28 lb Paper Size A5 Long edge feed A3 81 2 11 11 17 Short edge feed PAPER FEED UNIT Type 3800C 500 2 Dimensions W D H 540 600 270 mm 21 3...

Page 482: ...Paper Size A4 Long edge feed or 81 2 11 Short edge feed SR770 2 Tray Finisher Dimensions W D H 680 620 1 030 mm 26 8 24 4 40 6 Paper Size A5 Long edge feed A3 81 2 11 11 17 Short edge feed Paper Weigh...

Page 483: ...8 5 Tray 405 367 28 mm 15 9 14 4 1 1 Paper Size A3 A4 A5 B4 B5 11 17 Legal 8 1 2 11 Detectable size from Paper Feed Unit Paper Weight 60 105 g m2 16 28 lb Stack Capacity Tray 1 100 sheets 80 g m2 Tray...

Page 484: ...e feed Weight 8 kg 3 6 lb Printer Hard Disk Type 3800C Storage Capacity Formatted 20 GB 40 GB Spool print data to collate Spool Sample Locked Print data Store PostScript fonts Note You can install Pos...

Page 485: ...line Dual in line Memory Module Memory Type SDRAM Synchronous Dynamic RAM Number of Pins 144 pins User Account Enhance Unit TypeB Capacity 64 KB Store User Code Up to 400 users 1394 Interface Unit Typ...

Page 486: ...ant In Windows 2000 the 1394 Interface Unit can only be used with Service Pack 1 or later If the Serv ice Pack is not installed the connectable number of device in a 1394 bus is only one and the clien...

Page 487: ...Note The 1394 Interface Unit could not receive data from more than one PC at the same time In this case an error message appears The printer can accept data sent from other PCs after the first print...

Page 488: ...0 community name 207 Config Page 160 161 Configuration NetWare 42 NetWare 3 x 43 NetWare 4 x 5 51 Web Browser 194 Windows 2000 12 Windows NT 4 0 28 Configuring NetBEUI for Printing Windows 2000 14 Win...

Page 489: ...Admin 44 52 Installing by Network installation Windows 2000 16 Installing Software Windows 2000 16 Windows NT 4 0 32 I O Buffer 174 I O Timeout 174 IP address 200 IPP 210 IPP for Printing Windows 2000...

Page 490: ...Size 168 Paper Bank PS470 253 PAPER FEED UNIT Type 3800C 252 Paper Input 156 password 196 213 PCL 176 PCL Config Page 160 Point Size 176 PostScript Printing from Windows 240 precautions 239 Printer H...

Page 491: ...NetWare4 x NetWare5 1 57 Setting Up Options Windows 2000 24 Windows NT 4 0 38 SmartNetMonitor for Admin install 44 52 SMB 211 SNMP 197 207 specifications 248 SR770 2 Tray Finisher 253 subnet mask 201...

Page 492: ...263 Operating Instructions Administrator Reference 2 Copyright 2001...

Page 493: ...264 Operating Instructions Administrator Reference 2 UE USA G570 8851...

Page 494: ...Copier Feature Expander Type 3800C Operating Instructions Copy Reference Basic Features For safety please read this manual carefully before you use this product and keep it handy for future reference...

Page 495: ...nit can only be repaired in a factory or at a location with the requisite equipment The laser subsystem is replaceable in the field by a qualified Customer Engineer The laser chassis is not repairable...

Page 496: ...drafts checks pass ports driver s licenses The color copy samples in this book may differ slightly from the actual copies due to printing effects The color on each color key may differ slightly from...

Page 497: ...elded interconnect cables must be employed with this equipment to ensure compliance with the pertinent RF emission limits governing this device Direct or indirect reflected eye contact with the laser...

Page 498: ...ng the instructions under this symbol Be sure to read the instructions all of which are described in the Safety Information section The statements above are notes for your safety Important If this ins...

Page 499: ...lso ex plains settings for user tools Chapter 1 Advanced Copying Edit Image Describes functions for registering and creating color copies or editing func tions such as the attaching cover pages or tra...

Page 500: ...ng Originals on the Exposure Glass 18 Placing Originals in the Optional Document Feeder ADF 18 Original Orientation 19 Batch Mode 19 SADF Mode 20 Mixed Size Mode 21 Placing Custom Size Originals 22 Ba...

Page 501: ...from the Staple Unit 54 Punch 55 Duplex Combine 59 Original Orientation and Completed Copies 60 Originals and Copy Orientation 60 Specifying the Orientation of Bound Originals 60 Duplex 62 Duplex 62...

Page 502: ...1...

Page 503: ...2 WhatYouCanDowithThisMachine CopyMode...

Page 504: ...3...

Page 505: ...4 What You Can Do with This Machine Color Mode...

Page 506: ...hts up To turn the power off press this switch again the On indicator goes off Note If the machine does not operate check if the main power switch is turned on If it is off turn it on 5 Standard Tray...

Page 507: ...Clear Modes key Press to clear the previously entered copy job settings 7 Energy Saver key Press to switch to and from the Energy Saver mode Energy Saver Mode Advanced Features manual 8 Interrupt key...

Page 508: ...s 17 Color Circle Use this to adjust the color 18 Color Selection key Use this key to switch between Full Col or Black White Single Color or Two Color p 23 Selecting a Color Mode 19 Function keys Pres...

Page 509: ...illustrations are examples for a machine with the optional 2 Tray Finisher paper bank duplex unit and hard disk unit 40 GB installed Initial copy display Full Color Black White Two Color 1 Displays t...

Page 510: ...9 Function menu 1 Items you can select 2 The key highlighted indicates the tray feeding the paper...

Page 511: ...10...

Page 512: ...has warmed up you can make copies Main Power Switch left front side of the machine Important The documents stored in the fax memory will be deleted if the main power switch is turned off for more than...

Page 513: ...er switch is on If off turn it on If Ready is not displayed en ter the user code User Code Management User Code Administrator Reference 2 Copier System Edition Turning Off the Power A A A A Press the...

Page 514: ...n off the main power switch If you do not the hard disk or memory might be dam aged This could cause malfunc tions Make sure 100 is displayed for remaining memory space be fore turning off the main po...

Page 515: ...the left of the operation panel to use copier functions The initial screen can be changed when the operation switch is turned on Function Priority Administrator Reference 2 Copier System Edition Limi...

Page 516: ...eference p 17 Placing Originals E E E E Set your desired settings Reference See the explanation of each function F F F F Enter the number of copies re quired with the number keys Note The maximum numb...

Page 517: ...copy and a half dried print are put on top of each other The toner may also melt when using solvent type adhesive agents for pasting copies When folding copies the toner in the folds will come off The...

Page 518: ...trait or Landscape orientation To use the Staple or Punch func tion on originals such as A3K B4K or 11 17 K which cannot be scanned if the original s orienta tion is not changed select the ori entati...

Page 519: ...exposure glass The original should be aligned to the left scale 1 Reference mark 2 Left scale Note Start with the first page to be copied C C C C Lower the optional exposure glass cover or the optiona...

Page 520: ...and Combine 2 Sided functions Staple 2 Tray Finisher Punch 2 Tray Finisher Punch Kit Duplex Duplex unit hard disk unit 40 GB Combine 2 Sided Duplex unit hard disk unit 40 GB A A A A Press Special Ori...

Page 521: ...ed 2 Sided mode has been set press the key after all originals are scanned SADF Mode The optional document feeder ADF is required This function automatically feeds originals when they are placed one b...

Page 522: ...tional document feeder ADF and making copies without using the Mixed Size mode parts of the original image might not be copied or paper might become jammed The weight range for originals placed with t...

Page 523: ...tion can have a vertical length of 128 297mm 5 1 11 6 and a have a horizontal length of 128 432mm 5 1 17 A A A A Press Special Original B B B B Press Custm Size Origi C C C C Enter the horizontal size...

Page 524: ...System Reset is turned on when Energy Saver is turned off or after the machine is turned on You can change the default set tings for basic functions Reference User Tools Advanced Fea tures manual Sele...

Page 525: ...ple will be copied using a two color toner A A A A Press the Single Color key B B B B Select a color Note Each color can be adjusted in four levels of density Make sure that Basic Color is highlighted...

Page 526: ...Color Mode This mode makes copies in two col ors A A A A Press the Two color key B B B B Press Two color C C C C Press Change Color Setting D D D D Press Black Portion and then se lect the color to be...

Page 527: ...si ty to match your originals There are three types of adjustment available Auto Image Density The machine automatically detects and adjusts the image density and copies so that the background of dirt...

Page 528: ...ginals Text Select this mode when your origi nals contain only text no pictures Text Photo Select Text Photo when your orig inals contain photographs or pic tures with texts Photo Delicate tones of ph...

Page 529: ...Priority Advanced Fea tures manual B B B B Press OK Note If you do not wish to set any other functions press the Start key to start copying Selecting Maps Pale and Generation Copies A A A A Press Oth...

Page 530: ...pier System Edition If you set all the paper trays to No Display or Recycled Paper you cannot use Auto Paper Select Note See the following table for copy paper sizes and directions that can be used wi...

Page 531: ...t copying The tray with a key mark will not be automatically selected Manual Paper Select A A A A Select the paper tray Bypass Tray or paper bank The selected paper tray will be highlighted Note If Ye...

Page 532: ...function cannot be used General Features 1 5 Advanced Features manual You cannot use the Rotated Copy function when enlarging onto B4 or A3 size paper In this case place your original in the landscap...

Page 533: ...ight into the machine When paper larger than 433mm 17 in size is used the paper may become wrinkled may not be fed into the machine or may cause pa per jams To make copies onto OHP trans parencies or...

Page 534: ...etween the sheets to avoid a multi sheet feed When copying onto standard size paper A Press the key B Press Select Size C Select the paper size and then press OK Note The copy paper sizes that can be...

Page 535: ...front and back faces are properly po sitioned To avoid paper misfeeds fan the paper before loading it in the tray C C C C Press the key Display for Bypass Tray Paper is shown D D D D Select OHP Sheet...

Page 536: ...en 148 5 8 to 458mm 18 If Horiz mm is not highlighted press Horiz mm To change the number entered press Clear or the Clear Stop key and then enter the new number When entering a size over 305mm 12 the...

Page 537: ...is not straightened out it can cause paper jams The orientation of placing originals and paper and when copying Take care with placing the orientation of paper and originals Top to top Top to bottom A...

Page 538: ...Copying from the Bypass Tray 37 1 E E E E In Special Paper select Plain Dup Back or Thick Dup Back F F F F Press OK G G G G Place your originals and then press the Start key...

Page 539: ...ou can change the preset ratios to other ratios you frequently use Enlarge and Reduce Advanced Features manual You can set and display three ra tios on the initial display Shortcut R E Advanced Featur...

Page 540: ...Enlarge or Reduce C C C C Select a ratio D D D D Press OK E E E E Place your originals and then press the Start key Ratio Original Copy paper size 400 enlarge area by 16 200 enlarge area by 4 51 2 81...

Page 541: ...y By combining it with the Reproduction function you can also provide the Reduce Enlarge copy with a margin Note You can change the Reproduction ratio for Create Margin Re production ratio 2 2 Advance...

Page 542: ...io and then adjust the ratio with n n n n or o o o o A A A A Press Reduce Enlarge B B B B Enter the ratio To select the ratio with n n n n and o o o o A Adjust the ratios with n n n n or o o o o Note...

Page 543: ...sic Copying 42 1 Note To change the ratio entered press Clear or the Clear Stop key and enter the new ratio C Press to set the ratio D Press OK C C C C Place your originals and then press the Start ke...

Page 544: ...e originals of dif ferent sizes in the optional docu ment feeder ADF at the same time p 21 Mixed Size Mode You cannot use the Rotated Copy function when enlarging to B4 or A3 When enlarging to B4 or A...

Page 545: ...Stack with A5 L is 100 sheets Note When the number of copies ex ceeds the tray capacity remove copies from the tray The maximum tray capacity is as follows Metric version Stan dard Tray 500 sheets 80g...

Page 546: ...The paper sizes that can be used in the Rotate Sort function are as fol lows To use the Rotate Sort function two paper trays with pages identi cal in size and different in direction KL are required R...

Page 547: ...that can be used in the Shift Sort function are as follows A A A A Press Sort or Rotate Sort When the optional 2 Tray Finisher is not installed When the optional 2 Tray Finisher is installed Note When...

Page 548: ...tart key Note Place the original in the same direction as the first one C After all originals are scanned press the key Stack The optional 2 Tray Finisher is required Copies can be put together with e...

Page 549: ...k of originals in the optional document feeder ADF and then press the Start key Note The last page should be on the bottom When placing an original on the exposure glass or in the optional document fe...

Page 550: ...aper of different vertical sizes Note Stapling cannot occur when copying on thick paper as well as OHP transpar encies When the number of copies exceeds the tray capacity copying stops In this case re...

Page 551: ...Copies select K original for L copy and L original for K copy When combining the Mixed Size function and Auto Paper Select you can se lect and staple suitable paper even if originals of different siz...

Page 552: ...h they can be read They will auto matically be rotated and copied When the copy paper is identical in size and di rection to your original the staple positions are as follows Original location Staplin...

Page 553: ...riginals for K copies When using Top Slant Left 2 or Top 2 with Combine Double Copies or Auto Reduce Enlarge modes the Blank part will appear Check orienta tion message may be displayed depending on t...

Page 554: ...the optional document feeder ADF and then press the Start key Note The last page should be on the bottom When placing an original on the exposure glass or in the optional document feeder ADF using Ba...

Page 555: ...her functions Scanning will stop when memory reaches 0 during sorted copying However you can change this set ting so that all the scanned pages are copied and delivered to the tray After which the mac...

Page 556: ...d to punch holes in copies Note The optional Punch Kit varies depending on the geographic area See the fol lowing table for the one that suits your machine 2 holes 3 holes Name Hole number Punch Kit T...

Page 557: ...Double Copies or Auto Reduce Enlarge the message Blank part will appear Check orientation may appear because of the orientation of the original and the copy paper If this occurs change the orientatio...

Page 558: ...s vary slightly The punch hole positions change according to the direction of the paper se lected Orientation in which Original is Placed Punch Hole Positions Exposure glass Optional document feeder A...

Page 559: ...ling position when stapling copies p 49 Staple B B B B Enter the number of copy sets with the number keys Note To change the entered number press the Clear Stop key If you wish to use the Sort functio...

Page 560: ...2 Sided originals 1 Sided 2 Sided copies Duplex Combine Book Series p 62 Duplex p 65 Combine A A A A Press Dup Combine Series check your originals and then select 1 Sided or 2 Sided for the originals...

Page 561: ...ons of deliv ery Originals and Copy Orientation You can select the orientation Top to Top Top to Bottom p 60 Specify ing the Orientation of Bound Origi nals Top to Top Top to Bottom Specifying the Ori...

Page 562: ...Duplex Combine 61 1 B B B B Press Orientation C C C C Select an original orientation and a copy orientation D D D D Press OK E E E E Press OK...

Page 563: ...g margin or binding position You can also change their default values Front Margin Left Right Back Margin Left Right Front Margin Top Bottom and Back Mar gin Top Bottom Advanced Features manual A bind...

Page 564: ...g an original on the exposure glass or in the optional document feeder ADF using Batch mode A Place the original and then press the Start key Note Start with the first page to be copied B Place the ne...

Page 565: ...hen placing an original on the exposure glass or in the optional document Feeder ADF using Batch mode A Place the front side of the orig inal on the exposure glass or in the optional document Feeder A...

Page 566: ...ric version 25 400 Inch version 25 400 A separation line between origi nals can be printed with the User Tools Separation Line in Com bine Advanced Features manual If the direction of originals is dif...

Page 567: ...Copies four 1 sided originals to gether to one side of a sheet 1 Sided 8 Pages Combine 1 Side Copies eight 1 sided originals to gether to one side of a sheet 2 Sided 2 Pages Combine 1 Side Copies one...

Page 568: ...B B Select 1 Sided or 2 Sided for the original C C C C Press Combine 1 Side for the copy D D D D Select the pages of the originals to be combined and then press OK Note To change the orientation press...

Page 569: ...both sides of a sheet 1 Sided 8 Pages Combine 2 Side Copies eight 1 sided originals to one sheet with four pages per side 1 Front 2 Back 1 Sided 16 Pages Combine 2 Side Copies sixteen 1 sided origina...

Page 570: ...B B B Select 1 Sided or 2 Sided for the original C C C C Press Combine 2 Side for the copy D D D D Select the pages of the original to be combined and then press OK Note To change the orientation pres...

Page 571: ...ncies or Thick Paper 34 Copying from the Bypass Tray 32 Create Margin Mode 40 D Display 8 Display Panel 6 8 Document Feeder ADF 5 18 Duplex 59 62 1 Sided 2 Sided 62 2 Sided 1 Sided 63 2 Sided 2 Sided...

Page 572: ...de Red Black 26 Selecting Copy Paper 29 Auto Paper Select 30 Manual Paper Select 30 Selecting Original Type Setting 27 Generation 27 Map 27 Pale 27 Photo 27 Text 27 Text Photo 27 Sort 44 Rotate Sort 4...

Page 573: ...72 UE USA G570...

Page 574: ...In accordance with IEC 60417 this machine uses the following symbols for the main power switch a a a a means POWER ON b b b b means POWER OFF c c c c means STAND BY...

Page 575: ...Copier Feature Expander Type 3800C Operating Instructions Copy Reference Basic Features UE USA G570 8607...

Page 576: ...vanced Features this manual 10 Basic Features 10 1 Advanced Copying Edit Image Size Magnification 11 Directional Magnification 14 Directional Size Magnification Inch 17 Series 20 Erasing Colors 23 Era...

Page 577: ...Server 51 Programs 53 Storing a Program 54 Deleting a Program 56 Recalling a Program 57 Changing a Program s Name 58 User Color 59 Mixing Colors Manually with the Number Keys 62 Deleting User Colors 6...

Page 578: ...As You Want 79 General 79 Adjust Image 80 Combine 81 Duplex 82 When Memory Is Full 83 Copy Quality 85 Auto Color Calibration 88 Adjust Color 92 Color Balance 94 Color Balance Program 95 3 User Tools C...

Page 579: ...ures 5 5 110 Reproduction Ratio 1 2 111 Reproduction Ratio 2 2 113 Edit 1 2 115 Edit 2 2 118 Input Output 124 Adjust Color Image 127 4 Specifications Mainframe 128 Originals 131 Sizes and Weights of R...

Page 580: ...some areas Operator Safety This machine is considered a CDRH class 1 laser device safe for office EDP use The machine contains two 7 milliwatt 645 660 nanometer wavelength GaAIAs laser diodes Direct...

Page 581: ...t any maintenance or troubleshooting other than that mentioned in this manual This ma chine contains a laser beam generator and direct exposure to laser beams can cause permanent eye dam age Two kinds...

Page 582: ...dous radiation exposure Shielded interconnect cables must be employed with this equipment to ensure compliance with the per tinent RF emission limits governing this device Direct or indirect reflected...

Page 583: ...ly hazardous situation that might result in minor or moderate injury or property damage that does not involve personal injury when you misuse the machine without following the instructions under this...

Page 584: ...is symbol indicates numerical limits functions that cannot be used together or conditions in which a particular function cannot be used Reference This symbol indicates a reference Keys that appear on...

Page 585: ...al that suits your needs Advanced Features this manual The Advanced Features manual describes more advanced functions and also explains settings for key operators Basic Features The Basic Features man...

Page 586: ...ure and specify the lengths of the origi nal and copy by comparing A with a Limitation If the calculated ratio is over the maximum or under the minimum ratio it is adjusted to with in the available ra...

Page 587: ...y and then en ter the new length E E E E Enter the length of the copy with the num ber keys and then press Note You can enter sizes within the following ranges To change the length entered press Clear...

Page 588: ...Operating Instructions Copy Reference Advanced Features 13 G G G G Press OK H H H H Place your originals and then press the Start key...

Page 589: ...Note You can specify the ratio without considering the original and paper size However in some occasions parts of the image might not be copied or margins will appear on copies You can also select a p...

Page 590: ...ratio with the number keys and then press Note To change the ratio entered press Clear or the Clear Stop key and then enter the new ratio C Press Vertical D Enter the desired ratio with the number key...

Page 591: ...in 1 steps Pressing and holding down n n n n or o o o o changes it in 10 steps If you have incorrectly entered the ratio readjust the ratio with n n n n or o o o o D Press Vertical E Adjust the ratio...

Page 592: ...of the original and those of the copy as shown in the illustration Limitation If the calculated ratio is over the maximum or under the minimum ratio it is adjusted to with in the available range of ra...

Page 593: ...ss Specifd Ratio C C C C Press Dirc Size Mag In D D D D Enter the horizontal size of the original with the number keys and then press Note The horizontal size you can enter is from 1mm 0 1 to 9999mm 9...

Page 594: ...ze of the original with the number keys and then press Note The vertical size you can enter is from 1mm 0 1 to 999mm 99 9 G G G G Enter the vertical size of the copy with the number keys and then pres...

Page 595: ...wo facing pages of a spread original onto two sheets of paper The following types of Series modes can be used Series Copies Book 1 Sided Copies the two facing pages of a spread original to make two 1...

Page 596: ...When you use the Book 1 Sided function see the following table when you select the original and copy paper sizes with 100 ratio Metric version Inch version When you use the Book 2 Sided or Front Back...

Page 597: ...e Series B B B B Press Series C C C C Select the Series item and then press OK D D D D Press OK E E E E Make sure that Auto Paper Select is select ed Note Press Auto Paper Select if not selected F F F...

Page 598: ...le to specify up to 4 colors The width of the color to be deleted can be ad justed in 5 levels If the color width is set to Wide and red has been specified colors which are close to magenta or orange...

Page 599: ...ed The key of the selected color will be high lighted Note You can cancel the selection by pressing the selected highlighted key You can select up to 4 colors simulta neously D D D D Select the colors...

Page 600: ...age Note The default setting of the erased margin is as follows You can change the width of the erased mar gins as follows You can change this settings with the User Tools p 117 Erase Border Width p 1...

Page 601: ...the edge margins You can set the same margin width for all four sides or you can set different margin widths for each side Note If you want to erase the cente rmargin too use the Center Border Erase f...

Page 602: ...d Features 27 A A A A Press Edit Color Creation B B B B Press Erase C C C C Press Border D D D D Specify the erase border width with n n n n and o o o o and then press OK E E E E Press OK F F F F Plac...

Page 603: ...Advanced Features 28 Center Erase This function erases the center margin Note If you want to erase the border margin too use the Center Border Erase function p 29 Center Border Erase A A A A Press Ed...

Page 604: ...o change the width entered press n n n n and o o o o and then enter the new width E E E E Press OK F F F F Place your originals and then press the Center Border Erase This mode erases both the center...

Page 605: ...Width A Press Center and then specify the erase center width with n n n n and o o o o Note To change the width entered press n n n n and o o o o and then enter the new width B Press Same Width C Press...

Page 606: ...Width B Press the key for the part you wish to change and then specify an erase mar gin width with n n n n and o o o o Note To change the width entered press n n n n and o o o o and then enter the new...

Page 607: ...Margin Top Bottom When making 2 Sided copies from 1 Sided originals you can set a binding margin for back side pages p 116 1 sided 2 sided Auto Margin T to T p 116 1 Sided 2 Sided Auto Margin TtoB Whe...

Page 608: ...Press Margin Adjustment C C C C Set a binding margin for a front page Press and when setting the left and right margins and and when setting the top and bottom margins Note The binding margin width yo...

Page 609: ...d and when setting the top and bottom margins Note The binding margin width you can enter is from 0 to 30mm 0 to 1 2 You can specify the back side margin only when Duplex or 2 Sided copy with Com bine...

Page 610: ...t of the area next choose the location of the area by specifying the length and width Note The number of copies which can be re peated on a single sheet of paper is set automatically depending on the...

Page 611: ...e size of the copy paper and the re production ratio B B B B Press Edit Color Creation C C C C Press Edit Image D D D D Press Image Repeat E E E E Make sure that Whole Area is selected and then press...

Page 612: ...osition of the starting point of the area X1 Y1 and the length and width of the area X2 Y2 Note You can set the area in the following rang es B B B B Select the reproduction ratio and the paper size C...

Page 613: ...Image Repeat F F F F Press Specified Area G G G G Enter the length of X1 using the number keys and then press Note To change the length entered press Clear or the Clear Stop key and then en ter the nu...

Page 614: ...I I Enter the length of X2 using the number keys and then press J J J J Enter the length of Y2 using the number keys and then press K K K K Press OK L L L L Press OK M M M M Press OK N N N N Place you...

Page 615: ...ument feeder ADF You cannot use the Bypass Tray with this Note You can insert separation lines between re peated images p 121 Double Copies Sep aration Line See the following table for original and co...

Page 616: ...erence Advanced Features 41 A A A A Press Edit Color Creation B B B B Press Edit Image C C C C Press Double Copies D D D D Press OK E E E E Press OK F F F F Select the paper G G G G Place your origina...

Page 617: ...on with Auto Reduce Enlarge If the original size cannot be detected the centering function will not work The combined areas will be centered when using the Combine function Note The original sizes and...

Page 618: ...43 A A A A Select the paper B B B B Press Edit Color Creation C C C C Press Edit Image D D D D Press Centering Note If you want to cancel centering press Can cel E E E E Press OK F F F F Press OK G G...

Page 619: ...rs Limitation You cannot specify the Bypass Tray as the paper tray Preparation Before selecting this function set the tray for front cover paper Cover Sheet Tray for Copy Document Server function only...

Page 620: ...Administrator Reference 2 Copier System Edition When the Duplex mode is selected the ma chine refers to the setting used in the selected mode in Tray Display of the User Tools System Settings Mode Se...

Page 621: ...ect the paper tray containing the non cover sheet paper E E E E Place your originals and then press the Start key Note Press the key after the last original has been scanned when placing originals on...

Page 622: ...Only or double sided Duplex Copy Cover Sheet Tray for Copy Docu ment Server function only Administrator Reference 2 Copier System Edition When the Duplex mode is selected the ma chine refers to the se...

Page 623: ...lect Copy or Blank for the cover sheets D D D D Select the paper tray containing the non cover sheet paper E E E E Place your originals and then press the Start key Note Press the key after the last o...

Page 624: ...this function specify the pa per tray for slip sheets Slip Sheet Tray for Copy Document Server function only Admin istrator Reference 2 Copier System Edition The default setting of inch version is 1...

Page 625: ...P Transparencies or Thick Paper Basic Features manual You cannot specify anything but 1 for the copy amount when inserting slip sheets between OHP transparencies A A A A Press Cover Slip Sheet B B B B...

Page 626: ...Refer ence 2 Copier System Edition Note It may not be possible to change the file name or the user name of a stored document a while after it has been stored The start of a scanning operation and the...

Page 627: ...ace them see Placing the Original Basic Features manual E E E E Make the scanning settings for the original Reference For details see the explanations of each function in this manual F F F F Press the...

Page 628: ...t the standard mode or program No 10 as the mode to be set when modes are cleared or reset or immediately after the op eration switch is turned on p 107 Change Initial Mode Paper settings are stored b...

Page 629: ...ings so that all functions you want to store in this program are se lected B B B B Press the Program key The Program menu appears C C C C Press Register D D D D Press the program number you want to st...

Page 630: ...ram name go to step F F F F F Press OK When the settings are successfully stored the m m m m indicator goes on The screen returns to the initial copy display after a while Changing a Stored Program A...

Page 631: ...Press Register B Repeat steps E and F in Storing a Pro gram p 54 Not to overwrite the program A Press Do not Register The screen returns to the initial Program menu Deleting a Program A A A A Press t...

Page 632: ...gram is deleted and the screen returns to the initial copy display Note To cancel the operation press No Recalling a Program A A A A Press the Program key The Program menu appears B B B B Press the pr...

Page 633: ...the program number you want to change D D D D Change the program s name You can enter up to 40 characters Reference For details on entering characters see Entering Text Administrator Reference 2 Copi...

Page 634: ...255 Note When copying using user colors the fine shades might vary depending on the condition of the machine In order to correctly reproduce originals the values which have been entered are correct e...

Page 635: ...E E E E Select the color to be used as a base for reg istration The density of each color for the selected col or is displayed Note Press With Number Keys if you are directly specifying the density of...

Page 636: ...o change the density entered press Clear or the Clear Stop key and then enter the correct density Repeat step B if you want to specify the density of multiple colors G G G G Check densities and names...

Page 637: ...djust Program Color indicator lights up B B B B Press User Color C C C C Make sure that Program is selected D D D D Select the number 1 Not programed to 15 Not programed that you want to store the use...

Page 638: ...ress With n n n n o o o o To change the number press Clear or the Clear Stop key H H H H Check the names of each color and then press OK Note If you want to rename colors press Change Name and enter a...

Page 639: ...ors registered in the program and the registered colors in use cannot be deleted A A A A Press the Adjust Program Color key The Adjust Program Color indicator lights up B B B B Press User Color C C C...

Page 640: ...t Sampling the User Colors A A A A Press the Adjust Program Color key The Adjust Program Color indicator lights up B B B B Press User Color C C C C Make sure the copy paper and then press Print Sample...

Page 641: ...will be started automatically Note When an original has been set and reserved in the optional document feeder ADF the reservation will be cleared if the original is re moved If a paper jam occurs duri...

Page 642: ...s To Printing The screen returns to the initial copy display After the current copy job the next job starts automatically Note You can switch the display to the current copy job by pressing To Printin...

Page 643: ...press the Energy Saver key during an operation the current settings will be cleared It takes about 3 seconds to return to the ready condition from Energy Saver mode Reference The time for activating t...

Page 644: ...ights up and scan ning stops B B B B Remove the originals that were being cop ied and then place the originals you want to copy C C C C Press the Start key The machine starts making your copies D D D...

Page 645: ...complete remove your originals and copies E E E E Press the Interrupt key again The Interrupt indicator goes off Note The previous copy job settings will be re stored and the machine will continue cop...

Page 646: ...r the sample copy Note If you press Suspend after checking the results return to step A to adjust the copy settings as necessary You can change the settings for Staple Punch Duplex 2 Sided 1 Sided 1 S...

Page 647: ...Operating Instructions Copy Reference Advanced Features 72 Combination Chart...

Page 648: ...Operating Instructions Copy Reference Advanced Features 73...

Page 649: ...Adjust the image density Adjust ing Copy Image Density Basic Fea tures manual Auto Image Density is not selected Select Auto Image Density Ad justing Copy Image Density Basic Features manual A shadow...

Page 650: ...or coated paper Toner cartridge is almost empty Add toner Replacing the Toner Cartridge Maintenance Guide 2 Copier System Edition Parts of the image are not copied The original is not placed correctly...

Page 651: ...eference Advanced Features 76 A moir pattern is produced on cop ies Your original has a dot pattern image or many lines Place the original on the exposure glass at a slight angle Problem Cause Solutio...

Page 652: ...aper specified magnification for Reduce Enlarge copies Make sure that the original is correct ly placed on the exposure glass Placing Originals on the Exposure Glass Basic Features manual Originals ha...

Page 653: ...L Choose from the above sizes Stapling capacity exceeded The number of pages has exceeded the maximum stapling capacity Copy within the stapling capacity Staple Basic Features manual Cannot staple pap...

Page 654: ...stapler capacity Sta ple Basic Features manual Copy paper is curled Turn the copy paper over in the tray Staples are wrongly positioned Originals are not placed correctly Place the original on the upp...

Page 655: ...ase Center Width Originals are not scanned correctly Place the originals correctly In Margin Adjustment mode parts of the original image are not copied You set a wide erased margin Set a narrower marg...

Page 656: ...he correct reproduc tion ratio before using Com bine mode When you use staple and punch to gether extra margin may appear Change the orientation of the origi nals The blank space can be eliminated by...

Page 657: ...on the expo sure glass start with the first page to be copied Orientation of copies Top to Top or Top to Bottom is not correct You placed the originals in the wrong orientation or the orientation set...

Page 658: ...Cause Solution Reference Memory is full originals have been scanned Press Print to copy scanned origi nals Do not remove remaining origi nals Note Copying will stop and this message will be displayed...

Page 659: ...Cause Solution Reference Memory is full originals have been scanned The scanned original exceeds the number of pages that can be stored in memory Delete any unnecessary files and then scan the documen...

Page 660: ...ing the amount of black toner Text Photo Sensitivity For adjusting the standard level in the text and the photo part of the image when using Text Photo Note Sharp Soft Contrast and Background Density...

Page 661: ...al values will return when Auto Clear has been performed the Clear Modes key has been pressed or when the power has been turned off Adjusting the Contrast A Adjust by pressing Low or High B Press OK N...

Page 662: ...or or a different color might be copied B Press OK Note The Adjust Program Color indicator will light up when adjusting the image The adjusted settings will be deleted and the initial values will retu...

Page 663: ...arts of the texts are faded or are not clear Set to Photo when the outline of photos becomes dark C Press OK Note The Adjust Program Color indicator will light up when adjusting the image The adjusted...

Page 664: ...ress Start Printing and a test pattern will be printed Note The test pattern will be printed on an A4K A3 L 81 2 11 K 11 17 L size page If A4K is not available then A3L B4L will be used Make sure to c...

Page 665: ...be read if it is placed in the optional document feeder ADF Note Place the test pattern on the exposure glass in the following way When using the optional document feeder ADF make sure to place the t...

Page 666: ...g Instructions Copy Reference Advanced Features 91 A Press Previous Setting on the Copier Function B Press Yes The previous setting is reset Note If you do not want to return to the previ ous setting...

Page 667: ...ifted towards red to make orange or towards green to make a yellow green Note that only areas of the image containing this color will be modified Note You can set up to 3 colors from yellow red magent...

Page 668: ...ing or The color can be adjusted up to 9 levels Note Level 5 is the initial value E E E E Press OK Note The Adjust Program Color indicator will light up when adjusting the color The adjusted settings...

Page 669: ...ow Ma genta Cyan and Black color balance Nine levels of tone are available Note You can register the adjusted contents using the Color Balance Program and print a sam ple of the adjusted color using t...

Page 670: ...Clear has been performed the Clear Modes key has been pressed or when the power has been turned off Color Balance Program You can also store the color balance setting in memory and recall it when you...

Page 671: ...B B B Press Program Color Balance C C C C Press Program D D D D Select a number for this setting The color balance setting will be registered in the selected number Note When selecting the program nu...

Page 672: ...rogram A Press Register Note Press Do not Register if you do not want to make any changes E E E E Press Exit Changes in the Registered Contents A A A A Press Program Color Balance B B B B Select the p...

Page 673: ...ntents D D D D When changing the programmed contents press Program Color Balance E E E E Press Program and then press the pro gram number key to be overwritten F F F F Press Register The program is ch...

Page 674: ...e is selected and then press Program Color Balance C C C C Make sure that Recall has been selected and then select the program number regis tered by the color balance to be used The programmed color b...

Page 675: ...Adjust Program Color indicator lights up B B B B Make sure that Color Balance is selected and then press Program Color Balance C C C C Press Delete and then select the program number in which the colo...

Page 676: ...ols be sure to exit from the User Tools The selected key is highlighted Any changes you make with the User Tools remain in effect even if the main power switch or operation switch is turned off or the...

Page 677: ...he display panel and then press OK Note OK Press to set the new settings and re turn to the previous menu Cancel Press to return to the previous menu without changing any data Exiting From the User To...

Page 678: ...a default setting Auto Paper Select is selected You can cancel this setting Selecting Copy Paper Basic Features manual Note Default ON Paper Display You can choose whether the available paper trays si...

Page 679: ...y is shown as below Original Type Priority As a default setting Text Photo is selected as the Originals Type You can change it to Text Text Photo Photo Pale Generation Copy or Map Selecting Original T...

Page 680: ...whether to use Auto Tray Switching or not With Image Rotation Use this when copying with Auto Tray Switching Limitation The machine may not rotate depending on the operating function Without Image Rot...

Page 681: ...to matically cleared Note Default Metric version 1 Sided 1 Sided Inch version 1 Sided 2 Sided Copy Orientation in Duplex Mode The optional duplex unit and hard disk unit 40 GB are required You can set...

Page 682: ...originals after copying Note Default ON If the Panel Tone of the User Tools System Settings setting is Off the beeper does not sound irrespective of the Tone Original remains setting Panel Tone Admini...

Page 683: ...Duplex function Copy Function Key F1 1 Sided 1 Sided Combine Copy Function Key F2 1 Sided 1 Sided Combine 4 originals Copy Function Key F3 1 Sided 1 Sided Combine 8 originals Copy Function Key F4 None...

Page 684: ...n keys F1 to F5 You can also change the reg istered functions Note Default Document Server Storage Key F1 2 Sided Original Top to top Document Server Storage Key F2 1 Sided 1 Sided Combine Document Se...

Page 685: ...is function to whether or not copy by prioritizing either Black White or Full Color Note Default Full Color Two color Mode Priority Set this function to whether or not to prioritize Red Black or Two c...

Page 686: ...uently used Reduce Enlarge ratios other than the fixed Reduce En large ratio and have them shown on the initial display You can also change the registered Re duce Enlarge ratios Note Default Metric ve...

Page 687: ...sion Enlarge 1 115 Enlarge 2 122 Enlarge 3 141 Enlarge 4 200 Enlarge 5 400 Inch version Enlarge 1 121 Enlarge 2 129 Enlarge 3 155 Enlarge 4 200 Enlarge 5 400 When selecting User Enlrg Ratio enter a ra...

Page 688: ...ailable when you press Reduce Enlarge followed by Re duce Note Default Metric version Reduce 1 25 Reduce 2 50 Reduce 3 65 Reduce 4 71 Reduce 5 75 Reduce 6 82 Inch version Reduce 1 25 Reduce 2 50 Reduc...

Page 689: ...essed followed by Reduce Note Default Metric version 71 Inch version 73 Ratio for Create Margin You can set a Reduce Enlarge ratio when registering Create Margin in a Shortcut Key Note Default 93 R E...

Page 690: ...Metric version Left 5mm Inch version Left 0 2 Back Margin Left Right You can specify left and right margins on the back side of copies in Margin Adjust mode Note Default Metric version Right 5mm Inch...

Page 691: ...sided 2 sided Duplex mode you can specify whether to automatically set the margins on the back side The margin is set to the same value of Back Margin Left Right Note Default Metric version Right 5mm...

Page 692: ...Default Metric version 10mm Inch version 0 4 Erase Original Shadow in Combine In Combine Copy mode you can specify whether to erase a 3mm 0 1 bounding margin around all four edges of each original No...

Page 693: ...ructions Copy Reference Advanced Features 118 Edit 2 2 Front Cover Copy in Combine You can specify whether to make a combined copy on the front cover sheet when you select Front Cover Copy mode Note D...

Page 694: ...n Combine You can set the copy order in Combine mode to Left to Right or Top to Bottom Note Default From Left to Right Image Repeat Separation Line You can select a separation line in Image Repeat mod...

Page 695: ...ed when using None In Black and White printing will be done in black in Single Color printing will be done in the specified color in Two color standard printing will be done in the specified color of...

Page 696: ...e Copies Separation Line You can select a separation line in Double Copy mode from None Solid Broken A Broken B or Crop Marks p 40 Double Copies None Solid Broken A Broken B Crop Marks Note Default No...

Page 697: ...the specified color of the black area and in Two color Red and Black printing will be done in black An image of approximately 1 5mm 0 06 will not be displayed as the width of the separation line when...

Page 698: ...g None In Black and White printing will be done in black in Single Color printing will be done in the specified color in Two color standard printing will be done in the specified color of the black ar...

Page 699: ...lights for a selected time after an original is fed to show that the optional document feeder ADF is ready for another original You can adjust this time from 3 seconds to 99 SADF Mode Basic Features...

Page 700: ...o Memory Full Auto Scan Restart The optional hard disk unit 40 GB is required When the memory becomes full while scanning originals the machine can make copies of the scanned originals first and then...

Page 701: ...he initial display Note Default Stack Select Stapling Position The optional 2 Tray Finisher is required Specify whether Top 2 staples or Bottom is shown on the initial display with priority Note Defau...

Page 702: ...ressing Lighter or Darker Note Default Center of the 5 level adjustment Color Sensitivity You can adjust the tone of red in Two color Red Black and the color specified for Erase Col or in 5 levels Not...

Page 703: ...nal copying One dimensional solid copying system through laser beam Black Yellow Cyan Magenta Copy process Dry electrostatic transfer system Warm up time Less than 119 seconds 23 C Originals Sheet boo...

Page 704: ...ormal Full Color 28 copies minute A4K 81 2 11 K 14 copies minute A3L 11 17 L Black White 38 copies minute A4K 81 2 11 K 18 copies minute A3L 11 17 L Two color RGB 28 copies minute A4K 81 2 11 K 14 cop...

Page 705: ...ons Copy Reference Advanced Features 130 Zoom From 25 to 400 in 1 steps Maximum continuous copy run 99 sheets Power consumption Less than 1 5 Kw Reduction 82 85 75 78 71 73 65 65 50 50 25 25 Metric ve...

Page 706: ...ed Original Size Original Weight Exposure glass Up to A3 Optional document feeder ADF 1 sided originals A3L A5KL 60 128g m2 2 sided originals A3L B5KL 60 105g m2 Where Original Is Placed Original Size...

Page 707: ...uto detect Unable to auto detect Note If you want the machine to detect sizes 11 17 L instead of 8K L 267mm 389mm and 16K L 195mm 267mm instead of A4 L contact your nearest service representative Size...

Page 708: ...o detect sizes US EXE K instead of 8 1 2 11 K 8 10 L instead of 8 1 2 11 L 8 1 2 13 L instead of 8 1 2 14 L or 11 15 L instead of 11 17 L contact your nearest service representative Exposure glass Siz...

Page 709: ...nced Features 134 Optional document feeder ADF Area Where Images are not Copied The number of millimeters inside the area surrounding the original will not be copied Area where the original is not cop...

Page 710: ...r clipped originals Perforated or torn originals Curled folded or creased originals Pasted originals Originals with any kind of coating such as thermal fax paper art paper aluminum foil carbon pa per...

Page 711: ...following originals the paper size should be selected man ually Originals with indexes tags or other projecting parts Transparent originals such as OHP transparencies or translucent paper Dark origin...

Page 712: ...hat doubled sided paper or top and bottom margins on letterhead paper or business letter paper might not be printed correctly depending on the combination of the paper placed or original placed Make s...

Page 713: ...Adjusting the Background Density 87 Adjusting the Contrast 86 Adjusting the Sharp Soft 86 Adjusting the Text Photo Sensitivity 88 Adjusting the U C R 87 Cover 44 Front Back Covers 46 Front Cover 44 D...

Page 714: ...rver 51 T Troubleshooting 74 If You Cannot Make Clear Copies 74 If You Cannot Make Copies As You Want 79 When copying doesn t start 77 U User Color 59 Deleting 64 Sampling 65 User Tools Copier Documen...

Page 715: ...g Instructions Copy Reference Advanced Features In accordance with IEC 60417 this machine uses the following symbols for the main power switch a a a a means POWER ON b b b b means POWER OFF c c c c me...

Page 716: ...141 Operating Instructions Copy Reference Advanced Features UE USA G570 8657...

Page 717: ...5 Manuals for This Machine 7 How to Read This Manual 9 Symbols 9 Names of Major Options 10 1 Network Scanner Outline 11 Network TWAIN Scanner 11 Network Delivery Scanner 13 Document Server 15 Names an...

Page 718: ...g Software 42 Auto Run Program 42 Software for using a Network TWAIN Scanner 44 Software for using a Network Delivery Scanner 45 Software Required to Use the Document Server 46 DeskTopBinder V2 Lite 4...

Page 719: ...nner List Displays of Destinations and Senders 69 Delivery Procedure 71 Checking the Delivery Result 77 Using the Network Delivery Scanner with the Document Server 78 Simultaneous Delivery and Storage...

Page 720: ...ot Performed as Expected 101 Delivery Function Does Not Work 102 When the Error Message Is Displayed on the Control Panel 103 When the Error Message Is Displayed on the Computer 108 Powering Off the M...

Page 721: ...h emitter Direct or indirect reflected eye contact with the laser beam might cause serious eye damage Safety precautions and in terlock mechanisms have been designed to prevent any possible laser beam...

Page 722: ...slightly different from your machine Certain options may not be available in some countries For details please contact your local dealer Fax options are not sold in some areas Two kinds of size notati...

Page 723: ...vanced Features PDF Describes the procedures and functions for using this machine as a fax machine Scanner Reference this manual Describes basic settings for using scanner functions installing necessa...

Page 724: ...nagement Utilities for this machine For information about ScanRouter V2 Lite see p 13 Network Delivery Scanner p 51 ScanRouter V2 Lite ScanRouter V2 Lite Setup Guide PDF Describes the operating enviro...

Page 725: ...the prior knowledge or preparations required before operating Note This symbol indicates precautions for operation or actions to take after misoperation Limitation This symbol indicates numerical limi...

Page 726: ...e expander Printer Hard Disk Type 3800C 40 GB HDD 40 GB Printer Hard Disk Type 3800C 20 GB HDD 20 GB For other options see the respective documentation The following software products are referred to...

Page 727: ...ers three functions operation as a network TWAIN scanner network delivery scanner or storing scan data in the Document Server Network TWAIN Scanner The scanner of this machine is used from the compute...

Page 728: ...Operating Instructions Scanner Reference 12 1 This machine The scanner of the machine is used from the com puter via a network 2 Computer Originals are scanned by TWAIN driver from an application...

Page 729: ...anned by the machine is stored in the delivery server and delivered to the folder of the computer on the same network For more information see p 69 Delivering Stored Scan Data by the Network De livery...

Page 730: ...an in tray or Windows folder B in the figure 3 Client computer The contents of a stored document are checked in the following way View the document in an in tray of DeskTop Binder V2 Lite to check th...

Page 731: ...e machine and viewed or deleted using DeskTopBinder V2 Lite Professional from the computer via a network Documents can be searched by the user name or the document name Also others cannot view the doc...

Page 732: ...d by the scanner are stored 2 Computer The stored document can be viewed or deleted by connecting to the machine using DeskTopBinder V2 Lite Professional Reference For more information about DeskTopBi...

Page 733: ...the operating conditions 2 Display Shows the keys for operating each function The display also shows operation status and various messages 3 Check Modes key Press to check the current settings 4 Clear...

Page 734: ...nning file storage or delivery 9 Clear Stop key Clear Clears an entered numeric value Stop Stops scanning 10 key Enter key Use to enter a numeric value 11 Number keys Use to enter numeric values 12 Fu...

Page 735: ...1kgf approx 9 8N Note The Copy screen is set as the default screen when the machine is turned on You can change this setting under the Priority Function of the Basic Settings tab in System Settings Ad...

Page 736: ...en If the network TWAIN scanner screen is displayed press Cancel Using the Document Server Press Scanner to display the Document Server screen If the network TWAIN scanner screen is dis played press C...

Page 737: ...previous screen Cancel Cancels the selected function or entered value and returns to the previous screen U U U UPrev T T T TNext Displays the next or previous page when functions will not fit on a si...

Page 738: ...basic settings and then make scan ner settings Preparation Sequence The preparation sequence is different depending on whether the machine is to be used as a network TWAIN scanner or network delivery...

Page 739: ...required for using the network TWAIN scanner functions such as TWAIN driver and DeskTopBinder V2 Lite p 44 Software for using a Network TWAIN Scanner Connect the machine to the network with an Etherne...

Page 740: ...ry service p 45 Software for using a Network Delivery Scanner Reference For information about ScanRouter V2 Lite see the ScanRouter V2 Lite manual p 7 Manuals for This Machine Use ScanRouter V2 Admini...

Page 741: ...nce 1 Check the network settings in System Settings and change if required Administrator Reference 1 Make settings for the Document Server such as the setting of the scanning fea ture and original ori...

Page 742: ...hine as a network scanner Default Settings Settings to use the functions of the machine as a network scanner are listed below Make correct setting of necessary items Important Items marked are the min...

Page 743: ...etting It must be left at the factory default value 5 Make sure that IP address is set Settings TWAIN 1 Delivery 2 Store 3 Clock timer settings Administrator Reference 2 Scanner Auto Reset Timer Inter...

Page 744: ...Store 3 Scanner Features p 29 Resolution 200dpi Scan Size Auto Detection Scan type Full Color Image Density Medium Scanner Settings p 35 Function Priority Delivery store Delivery Store Connection Time...

Page 745: ...ed to any name of up to 16 characters The Scanner Features consist of the following items Resolution Set the resolution to 100 dpi 200 dpi 300 dpi 400 dpi or 600 dpi Scan Size Select the size of the o...

Page 746: ...ing for the purpose of printing is best done with Photo and Scanning for viewing on the computer display with Gray Scale Image Density Set the image density for scanning The set ting can be made in se...

Page 747: ...about character input see the Facsimile Reference Basic Fea tures F F F F Select the item to be set To select an item touch its key on the screen The item is highlighted Example resolution setting Exa...

Page 748: ...n Selecting a custom size When Custom Size is selected as the scan size follow the procedure below A A A A Press Custom size on the Scan Size setting screen B B B B Enter the original size with the nu...

Page 749: ...how the original is positioned the scan area will be as follows A When the original is placed on the expo sure glass B When the original is placed on the ADF The maximum scan size is 432mm 17 in the Y...

Page 750: ...ess Exit The main menu is shown again Deleting programmed scan settings A A A A Press the User Tools Counter key The User Tools Counter screen appears B B B B Press Scanner Features The Scanner Featur...

Page 751: ...elected the network TWAIN scanner mode is set By pressing Cancel in this condition you can switch to network delivery scanner operation or Document Server operation When Delivery Store is selected the...

Page 752: ...ac cordingly The actual time required for data transfer will vary depending on the data size and network load Delivery Option This setting determines whether the machine is used as a network delivery...

Page 753: ...re the original is read as a part of the same document If Off is selected the scanning of one document is terminated at the point when all originals in ADF have been scanned If set to On enter the num...

Page 754: ...o the Scanner Features screen I I I I Press Exit The main menu is shown again Making Scan Data Subject Set tings Subject information can be added to the scan data files This information added to the d...

Page 755: ...ner Features screen appears C C C C Press the Subject Settings tab D D D D Verify that Program Change is selected and select the subject you want to program E E E E Enter the subject string Reference...

Page 756: ...subject settings A A A A Press the User Tools Counter key The User Tools Counter screen appears B B B B Press Scanner Features The Scanner Features screen appears C C C C Press the Subject Settings t...

Page 757: ...Operating Instructions Scanner Reference 41 H H H H Press Exit The display returns to the Scanner Features screen I I I I Press Exit The main menu is shown again...

Page 758: ...settings In this case launch CD Launch EXE located on the CD ROM root directory If you want to install without using Auto Run hold down the Shift key while inserting the CD ROM Keep the Shift key hel...

Page 759: ...Select thesoftware Insert the CD ROM Restart your PC TWAIN Driver TWAIN Driver Ver 3 ScanRouter V2 Lite ScanRouter V2 Lite DeskTopBinder V2 Lite DeskTopBinder V2 Lite Acrobat Reader Job Binding ScanRo...

Page 760: ...reparation Before installing check the operating environment for the TWAIN driver p 48 Type3800C TWAIN Driver Using Windows 95 98 Me Windows 2000 or Windows NT 4 0 Install the TWAIN driver using Auto...

Page 761: ...elivery Scanner To use the machine as a network delivery scanner it is essential to install ScanRouter V2 Lite on the delivery server To check an in tray or auto receive the documents it is necessary...

Page 762: ...der V2 Lite The change the language screen appears Reference For information about the subsequent installation procedure see the Setup Guide that can be displayed from the Setup screen of the respecti...

Page 763: ...Windows is running Insert the supplied CD ROM labeled Scanner Driver Document Management Utilities into the CD ROM drive of the computer The choose setup language screen appears B B B B Select a lang...

Page 764: ...ROM are contained in the following folder DRIVERS TWAIN System requirements Hardware PC AT compatible Limitation Under Windows NT machines with RISC based processors MIPS R series Alpha AXP CD ROM Dri...

Page 765: ...pBinder V2 Lite is to be installed on the client computers for integration and management of various kinds of data such as scanned image data files created with applications and existing image files T...

Page 766: ...t Windows Millennium Edition Microsoft Windows 2000 Server Service Pack 1 or later Microsoft Windows 2000 Professional Service Pack 1 or later Microsoft Windows NT Server 4 0 Service Pack 5 or later M...

Page 767: ...e is to be installed on the delivery server The data scanned by the machine can be sorted on the delivery server stored in specified in trays or saved in folders of client computers on the same networ...

Page 768: ...lling 200 MB Note In addition to the space required for installation the hard disk should have at least 500 MB of free space for files Network protocol TCP IP Software installed with ScanRouter V2 Lit...

Page 769: ...al size is or but in the table below a square original is used to make the original orientation easy to understand If the actual original size changes a combination of original orientation and the ori...

Page 770: ...erence 54 Specify the ori enta tion When scanned by the deliv ery scanner or Document Server Specified on the control panel When scanned by the TWAIN scanner Specified by the Scanner Control dialog bo...

Page 771: ...e Advanced Features A A A A Lift the exposure glass cover or the ADF Note Raise the exposure glass cover or ADF ful ly more than 30 degrees The open ing closing action triggers the automatic original...

Page 772: ...When using the machine as a network TWAIN scanner this orientation is stand ard setting in the TWAIN driver Normal ly use this orientation for setting C C C C Close the exposure glass cover or the ADF...

Page 773: ...owing originals also cannot be placed in the ADF Originals longer than the length 432mm of the A3 11 x17 For information about which original sizes can be detected automatically and notes on placing o...

Page 774: ...rst When using the machine as a network TWAIN scanner this orientation is the standard setting in the TWAIN driver Nor mally use this orientation for placement C C C C Select the appropriate orientati...

Page 775: ...all originals are scanned these multi ple documents can be scanned as one document by the SADF After the originals are scanned the remaining time for accepting the next original is displayed When ther...

Page 776: ...on the con trol panel of the machine When using the ma chine as a network TWAIN scanner settings are made on the TWAIN driver For a Network Delivery Scanner and Document Server A A A A On the Scanner...

Page 777: ...on of the original Orientation selection A A A A Press the key for the same orientation as the actual orientation of the original or Mixed size selection A A A A When originals of different size are p...

Page 778: ...or from the drop down menu of the Orientation Reference p 53 Setting Originals D D D D When the original is placed in the ADF se lect Simplex or Duplex from the drop down menu of the Side box Note If...

Page 779: ...ions When using DeskTopBinder V2 Lite for scanning the basic flow of operations is as follows For more information about the operation procedure see p 64 Scanning Originals Start up DeskTopBinder V2 L...

Page 780: ...appears If the scanner is already selected no scanner settings are necessary Check File format for scanned image s and go to step E C C C C Click Select Scanner Driver The Select Source dialog box app...

Page 781: ...scanning select the icon in Mode Standard is suitable for scanning standard originals that comprise mainly of text Photo is suitable for scanning originals that include photos shaded illustrations etc...

Page 782: ...a click and drag one corner of the area towards its opposite cor ner Note Depending on the scanning resolution the area to be scanned may possibly be subject to re strictions For information about the...

Page 783: ...Document Information dialog box appears B B B B Enter the file name and click OK The image is stored in DeskTopBinder V2 Lite and the DeskTopBinder viewer closes Editing and printing scanned data With...

Page 784: ...e scanned slanted Printing to the Image This function allows you to imprint dates page numbers or your favorite characters to a scanned image You can also change the fonts of the imprints as well as t...

Page 785: ...ote A delivery server in which ScanRouter V2 Lite Professional is installed is necessary to use the net work delivery server function Information about delivery destinations and senders must be pro gr...

Page 786: ...k Modes key lets you verify the selected destinations 3 Number Keys Use these to specify a destination using the 3 digit short ID number 4 Attach Sender s Name Attach Subject Sets the sender and subje...

Page 787: ...The Scanner Function screen appears Note If the network TWAIN scanner screen is displayed press Cancel This screen is displayed if Function Priority in the Scan ner Initial Setup is set to network TWA...

Page 788: ...ll screen appears B B B B Select a user program of scan settings C C C C Press OK The selected user program settings be come active Making the settings individually A A A A Press Scan Settings The scr...

Page 789: ...the latest infor mation for operation press the Update Address on the control panel before de livering scan data to update the dis played information If the list is updated after the destina tion or s...

Page 790: ...stination field and then press Clear D D D D To select more destinations repeat step C C C C Using the short ID number to select a destination A A A A Press Number Keys B B B B Use the number keys to...

Page 791: ...rmation is added to the scan data file When the optional ScanRouter V2 Profes sional is used to send scan data files as e mail the sender information is automati cally entered in the message sender fi...

Page 792: ...the message subject A A A A Press Attach Subject B B B B Select a subject C C C C Press OK The subject is applied I I I I Press the Start key The original is scanned and the scan data file is deliver...

Page 793: ...hine to the delivery server was completed is recorded If delivery retry was performed but unsuc cessful the date and time refers to the last retry operation Destination When multiple destinations were...

Page 794: ...For more information see p 71 Delivery Procedure A A A A Place the original and adjust the settings for original size and orientation if re quired Reference p 53 Setting Originals B B B B Make the sca...

Page 795: ...delivered Note This section explains mainly how to select files to be delivered For more information about the delivery procedure see p 71 Deliv ery Procedure When the stored files are delivered scan...

Page 796: ...will be delivered in the order they were selected If you press Display Selection the selected files will only be shown in the order of de livery D D D D Press OK The screen for specifying a destinati...

Page 797: ...rk Delivery Scanner with the Document Server Storing Data This section describes how to store data in the Document Server and how to assign file information to stored data Note You can specify whether...

Page 798: ...rs Note If the network TWAIN scanner screen is displayed press Cancel This screen is displayed if Function Priority in the Scan ner Initial Setup is set to network TWAIN scanner mode C C C C Make sure...

Page 799: ...program settings be come active Making settings individually A A A A Press Scan Settings The screen for making scan settings ap pears B B B B Select the desired resolution original size and other item...

Page 800: ...be stored Reference For more information about how to specify file information see p 85 Specifying file information H H H H Press the Start key The original is scanned and the resulting data is store...

Page 801: ...long The user name can be up to 20 charac ters long The first 16 characters are shown on the control panel With DeskTopBinder V2 Lite Professional installed on a client compu ter you can view the enti...

Page 802: ...t the desired user name Note The user names shown here are names that were programmed in Sys tem Settings under the Administrator tab To enter a name not shown here press Non programmed Name and then...

Page 803: ...view the data A A A A Press Password The Password Entry screen appears B B B B Enter a password consisting of four numbers C C C C Press OK The password is applied Important Do not forget the passwor...

Page 804: ...anner Function screen appears Note If the network TWAIN scanner screen is dis played press Cancel This screen is displayed if Function Priority in the Scanner Initial Setup is set to network TWAIN sca...

Page 805: ...Reference 89 When using Document Server only A A A A Press Stored Files Manage Viewing the List The list displayed scanned data files that are stored has the following elements When using the network...

Page 806: ...mation Use for deleting changing the user name file or password of the selected file or for checking file information 4 A list of stored files Note Stored files are not shown when a function other tha...

Page 807: ...Connected device name Displays the files stored in the connected device on the desk tree by dividing into User name and All Uses folders 2 User name Displays only the files stored with the same user n...

Page 808: ...ames shown here are names that were programmed in System Settings under the Administrator tab To enter user name not shown here press Non programmed Name and then enter the name C C C C Press OK The s...

Page 809: ...Operating Instructions Scanner Reference 93 C C C C Press OK The search starts and file whose name starts with the entered string are displayed...

Page 810: ...e list of stored files Reference p 88 Viewing a List of Stored Files B B B B Select the file to be deleted Note Up to 30 files can be selected When you select a password protected file the Password En...

Page 811: ...e changed A A A A Display the list of stored files Reference p 88 Viewing a List of Stored Files B B B B Select the file for which you want to change the file information Note When you select a passwo...

Page 812: ...ser name not shown here press Non pro grammed Name and then enter the user name C C C C Press OK The user name is changed Changing the file name A A A A Press Change File Name The screen for changing...

Page 813: ...rd B B B B Enter the new password consisting of four numbers C C C C Press OK The new password is stored Important Do not forget the password If you for get it ask the key operators in charge of this...

Page 814: ...he scan ning resolution and the data size is shown below If the data size is too large the message Exceeded max data capacity Check the scanning resolution appears on the control panel of the machine...

Page 815: ...h combinations in the table according to the memory capacity of the machine When a total of 160 MB of memory is loaded When a total of 256 MB of memory is loaded When a total of 384 MB of memory is lo...

Page 816: ...h combinations in the table according to the memory capacity of the machine When a total of 160 MB of memory is loaded When a total of 256 MB of memory is loaded When a total of 384 MB of memory is lo...

Page 817: ...sure that the original orientation is correct When placed directly on the exposure glass the side to be scanned must face down When fed via the ADF the side to be scanned must face up p 53 Setting Or...

Page 818: ...ayed If the network TWAIN scanner screen appears when the machine is switched to scanner operation press Cancel to switch to the Network Scanner screen If the display does not switch from network TWAI...

Page 819: ...from the delivery server Possible causes are as follows The delivery server is not running or has not started delivery service Delivery Server IP Address is not set correctly in System Settings The de...

Page 820: ...is 3000 Delete unneeded files Exceeded max number of pages 500 pages per file Do you want to store the scanned pages as 1 file The maximum number of pages per file is 500 Specify whether to use the da...

Page 821: ...l Scanning has been cancelled Do you want to store the scanned data Because there is not enough hard disk capacity in the ma chine the page could only be partially scanned Specify whether to use the d...

Page 822: ...g the scanner for another function such as copying Retry the operation after the other function is completed Selected file is currently in use Cannot change file name The name of a file that is being...

Page 823: ...nsmission has been failed Insufficient memory in server There is not enough free space on the hard disk of the de livery server Free up the required amount Transmission to the server has been failed T...

Page 824: ...tions Cannot connect to the scanner Check the network Access Mask settings in User Tools The access mask is set Notify the network or scanner ad ministrator Cannot detect the paper size of the origina...

Page 825: ...lications then restart scanning Terminate the unnecessary application started by the computer Insufficient memory Reduce the scanning area Reset the scan size Lower the resolution Set with no compress...

Page 826: ...e wait The machine is used by the function other than the scan ner function such as copy or the machine is warming up Wait for a while and reconnect Scanner is in use by other user Please wait Other u...

Page 827: ...when turning off the machine s main power Reference For more information see Turning On and Off the Power in Administrator Reference 1 Turning Off the Operation Switch A A A A Make sure that the expos...

Page 828: ...switch Damage to the HDD or memory may result Before turning off the main power switch or unplugging the machine check the memory remaining is 100 After about 1 hour passes after the main power switc...

Page 829: ...uter V2 Link or DeskTopBinder V2 Lite Professional In addition appropriately set up con nected devices with the I O settings of ScanRouter V2 Administration Utility If the network environment changes...

Page 830: ...the computer is set up to connect to the Internet automatically the confirmation dialog box will not appear and telephone charges may be incurred without the user being aware of it To prevent unneces...

Page 831: ...as network TWAIN scanner Setting range 100dpi 1200dpi When used as network delivery scanner Setting range 100dpi 200dpi 300dpi 400dpi 600dpi Maximum number of files and pages Storage When extended HD...

Page 832: ...Delivery Store connection time out 35 DeskTopBinder V2 Lite 47 49 63 Display 17 Display Contents Document Server 20 Network Delivery Scanner 20 Network TWAIN Scanner 19 Document Server 15 E Energy Sa...

Page 833: ...66 Printing to the image 68 R Resolution 29 S SADF auto reset timer 37 Save 67 Scanning mode registration 68 Scanning originals 64 ScanRouter V2 Lite 51 Scan size 29 Scan type 29 Selecting a custom s...

Page 834: ...ctions may cause harmful interference to radio communications However there is no guarantee that interference will not occur in a particular installation If this equipment does cause harmful interfere...

Page 835: ...terference Causing Equipment Regulations Remarque concernant les utilisateurs au Canada Avertissement Cet appareil num rique de la classe B respecte toutes les exigences du R glement sur le mat riel b...

Page 836: ...ntification purposes only and might be trademarks of their respective companies We disclaim any and all right in those marks The product name of Windows 95 is Microsoft Windows 95 The product name of...

Page 837: ...121 Operating Instructions Scanner Reference UE USA G570 8867...

Page 838: ...0C Operating Instructions Facsimile Reference option Basic Features Read this manual carefully before you use this product and keep it handy for future reference For safety please follow the instructi...

Page 839: ...rtant information related to USER SAFETY and PREVENTING EQUIPMENT PROBLEMS Notes Some illustrations might be slightly different from your machine Certain options might not be available in some countri...

Page 840: ...munications However there is no guarantee that interference will not occur in a particular installation If this equipment does cause harmful interference to radio or television reception which can be...

Page 841: ...first page of the transmission the date and time it is sent and an identification of the business other entity or other individual sending the message and the telephone number of the sending machine o...

Page 842: ...uctions Save these instructions IMPORTANTES MESURES DE S CURIT Certalnes mesures de s curit doivent tre prises pendant l utilisation de mat ri al t l phonique afin de r duire les risques d incendle de...

Page 843: ...ymbol Be sure to read the instructions all of which are included in Safety In formation in Administrator Reference 1 Copier System Edition The statements above are notes for your safety Important If t...

Page 844: ...n Explains how to erase a fax message programmed in memory and check the contents of any file in memory Chapter 4 Other Transmission Features Explains the useful transmission features Learn how to dia...

Page 845: ...ax directly from a computer and make necessary settings Chapter 10 Troubleshooting Explains what to do when toner runs out and when power is turned off or fails Chapter 11 Appendix You can check the c...

Page 846: ...l Document Feeder ADF 18 Originals unsuitable for the optional Document Feeder ADF 18 Setting a Scan Area 19 If the Machine Cannot Detect the Size of Your Original 21 Original Sizes Difficult to Detec...

Page 847: ...44 Selecting the Reception Mode 44 Manual Reception 44 Auto Reception 44 3 Registering Initial Settings and Adjustments 45 Programming 46 Editing 49 Deleting 50 Quick Dial 52 Programming 53 Editing 56...

Page 848: ...s switch to turn the power on the On indicator lights up To turn the power off press this switch again the On indica tor goes off Chapter 10 Power Failure Report in the Advanced Features manual 4 Stan...

Page 849: ...port 2 Network Interface Unit Plug the network cable into this port 3 Bypass Tray Use this tray for non standard size paper Chapter 5 Having Incoming Messag es Printed on Paper From the Bypass Tray i...

Page 850: ...Confidential Recep tion Chapter 3 Printing a Confiden tial Message in the Advanced Features manual Blinks when a Memory Lock file has been received into memory Chapter 3 Printing a File Received with...

Page 851: ...rror message and take the appro priate action p 75 When the Fac simile Key is Lit in Red 16 On Hook Dial key Use to dial a number from the number keys without having to lift the handset Chapter 4 On H...

Page 852: ...activate the machine When the machine has warmed up you can make copies or send faxes Main Power Switch Left front side of the machine Do not touch the main power switch It should be used only by a s...

Page 853: ...performed General Fea tures 1 2 Function Priority in Administrator Reference 2 Copier System Edition D D D D Press the Facsimile key The Facsimile screen is displayed Turning Off the Power A A A A Tu...

Page 854: ...e the indicator is lit or blinking This may cause problems in the hard disk or memory Be sure to turn off the main power switch before unplugging the power cord This may cause prob lems in the hard di...

Page 855: ...ile mode press the Facsimile key on the left of the operation panel to use fax functions Limitation You cannot switch modes under the following circumstances While scanning in a fax During Immediate T...

Page 856: ...a dashed outline for example All procedures in this manual assume you are in Facsimile mode If the ma chine is not in Facsimile mode press the Facsimile key to change to Facsim ile mode You can have...

Page 857: ...en adding destina tions with the number keys press Add 4 Displays messages and the ma chine status 5 Press to display various informa tion about transmission 6 Appears when a destination is en tered P...

Page 858: ...n specify a User Code with System Settings Key Operator Tools 1 2 User Code in Administrator Reference 2 Copier System Edi tion Even when User Code Management is on you can still receive and print fax...

Page 859: ...is shown Memory Transmission Initial display Immediate Transmission Note To return the machine to standby mode do one of the following If you have placed the original on the optional Document Feeder...

Page 860: ...Note Even when the machine is using memory to fax a message or receive a mes sage you can still scan the next original into memory Chapter 4 Dual Access in the Advanced Features manual Even when the m...

Page 861: ...Getting Started 14 1 Display Prompts Depending on the situation the machine will show various prompts on the dis play Instructions and Requests Questions Selections Status...

Page 862: ...e memo ry You can only specify one address Important If the machine is switched off for more than one hour all the files stored in the memory are deleted If files have been deleted once the ma chine h...

Page 863: ...Header will be printed on the received faxes at the destina tion as follows 1 On the top of the fax 2 On the left side of the fax When sending a fax the image output at the other end depends on the si...

Page 864: ...east 30 degrees Place the original face down and align its upper left corner with the reference mark at the upper left corner of the exposure glass 1 Reference mark 2 Scale Note If you do not raise th...

Page 865: ...me ters Switch14 Bit0 in the Ad vanced Features manual If an original jams press the Clear Stop key and then remove the original carefully If your original is bent or folded flatten or straighten it o...

Page 866: ...11 17 Area Enter the area to be scanned The placed document is scanned ac cording to the entered size regard less of its actual size Chapter 7 Programming and Changing a Scan Size in the Advanced Fea...

Page 867: ...ecified size is shown D D D D Press OK Regular is highlighted on the display and the size is shown above it Specifying Programmed Sizes A A A A Press Area 1 or Area 2 Area 1 or Area 2 is highlighted T...

Page 868: ...ze the following display is shown If this happens carry out the follow ing steps A A A A Press Exit B B B B Remove the original and then re place it on the exposure glass C C C C Press the Start key t...

Page 869: ...ark originals with many characters or drawings Originals which partially contain solid printing Originals which have solid printing at their edges Slippery originals Originals in bound form of more th...

Page 870: ...mmediate Transmission instead Note Maximum number of destinations per Memory Transmission 500 Combined total number of desti nations that can be programmed 500 2 000 with the optional Fax Function Upg...

Page 871: ...exposure glass after you have started using the op tional Document Feeder ADF Note To store multiple page originals from the exposure glass place them page by page The original can be placed in ei the...

Page 872: ...nt to specify a differ ent destination repeat steps E and F G G G G Press the Start key The machine starts scanning the original Note Do not open the optional Docu ment Feeder ADF while it is scanning...

Page 873: ...Place the last original and then press Checking the Transmission Settings You can check the transmission set tings e g destination and transmis sion mode on the display A Press the Check Modes key The...

Page 874: ...nned Canceling a transmission after press ing the Start key Use this proce dure to cancel a transmission after the original has been scanned A A A A Press the Clear Stop key The machine will stop scan...

Page 875: ...if you cancel a trans mission If the transmission finishes while you are carrying out this proce dure it will not be canceled Note If you cancel a message while it is being sent the transmission is ha...

Page 876: ...Canceling a Memory Transmission 29 2 C C C C Press Stop Transmission Note To cancel another file repeat steps B and C D D D D Press Exit The machine will return to standby mode...

Page 877: ...ass set them one page at a time You can scan some pages of your original from the exposure glass and the remainder from the option al Document Feeder ADF When you have finished scanning from the expos...

Page 878: ...ill return to standby mode Sending Originals from the Exposure Glass A A A A Place the first page face down on the exposure glass B B B B Dial a destination C C C C Make any scan settings you re quire...

Page 879: ...Made The following display appears if the fax could not be sent Do one of the following Press Cancel Transmission and try again Press Memory Transmission to have the machine store the scan in mem ory...

Page 880: ...ional Document Feeder ADF you can also cancel an Immediate Transmission by re moving the original from the machine Canceling a Transmission After You Have Pressed the Start Key A A A A Press the Clear...

Page 881: ...all characters or when you re quire greater clarity This resolu tion is twice as fine as Standard Super Fine optional Expansion Mem ory required 16 15 4lines mm 400 400dpi Select for originals with ve...

Page 882: ...want to send clearer text Text Photo Select Text Photo to send an orig inal containing both a high con trast black and white image such as text and a halftone image such as a photograph Photo Select...

Page 883: ...density Auto Image Density The appropriate density setting for the original is automatically select ed Manual Image Density Use manual image density to set image density yourself Combined Auto and Ma...

Page 884: ...ity is not selected If it is se lected press Auto Image Density to turn it off B B B B Press i i i iLighter or Darkerj j j j to change the density Note You can select one of seven density levels Combi...

Page 885: ...When placing originals on the exposure glass While the machine is beeping you have about 60 seconds 10 for Imme diate Transmission to select density resolution and original type The re maining time i...

Page 886: ...ar on the display as you enter them Note If you make a mistake press Clear or the Clear Stop key and enter again If the optional ISDN Unit is in stalled select G3 or G4 before you go to the next step...

Page 887: ...more numbers This is because fax numbers have been dialed with the number keys for some of the files awaiting transmission When these files have been sent and their fax numbers are deleted from memor...

Page 888: ...r a tone indication in the User Pa rameters BP tone or UUI Chapter 8 Changing the User Pa rameters Swith11 Bit1 in the Advanced Features manual Quick Dials When you have programmed a desti nation s nu...

Page 889: ...umber Keys Groups If you frequently send the same mes sage to more than one place program these numbers into a Group Then you can send messages to all the des tinations in that Group with just a few k...

Page 890: ...otal number of destinations is displayed Press U U U U and T T T T to see the other destinations Note If the destination is not dis played press U U U U Prev or T T T T Next to find it To cancel a set...

Page 891: ...e Use this setting for a dedicated fax line Limitation You cannot select the reception mode when the optional Extra G3 Interface Unit is installed The optional external telephone or optional Handset i...

Page 892: ...x Header Chapter 7 General Settings Adjust ment in the Advanced Features manual Own Fax Number Facsimile number of sender The Own Fax Number of the send er is sent to the other party when sending a fa...

Page 893: ...n C C C C Press Gen Settings Adjust D D D D Press Program Fax Information Note If Program Fax Information is not shown press U U U U Prev or T T T T Next E E E E Program the name and facsimile number...

Page 894: ...B B B B Press Own Name C C C C Enter an Own Name Reference p 71 Entering Text D D D D Press OK Programming an Own Fax Number A A A A Press Own Fax Number B B B B Select line type to Program When an op...

Page 895: ...display appears as below when the optional ISDN Unit is in stalled A A A A Press G4 Terminal ID B B B B Press Country Code C C C C Enter a country code using the number keys D D D D Press OK E E E E...

Page 896: ...following procedure explains how to edit Own Name as an ex ample A A A A Press the User Tools Counter key B B B B Press Facsimile Features The Facsimile Features menu is shown C C C C Press Gen Settin...

Page 897: ...d Own Fax Number of G4 Termi nal ID H H H H Press OK I I I I Press Exit J J J J Press the User Tools Counter key The machine will return to standby mode Deleting Note The following procedure explains...

Page 898: ...ax Header Own Name or Own Fax Number for deleting F F F F Press the item you want to delete G G G G Press Backspace or Delete All Note Press Clear or the Clear Stop key if you want to edit Own Fax Num...

Page 899: ...ogramming Quick Dials Key Display You can program the Key Display shown on the display up to 16 characters The Group name up to 16 characters of the Group name will be programmed as the Key Display au...

Page 900: ...stinations when Fax Func tion Upgrade Unit is installed The maximum number of digits for a fax number may be less than 254 due to the settings for SUB SID SEP PWD Space and Sub ad dress Reference Chap...

Page 901: ...hapter 4 Advanced Features in the Advanced Fea tures manual You can select a line type for each destination when the op tional ISDN Unit or the optional Extra G3 Interface Unit is in stalled Press Sel...

Page 902: ...anced Features manual C C C C Press OK Selecting a Fax Header A A A A Press Select Fax Header B B B B Select 1st Name or 2nd Name for registration C C C C Press OK Programming Label Insertion A A A A...

Page 903: ...urn to standby mode Editing Use this procedure to change the re ceiver information already pro grammed Limitation When a programmed Quick Dial key is being used for a standby Memory Transmission the m...

Page 904: ...apter 4 Advanced Features in the Advanced Fea tures manual You can select a line type for each destination when the op tional ISDN Unit or the optional Extra G3 Interface Unit is in stalled Press Sele...

Page 905: ...Freq will be normally displayed even if it s switched to Desti nation List Title 1 Title 2 or Title 3 Chapter 7 Pro gramming Title of the Quick Dial Table in the Advanced Features Manual C C C C Press...

Page 906: ...pears as in step C G G G G Press Exit twice The machine will return to standby mode Deleting This procedure describes how to find a programmed Quick Dial and delete it Limitation When you try to delet...

Page 907: ...ck Dial key is shown Note If the Quick Dial key you re quire is not shown press U U U U and T T T T Press Change Title to display another title E E E E Press Delete The destination has been deleted No...

Page 908: ...do not program a Key Display You can edit destinations which are programmed in a Group Programming Preparation All destinations to be programmed should be selected using the Quick Dial table or entere...

Page 909: ...s If programming 200 desti nations in one group when pro gramming completely different destinations number of destina tions that can be programmed in the remaining groups is 300 The procedure is also...

Page 910: ...ination key you re quire is not shown press U U U U and T T T T Press Change Title to display another title When you specify multiple des tinations using the number keys press Add When you add the des...

Page 911: ...Press Adv Features C Press Transfer Req D Press Receiving Station E Specify the receiving station Note When you specify the receiving station with Quick Dial press Quick Dial and enter the Group Dial...

Page 912: ...ts of the group Editing a Group Name A A A A Press Group Name B B B B Press Backspace or Delete All and then reenter the Group name Reference p 71 Entering Text C C C C Press OK The display appears as...

Page 913: ...ber of the desti nation Ifthedestinationisprogrammed with the Quick Dial Table press the Clear Stop key or Clear to cancel programming and then program with the destination key again You can cancel pr...

Page 914: ...Features to pro gram SUB SID SEP PWD sub address or UUI Chapter 4 Advanced Fea tures in the Advanced Fea tures manual You can select a line type for each destination when the optional ISDN Unit or the...

Page 915: ...programmed in a Group A A A A Press Dest Management B B B B Press Program Change Delete Group C C C C Select the Group key which con tains the destination you want to delete Note If the Group key you...

Page 916: ...n the display F F F F Press OK Note If you press Cancel the desti nation is not display appears as in step C G G G G Press Exit twice The machine will return to standby mode Deleting Groups A A A A Pr...

Page 917: ...rogramed is shown If the Group key has been pro grammed the group name or Key Display is shown E E E E Press Delete The Group is deleted Note If you press Do not Delete the display appears as in step...

Page 918: ...on of the cursor If there is a character at the cursor position the entered character is shown before the character Available Characters Alphabetic characters ABCDEFGHIJKLMNOPQRSTUVWXYZabcdefghijklmno...

Page 919: ...to Enter Text Entering characters A A A A Press Shift to switch between up percase and lowercase B B B B Press the letter you want to enter Deleting characters A A A A Press Backspace or Delete All t...

Page 920: ...he destination At Printing Sounds when a received message has been printed Chapter 5 Print Completion Beep in the Advanced Features manual Limitation Adjusting Volume is not available with the optiona...

Page 921: ...r each item Note You can hear the actual volume by pressing Check F F F F Press OK Note If you press Cancel the volume setting is canceled The display appears as in step D G G G G Press the User Tools...

Page 922: ...g Paper in Maintenance Guide 2 Copier System Edition The paper output tray is full Remove the paper from the tray The machine is in RDS Remote Diagnostic System mode Wait with the main power switch on...

Page 923: ...he original Note There may be a problem with the machine or the tele phone line for example noise or cross talk If the er ror re occurs frequently contact your service representative Cannot detect ori...

Page 924: ...beginning to run out Replace the toner car tridge soon Replacing the Toner Car tridge in Maintenance Guide 1 Copier System Edition Message appears blank at the other end The original was placed up sid...

Page 925: ...e Terminal Adap tor is incorrect Check the set ting Transmission is possible though receiving is impossi ble Setting of the optional Termi nal Adaptor is incorrect Check the setting Receiving is possi...

Page 926: ...g characters 72 Entering Text 71 Error Messages 76 Exposure Glass 1 Exposure Glass Cover 1 External Tray 2 Extra G3 Interface Unit Connector 2 F Facsimile key 4 75 Fax Header 45 Deleting 50 Editing 49...

Page 927: ...key 3 Q Quick Dial 39 41 52 Deleting 59 Dialing 41 Editing 56 Programming 53 R Receive File Indicator 3 Reception 44 Auto Reception 44 Manual Reception 44 Registering 45 Resolution 34 RTI Own Name 45...

Page 928: ...to disconnect the equip ment from the network until the problem is resolved 8 This equipment cannot be used telephone company provided coin service Connection to Party Line Service is subject to stat...

Page 929: ...FAX Option Type 3800C Operating Instructions Facsimile Reference option Basic Features UE USA G307 8627...

Page 930: ...n Result TX File Status 49 Checking the Reception Result RX File Status 51 Displaying the Memory Status 53 Printing a Confidential Message 55 Confidential File Report 57 Printing a File Received with...

Page 931: ...dress 86 UUI 87 On Hook Dial 89 Manual Dial 91 Changing the Line Type 93 Sub Transmission Mode 96 Book Fax 96 2 Sided Transmission Double Sided Transmission 98 Standard Message Stamp 100 Sending an Au...

Page 932: ...ess 125 Dual Access 125 Transmission with Image Rotation 125 Simultaneous Broadcast 126 JBIG Transmission 126 Printed Report 127 Memory Storage Report 127 Transmission Result Report Memory Transmissio...

Page 933: ...n Time 140 2 Sided Printing 141 180 Degree Rotation Printing 142 Multi copy Reception 143 Image Rotation 143 Combine 2 Originals 144 Page Separation and Length Reduction 145 Reverse Order Printing 146...

Page 934: ...0 File Manage 164 Delete File 167 7 Facsimile Features Accessing the User Tools 170 Program Change Delete Menu 172 Changing the Order of the Quick Dial Table 172 Programming Title of the Quick Dial Ta...

Page 935: ...he User Parameter list 222 Special Senders to Treat Differently 223 Programming Changing Special Senders 227 Programming Initial Set UP of a Special Sender 232 Deleting a Special Sender 235 Printing t...

Page 936: ...Book and the LAN FAX driver 271 Setting PC FAX Properties 273 Basic Transmission 274 Address Book 276 Printing 277 PC FAX Operation Messages 277 10 Troubleshooting Reading Reports 278 Error Report 278...

Page 937: ...Type 3800C 289 Extra G3 Interface Unit G3 Interface Unit Type 3800C 289 Handset Handset Type 1018 290 Specifications 291 Acceptable Types of Originals 293 Acceptable Original Sizes 293 Paper Size and...

Page 938: ...ifferent from your machine Certain options might not be available in some countries For details please contact your local dealer Fax options are not sold in some areas Two kinds of size notation are e...

Page 939: ...are as follows Microsoft Windows 95 operating system Microsoft Windows 98 operating system Microsoft Windows Millennium Edition Windows Me Microsoft Windows 2000 Professional Microsoft Windows 2000 S...

Page 940: ...ially hazardous situation that might result in minor or moderate injury or property damage that does not involve personal injury when you misuse the machine without following the instructions under th...

Page 941: ...merical limits functions that cannot be used together or conditions in which a particular function cannot be used Reference This symbol indicates a reference Keys that appear on the machine s panel di...

Page 942: ...e most frequently used fax functions and operations Chapter 1 Getting Started Describes the parts of the machine and control panel Chapter 2 Faxing Explains about basic transmission You can also learn...

Page 943: ...me cheaper as the Econ omy Transmission Time p 196 Program Economy Time Then if you have a non urgent fax just select Send Later with Economy Transmission when you scan it Faxes will be queued in memo...

Page 944: ...make a mistake press Clear or the Clear Stop key and try again To cancel Send Later press Cancel and the display will return to step C E E E E Press OK The Transmission Mode menu is shown on the displ...

Page 945: ...an have your message sent before any other queued messages Limitation This feature is not available with Immediate Transmission If this feature is selected the machine automatically switches to Memory...

Page 946: ...g InstructionsFacsimile Reference option Advanced Features 18 D D D D Press OK The initial display is shown E E E E Dial and then press the Start key Note Press Change Stop TX File to cancel the trans...

Page 947: ...you wish to send a Confidential Mes sage to a particular person at the other end you can specify the Confidential ID that per son has to enter to see that message Before you send the message do not fo...

Page 948: ...fidential TX D D D D Depending on the Confidential Transmis sion type use one of the following proce dures Default ID A A A A Check that Default ID is selected Note If Default ID is not selected press...

Page 949: ...To cancel Confidential TX press Can cel The display will return to the Trans mission Mode menu C C C C Press OK The Transmission Mode menu is shown The Confidential TX key is highlighted and ID Overr...

Page 950: ...e trying to poll your message is the same as the Polling ID stored in your machine Make sure that both machines Poll ing IDs are identical in advance ID Override Transmission You must enter an Overrid...

Page 951: ...need to program the Polling ID p 259 Pro gramming a Polling ID You can set whether a Polling Transmission file is deleted after transmitting in User Pa rameters To save the file to transmit repeat ed...

Page 952: ...ures 24 D D D D Depending on the Polling Transmission mode use one of the following procedures Free Polling TX A A A A Check that Free Polling TX is selected Note If Free Polling TX is not selected pr...

Page 953: ...to the F F F F Press OK The Transmission Mode menu is shown The Polling TX key is highlighted and the specified mode is shown above G G G G Press OK The initial display is shown H H H H Press the Star...

Page 954: ...efault ID Polling If the Polling ID is programmed in your machine any messages waiting in the transmitting machine with the same ID are re ceived If the other machine does not have any messages waitin...

Page 955: ...der s Usually you can only receive documents with a Polling ID from machines of the same make that support the polling function However if the other party s fax machine supports Polling Transmissions...

Page 956: ...If Default ID Free Polling RX is not select ed press Default ID Free Polling RX To cancel the Polling Reception press Cancel The display will return to the Transmission Mode menu ID Override Polling...

Page 957: ...his report is printed after Polling Reception has been set up Note You can turn this function on or off with the User Parameters p 216 Changing the User Parameters Switch03 Bit3 Polling Result Report...

Page 958: ...tial Transmission Transfer Request Poll ing Reception and Polling Transmission Limitation You cannot check or edit a file being sent or received Also a Confidential Transmission file or stored file to...

Page 959: ...hown press U U U U Prev or T T T T Next If there are multiple destinations for a file only the destination selected first is dis played If there are multiple destinations for a file only the number of...

Page 960: ...ice a mistake in destination or with the originals after storing originals in memory To cancel Memory Transmission search for the file to be canceled among the files stored in mem ory and delete it No...

Page 961: ...only the number of destinations that have not been sent the file are displayed If there are multiple destinations for a file only one destination can be displayed To display all destinations press Ch...

Page 962: ...on that is the only des tination for a transmission the transmission is canceled A A A A Press Change Stop TX File B B B B Press Check Change Settings C C C C Select the file from which you want to de...

Page 963: ...ge for the destination you want to delete Note If the desired destination is not shown press U U U U Prev or T T T T Next E E E E Press Clear to delete the destination F F F F Press Exit Note To delet...

Page 964: ...a Destination A A A A Press Change Stop TX File B B B B Press Check Change Settings C C C C Select the file to which you want to add a destination Note If the desired file is not shown press U U U U P...

Page 965: ...te If a destination is not shown press U U U U Prev or T T T T Next E E E E Specify the destination Note You can specify the destination using the number keys F F F F Press Exit Note Repeat steps D an...

Page 966: ...can also delete the transmission time When the transmission time is deleted the file is trans mitted immediately A A A A Press Change Stop TX File B B B B Press Check Change Settings C C C C Select th...

Page 967: ...ified is shown If you select Economy Time the economy time already specified is entered p 189 General Settings Adjustment If you press Transmit Now the file is trans mitted immediately However if ther...

Page 968: ...ile that is stored in memory and has not been sent yet use this procedure to print it out Limitation Polling Transmission files are not displayed in the list Confidential Transmission files are displa...

Page 969: ...f destinations that have not been sent the file are displayed If you want two sided printing option press Print 2 Sides To cancel printing press Cancel The dis play will return to step C D D D D Press...

Page 970: ...rs for Store a message that could not be transmit ted in User Parameters p 216 Changing the User Parameters Switch 24 Bit0 Note If you select the failed transmission file you can resend it This featur...

Page 971: ...estinations for a file only the destination selected first is dis played If there are multiple destinations for a file only the number of destinations that have not been sent the file are displayed D...

Page 972: ...ng the file number can be useful for example when erasing files Note The contents of a file stored in memory can also be printed p 40 Printing a File A A A A Press Change Stop TX File B B B B Press Pr...

Page 973: ...onal Fax Function Up grade unit receptions transmissions on the display All Prints the results of communications in the order made Print per File No Prints only the results of communications specified...

Page 974: ...InstructionsFacsimile Reference option Advanced Features 46 A A A A Press Information The Information menu is shown B B B B Select Print Journal C C C C Select a printing mode Selecting All A A A A P...

Page 975: ...istake press Clear or the Clear Stop key and try again Selecting Print per User Code A A A A Press Print per User Code B B B B Specify an 8 digit User Code with the number keys Note If you make a mist...

Page 976: ...mile Reference option Advanced Features 48 D D D D Press the Start key Note To cancel a file printing press Stop Print ing and the display will return to step C E E E E Press Exit F F F F Press Exit T...

Page 977: ...hile you are using this function the result will not be shown until you exit TX File Status and start it again Note Only the transmission result of the last 200 communications are shown A A A A Press...

Page 978: ...smission results and then press Exit Note If a desired transmission result is not shown press U U U U Prev or T T T T Next Destination shows the fax number of a sender or Fax Header information For a...

Page 979: ...are using this function the result will not be shown until you exit RX File Status and start it again Note Only the reception result of the last 200 com munications are shown A A A A Press Information...

Page 980: ...res 52 C C C C Check the reception results and then press Exit Note If a desired reception result is not shown press U U U U Prev or T T T T Next TX Station shows the fax number of a sender or Fax Hea...

Page 981: ...memory usage Items shown are the percentage of free memory space the number of received Confidential Messages the number of files to be sent the number of Memory Lock files and the number of received...

Page 982: ...hers will be displayed When storing attachment files p 179 Storing and Changing an Auto Docu ment When storing Transfer Request files p 82 Transfer Request When storing originals in the Informa tion B...

Page 983: ...eparation Before using this function program your Con fidential ID p 257 Programming a Confi dential ID Important If the main power switch is off more than 1 hour all Confidential Messages are deleted...

Page 984: ...pro grammed in this machine when the re ceived file has no Confidential ID You must enter the Confidential ID pro grammed by the sender Confirm the sender s Confidential ID in advance If no Confident...

Page 985: ...i indicator is lit The Confidential File indicator also lights if the machine received a message with a SUB Code Check the Personal Boxes Note Print from the Personal Box when a file has been sent fro...

Page 986: ...m your Memory Lock ID p 260 Programming a Memory Lock ID Before using this function set Confidential Transmissions to On Important If the main power switch is turned off for more than an hour all mess...

Page 987: ...on the display Note If no messages were received while Memory Lock was switched on the message No reception file is shown Press Exit If the Memory Lock ID does not match the message Specified code doe...

Page 988: ...nto a Personal Box you must enter the SUB Code as signed to that Personal Box This enables several individuals or departments to share a single fax machine yet be able to differentiate between mes sag...

Page 989: ...not assigned see p 61 Printing Personal Box Messages for how to print these messages Printing Personal Box Messages Follow these steps to print a message that has been received into a Personal Box Pre...

Page 990: ...ed Personal Box password is set in advance The password is registered in Key Operator Tools p 239 Programming Editing Per sonal Boxes A A A A Enter a password B B B B Press OK Note If you make a mista...

Page 991: ...Reference option Advanced Features 63 E E E E Press Exit Note If there are messages in other Personal Boxes the display will return to step C Repeat from step C to print another file F F F F Press Ex...

Page 992: ...able to retrieve a mes sage programmed in an Information Box you need to inform them of the SEP Code as signed to that Information Box When a SEP Code Polling Reception request is made by another par...

Page 993: ...t the Information Box in advance p 244 Programming Edit ing Information Boxes Note One Information Box stores one file The stored file is not deleted automatically If you want to delete a stored file...

Page 994: ...ing the file name The original ly stored file will be overwritten When a password is required A A A A Enter a password B B B B Press OK Note If you make a mistake press Clear or the Clear Stop key and...

Page 995: ...te After you place an original on the exposure glass place the next original within 60 sec onds After all originals are scanned press F F F F Press Exit Repeat from step C to store another file in a b...

Page 996: ...t Store Delete Print Information Box File C C C C Press Print File D D D D Select the box with the message you want to print The SEP Code and Box Name are displayed Note If a desired box is not shown...

Page 997: ...cancel entering a password press Cancel The display will return to step D E E E E Press the Start key The machine starts to print Note If you want 2 sided printing option press Print 2 Sides before p...

Page 998: ...ced Features 70 Deleting Information Box Mes sages Follow these steps to delete a file stored in an In formation Box A A A A Press Information The information menu is shown B B B B Select Store Delete...

Page 999: ...ame are displayed Note If a desired box is not shown press U U U U Prev or T T T T Next You cannot select a box which has no stored file When the password is required A A A A Enter a password B B B B...

Page 1000: ...tarts to print Note If you want 2 sided printing option press Print 2 Sides before pressing the Start key To stop printing press Stop Printing and the display will return to step D F F F F Press Exit...

Page 1001: ...keys Note Maximum length of a telephone or fax num ber 254 digits For Memory Transmission and Immediate Transmission insert a pause between parts of a number For On Hook Dial and Manual Dial no pause...

Page 1002: ...warding terminal of the Substitute Re ception Destinations dialed using the external tele phone or optional handset keypad Destinations dialed by Redial regarded as already stored in memory Any destin...

Page 1003: ...Advanced Features 75 B B B B Select a destination you want to redial Note As the date and time of the reading of the original has become a key select it by pressing on it If the receiver is not displa...

Page 1004: ...ature p 73 Chain Dial You cannot select this function when carrying out standard Confidential Transmission Note The ID can be up to 20 digits long and consist of numbers spaces and Make sure the numbe...

Page 1005: ...F F Enter a SUB Code with the number keys Note If you make a mistake press Clear or the Clear Stop key and try again G G G G Press OK SUB Code appears one line above Adv Features on the display H H H...

Page 1006: ...ups and Programs Chapter 3 Quick Dial Groups in the Basic Features manual and p 153 Registering and Changing Key stroke Programs Messages you send using this feature are marked SID on all reports p 18...

Page 1007: ...ick Dials Groups and Programs with the number keys and consist of space and Chapter 3 Quick Dial Groups in the Basic Features manual and p 153 Registering and Changing Keystroke Programs Messages you...

Page 1008: ...make a mistake press Clear or the Clear Stop key and try again F F F F Press OK A SEP Code appears one line above Adv Features on the display G G G G To enter a password press Password PWD H H H H En...

Page 1009: ...n O O O O Press OK The initial display is shown P P P P Press the Start key PWD Code There are times you may wish to use a password when receiving faxes by polling with the SEP Code feature Limitation...

Page 1010: ...this machine and have the Transfer Station function The following terminology is used in this section Requesting Party The machine where the message originates from Transfer Station The machine that f...

Page 1011: ...ransfer Sta tion Group the Group counts as a single re ceiver The combined total of End Receivers and Transfer Stations you specify with the number keys cannot exceed 100 Chapter 2 Num ber keys in the...

Page 1012: ...escribed below To cancel the Transfer Request press Cancel and the display will return to step D Quick Dial A A A A Press q q q q Quick Dial B B B B Enter the number 2 or 3 digits of the Quick Dial wh...

Page 1013: ...4 To cancel the Transfer Request press Cancel G G G G Press Add Repeat step F to enter more End Receivers Note Press U U U U Prev or T T T T Next to see the End Receivers already entered You can sele...

Page 1014: ...t a destination are assigned sub addresses dialing a sub address allows you to direct your fax message to a particular terminal at the destination Limitation Sub addresses can only be used with ISDN N...

Page 1015: ...Clear Stop key and try again G G G G Press OK H H H H Press Exit I I I I Press the Start key UUI The optional ISDN Unit is required Limitation UUI can only be used with ISDN Note You can program a UU...

Page 1016: ...Features 88 D D D D Select Sub add UUI E E E E Select UUI F F F F Enter the destination UUI with the number keys Note If you make a mistake press the Clear or the Clear Stop key and try again G G G G...

Page 1017: ...ther party Limitation This feature is not available in some coun tries On Hook Dial does not work with ISDN lines This feature is not available for the optional Extra G3 Interface Unit A A A A Place y...

Page 1018: ...al or Clear Modes key and return to step B D D D D When the line is connected and you hear a high pitched tone press the Start key If you hear a voice pick up the external telephone before you press t...

Page 1019: ...SDN lines This feature is not available for the optional Extra G3 Interface Unit The result of a transmission with Manual Dial is not mentioned in the Transmission Result Report Immediate Transmission...

Page 1020: ...you hear a high pitched tone press the Start key to send your fax message Note If you hear a voice notify the destination that you want to send a fax message ask them to switch to Facsimile mode E E E...

Page 1021: ...lines Limitation When sending a fax you can select the line type if dialing with the number keys or Chain Dial Note When you install the optional ISDN Unit or Ex tra G3 Interface Unit you can specify...

Page 1022: ...mission Note If you wish to use an analog PSTN line for G3 transmission contact your service representative Auto Identification This feature is used when G4 is selected The machine first tries a G4 co...

Page 1023: ...imile Reference option Advanced Features 95 B B B B Select the line you want to use When an optional ISDN Unit is installed When an optional Extra G3 Interface Unit is installed C C C C Press Exit The...

Page 1024: ...on the destination machine the message may be reduced when printed at the other end Note You can have bound originals scanned in left page first or right page first You can set which page left or righ...

Page 1025: ...rom first Page to send a book original from the first page Select From second Page if you want to send a cover letter as the first page F F F F Press OK The Book Fax key is highlighted and the se lect...

Page 1026: ...ther end If you want to print the original with the same orientation at the other end specify the Original Posi tion and Page Opening Orientation This feature is only available with Memory Transmissio...

Page 1027: ...F F F F Specify the Transmission Mode from 2 Sided from 1st Page or 1 Sided for 1st Page Note To cancel this mode press Cancel The display will return to step C Note Select 2 Sided from 1st Page to s...

Page 1028: ...in use the second and third lines of the Label Insertion are not print ed p 119 Programming the Label Inser tion When there is an image around the area where the standard message is to be stamped tha...

Page 1029: ...ey Sending an Auto Document If you often have to send a particular page to peo ple for example a map a standard attachment or a set of instructions store that page in the mem ory as an Auto Document T...

Page 1030: ...he Auto Document is sent first Storing Auto Documents reduces the amount of free memory slightly Unless you delete the document free memory will not return to 100 You can print an Auto Document curren...

Page 1031: ...ou make a mistake press Clear or the Clear Stop key and try again To cancel the Auto Document press Can cel The display will return to step C E E E E Press OK The Auto Document is highlighted and the...

Page 1032: ...essage Not Programed is shown If a desired file is not shown press U U U U Prev or T T T T Next To cancel the Auto Document press Can cel The display will return to step B D D D D Press File Print E E...

Page 1033: ...rver The documents stored in the Document Server can be sent again and again until they are deleted Once sent documents are stored into the Document Serv er Therefore you can send them in just one ope...

Page 1034: ...the documents to be sent Note When multiple documents are selected they are sent in the order of selection Press TX Order to arrange the order of the documents to be sent Press File Name to place the...

Page 1035: ...A A A Press Search by User Name B B B B When the User Code is programmed press the User Name of the registered document and then go to step D D D D Note These User Names are programmed in the User Co...

Page 1036: ...enter the User Name D D D D Press OK E E E E Select the file name to be sent Specifying Documents from the File Name A A A A Press Search by File Name B B B B Enter the name of the document to be sen...

Page 1037: ...t to add your originals to the stored documents and send them all at once press R R R R Origi Stored File or Stored file R R R R Origi When sending only the stored documents go to step G Note When the...

Page 1038: ...Only the documents that are stored using the fax feature can be printed Documents stored using the fax feature are shown with an F in front You can also print the first page only to check the content...

Page 1039: ...ace the documents in alphabetical order Press User Name to place the documents in order by the programmed User Name Press Date to place the documents in or der by the programmed date To see details of...

Page 1040: ...A A A Press Search by File Name B B B B Enter the file name to be sent Note Partial matching is used to search for the file name Reference Chapter 3 Entering Text in the Ba sic Features manual C C C C...

Page 1041: ...res manual C C C C Press OK D D D D Select the file name D D D D Press Print File or Print 1st Page When the Print File key is pressed the ma chine prints all the pages When the Print 1st Page key is...

Page 1042: ...tion Stamp only works when scanning from the optional Document Feeder ADF You cannot turn the Stamp feature on or off while a document is being scanned Do not open the optional Document Feeder ADF whi...

Page 1043: ...if you frequently use a certain option configuration you can change the default home position on or off of each option Fax Header Print When the Fax Header is set to ON the stored name is printed on...

Page 1044: ...s deleted You can switch this feature on and off with Gen Settings Adjust Sender Stamp When there is data such as the User Name and department name programmed into the User Code you can have the machi...

Page 1045: ...the orig inal is maintained and some parts of the im age may be deleted when printed at the other end Note You can switch this feature on and off with Gen Settings Adjust Default ID Transmission If y...

Page 1046: ...l and then select any scan settings you require B B B B Press Sub TX Mode The Sub Transmission Mode menu is shown C C C C Select Options D D D D Select options to be set up Programming the Fax Header...

Page 1047: ...ame A A A A Press Change B B B B Press the name of the user to be stamped Note The set User Name is displayed when the User Code has been stored Us er Code in Administrator Reference 2 Copier System E...

Page 1048: ...A A A Press ON in Reducd Image TX Note Press OFF if you do not want to do a reduced transmission To close the option settings go to step E Programming the Auto Reduce A A A A Press ON in Auto Reduce...

Page 1049: ...ansmission To close the option settings go to step E E E E E Press OK The screen returns to the Sending menu screen Note When changing the settings the Option Settings will be highlighted in dark F F...

Page 1050: ...mory Transmission de pending the optional equipment installed if there is not enough free memory left Parallel Memory Transmission This function dials while the original is being scanned Standard Memo...

Page 1051: ...les are de leted When Parallel Memory Transmission is used the total number of originals in Fax Header Print is not automatically printed Checking the Transmission Result Turn the Transmission Result...

Page 1052: ...the same destination that message is sent along with your original Several fax messages can be sent with a single call thus eliminating the need for several separate calls This helps save communicatio...

Page 1053: ...file list Dual Access The machine can scan other messages into mem ory even while sending a fax message from mem ory receiving a message into memory or automatically printing a report Since the ma ch...

Page 1054: ...a maximum of 2 lines si multaneously When using the optional Extra G3 Interface Unit if you set the line selection as G3 Auto Select beforehand the machine will use whichever G3 line is not busy This...

Page 1055: ...nted Transmission Result Report Mem ory Transmission This report is printed when a Memory Transmis sion is completed so you can check the result of the transmission If two or more destinations are spe...

Page 1056: ...gives the num ber of pages that could not be sent success fully Transmission Result Report Immediate Transmission If you turn this report on a report will be printed after every Immediate Transmissio...

Page 1057: ...s are that Subsutitute Reception should be used a fax message is not printed It will be stored in memory p 130 Memory Recep tion p 131 Substitute Reception Reception Resolution This machine supports S...

Page 1058: ...eption p 131 Substitute Re ception 2 sided Printing p 141 2 Sided Printing Important All the messages stored in memory are delet ed if the main power switch is turned off for more than one hour The ma...

Page 1059: ...when message s have been received using Substitute Reception If free memory reaches 0 during Substitute Reception any further reception becomes im possible and the current communication is Screening...

Page 1060: ...to identify which messages are lost so you can ask the senders to transmit them again Important If a sender has not programmed their Own Name or Own Fax Number the machine may reject an important fax...

Page 1061: ...curred Indication Status Solution Paper has run out B and or Facsimile indicator is lit red Add paper Loading Paper in Maintenance Guide 2 Copier System Edition Toner is empty D is lit Replace the ton...

Page 1062: ...been received and stored in memory as a Confidential Message or in the Personal Box You need to print it out manually p 55 Printing a Confidential Message p 61 Printing Personal Box Messages If the Co...

Page 1063: ...ogrammed into Quick Dial or Groups in the Transfer Station Limitation Polling ID s of the Requesting Party and Transfer Station must be identical for this fea ture to work A Transfer Request cannot be...

Page 1064: ...ons For more information contact your service rep resentative This feature can only be used if the machines are made by the same maker Reference Chapter 3 Groups in the Basic Features manual Sending t...

Page 1065: ...prints the report if it cannot be sent back to the Requesting Party You must program the fax number of the Requesting Party in Quick Dial in the Transfer Station Note You can set whether a portion of...

Page 1066: ...receive incoming messages as long as the main power switch is on Important Reception is not possible if both the operation switch and main power switch are turned off Note You can set whether messages...

Page 1067: ...has been printed Note You can alter the volume of the beep or turn it off completely set the volume to the minimum level Chapter 4 Adjusting Volume in the Basic Features manual Checkered Mark When th...

Page 1068: ...t center of the edge Note You can turn this function on or off with the Reception Mode p 198 Reception Mode Reception Time You can have the date and time printed at the bot tom of the message when it...

Page 1069: ...per set in your machine of the same size as that sent by the sending par ty A4 A4 81 2 11 81 2 11 are typical ex amples whether A3 and B5 sizes are correctly scanned in will depend on the fax machine...

Page 1070: ...or containing excess white space when printed at your end For ex ample if the sending machine thinks a B5 original is a B4 original it will be printed at your end on B4 size paper even if you have B5...

Page 1071: ...mitation The maximum number of copies that can be made for each message is 10 If you are using Multi copy with Specified Senders the maxi mum number is 10 Note You can turn this function on or off wit...

Page 1072: ...Two 81 2 11 K messages are printed side by side on a sheet of 11 17 L Limitation This feature does not work with messages larger than A5K B5K A4K 81 2 11 K or 81 2 51 2 K When A5K B5K A4K 81 2 11 K or...

Page 1073: ...than the paper used The message is reduced if it is less than 20mm 0 79 longer When a message is split the split mark is inserted at the split position and about 10mm 0 39 of the split area is duplic...

Page 1074: ...rst page will be printed last This feature uses Memory Reception Page Reduction If you receive a message that is longer than the paper in the cassette usually the machine prints it on two pages If you...

Page 1075: ...t3 CIL TID Print The optional ISDN Unit is required Two features are provided for identification of messages received by G4 ISDN If turned on this information will be printed on every page The CIL Cal...

Page 1076: ...1 K and A3L loaded and you receive a A4L size message check the A4L column of the following table The paper size at the top has the highest priority In this case since 81 2 11 K is a higher priority t...

Page 1077: ...ed to print a received mes sage may be different from the size of the sent original Note Widths that this machine can receive are A4 B4 and A3 Any messages narrower than A4 are sent as A4 width with t...

Page 1078: ...ters Switch05 Bit5 Having Incoming Messages Printed on Paper from the Bypass Tray You can have messages sent from Specified Senders printed on paper from the bypass tray This is useful if you need mes...

Page 1079: ...set paper sizes other than A4L B4L A3L 81 2 11 L 11 13 L in the bypass tray specify the paper size This size should match the bypass paper size for copy ing or a paper jam may occur To change the byp...

Page 1080: ...acilitating the separation of files Note To use this feature specify the line and desti nation in G3 G4 Separate Tray p 198 Reception Mode Tray Shift The optional Finisher Unit is Required When the op...

Page 1081: ...Transmission Polling Reception Trans fer Request 2 sided transmission optional functions Program name up to 20 characters Important We recommend that you print the Keystroke Program list and keep it w...

Page 1082: ...ode C C C C Select Send Later D D D D Enter the time to send Note If Send Later is already specified that time is shown Press the Clear Modes key to change Send Later B B B B Press the Program key C C...

Page 1083: ...t a registered destinations or scan settings as a program enter the fax number for the destination and select any scan settings you require C C C C Press the Program key D D D D Select a program numbe...

Page 1084: ...lay is shown Note If the standby display is not shown press the Facsimile key B B B B Press the Program key C C C C Press Change Name D D D D Select the program number for the name you want to change...

Page 1085: ...r transmission is com pleted Note If you delete a program the registered pro gram name is also deleted A A A A Make sure that the machine is in Facsimile mode and the standby display is shown Note If...

Page 1086: ...ting InstructionsFacsimile Reference option Advanced Features 158 E E E E Press Yes Note Press No not to delete the program The display will return to step C F F F F Press Exit The initial display is...

Page 1087: ...ed doc uments p 105 Sending a Stored File Limitation Documents stored with Store File in the Fac simile mode cannot be operated from the screen displayed when the Document Server key is pressed p 160...

Page 1088: ...ne p 161 Programming a User Name Password You can set this function so as not to send to unspecified people p 163 Setting a Pass word Note The stored documents are given file names such as FAX0001 and...

Page 1089: ...nts When Store only is selected pppp pppppp is shown E E E E Set the User Name file name and password if necessary Note If you are not going to set the User Name file name or password go to step F You...

Page 1090: ...User Code are shown Note Press U U U U Prev or T T T T Next to search for the set User Name when it is not dis played Press the title key to switch between ti tles To set an unprogrammed User Name pre...

Page 1091: ...B B B Press File Name The File Name change menu is shown C C C C Enter the file name Reference Chapter 3 Entering Text in the Ba sic Features manual D D D D Press OK The changed file name is shown E...

Page 1092: ...F Press OK G G G G If you have selected the Store Transmit key specify the receiver Note If you have selected Store only go to step H H H H H Press the Start key File Manage You can change the file n...

Page 1093: ...me Press U U U U Prev or T T T T Next to search for the file to be changed when it is not displayed E E E E If you select a document for which a pass word is set enter the password When a se lected fi...

Page 1094: ...To set an unprogrammed User Name press the Non programed Name key and then enter the name User Names that are entered by press ing the Non programed Name key are not programmed into the User Code Refe...

Page 1095: ...Change Password B B B B Enter a new password using the number keys C C C C Press OK H H H H Press Exit The Sub Transmission menu is shown I I I I Press OK The initial display is shown Delete File Use...

Page 1096: ...te Press U U U U Prev or T T T T Next to search for the User Name to be changed when it is not dis played Note Enter the password when the Password setting menu is shown E E E E Press Delete File F F...

Page 1097: ...ns are available from the computer Displaying documents Easy Viewer Displaying document properties Properties Deleting documents Delete Copying documents to a computer Copy Printing documents Print fr...

Page 1098: ...the Journal Group Dial list Pro gram list Auto Document list Quick Dial list Label Insertion list p 187 Reports Lists General Settings Adjustment Use to set defaults for Transmission Mode Memory Imme...

Page 1099: ...or Tools This pre vents unauthorized people from changing regis trations Note You can turn the Key Operator Code on or off in the System Settings When you set the Key Operator Code active enter a code...

Page 1100: ...ou fax to frequently on the first page of the Quick Dial Table Note You can only change the order within Title 1 Title 2 and Title 3 You cannot change the or der within the Destination List Pressing a...

Page 1101: ...is shown C C C C Check that the Prog Change Delete tab is shown D D D D Select Change Order of Quick Dial Table E E E E Press the destination key for which you want to change the order Note If the de...

Page 1102: ...H Press the User Tools Counter key The initial display is shown Programming Title of the Quick Dial Table Use this feature to add a name to the title of the Quick Dial Table in order to facilitate fin...

Page 1103: ...les To display a Quick Dial Table dif ferent from the one being shown press the Change Title key p 176 Switching Titles You can program up to four characters for the Title 1 and Title 2 keys You can p...

Page 1104: ...n the Quick Dial Ta ble select the title where that receiver is pro grammed You can specify all programmed receivers on the Destination List To display the Quick Dial Table in alphabetical order selec...

Page 1105: ...Messge 2 and Prog Messge 3 keys only You cannot change the Confidential Urgent Please phone or Copy to corres messages Use the same procedure to program and change your messages A A A A Press the Use...

Page 1106: ...a registration press Cancel H H H H Press the User Tools Counter key The initial display is shown Deleting Standard Messages Use this feature to delete programmed messages that you no longer need A A...

Page 1107: ...mory as an Auto Document This saves rescan ning the original every time you wish to send it Use the following procedure to program a new Auto Document or overwrite an existing one Important You can st...

Page 1108: ...k that the Prog Change Delete tab is shown D D D D Select Store Change Delete Auto Document E E E E Select the file you want to store or change Note If there are stored files the file names are shown...

Page 1109: ...Press Change Name B B B B Select a file you want to change C C C C Enter a file name Reference Chapter 3 Entering Text in the Ba D D D D Press OK Go to step H F F F F Place your original and select an...

Page 1110: ...l the transmission and then de lete the Auto Document A A A A Press the User Tools Counter key B B B B Select Facsimile Features The Facsimile Features menu is shown C C C C Check that the Prog Change...

Page 1111: ...To change an existing Scan Size just use the same procedure Important When programming or changing a Scan Size we recommend that you make a memo of the new size Note You can specify a horizontal leng...

Page 1112: ...th is convert ed automatically according to the unit frac tions are rounded off For Example When you enter 2 5 and 0 in millimeters and change to inch the length 9 8inch is shown on the display If you...

Page 1113: ...y B B B B Select Facsimile Features The Facsimile Features menu is shown C C C C Check that the Prog Change Delete tab is shown D D D D Select Program Change Delete Scan Size E E E E Press Delete F F...

Page 1114: ...Operating InstructionsFacsimile Reference option Advanced Features 186 H H H H Press Exit I I I I Press the User Tools Counter key The initial display is shown...

Page 1115: ...k Dial list Chapter 3 Quick Dial in the Basic Fea tures manual Label Insertion list Chapter 3 Quick Dial in the Basic Fea tures manual Group Dial list Chapter 3 Groups in the Basic Features manual Pro...

Page 1116: ...All Print per File No or Print per User Code When printing the Quick Dial list you can select from Print per Programing No Print Title 1 Print Title 2 or Print Title 3 E E E E Press the Start key Aft...

Page 1117: ...eature for specifying whether to pri oritize automatic Image Density for scanning your originals Adjust Scan Density Use this feature for specifying the scan densi ty of your originals Switch Title of...

Page 1118: ...ngs each time an original is scanned Mix Original Size Priority Setting Use this feature for specifying whether to use the Mixed Original Sizes when your originals are set in the optional Document Fee...

Page 1119: ...2 Sided Original Closed Net work Polling TX Polling RX Fax Header Print Label Insertion Dest Management Forwarding Transfer Request Up to three functions can be programmed in Quick Operation Keys A A...

Page 1120: ...uire Memory Immed Transmission Switch A A A A Select Memory Transmission or Immedi ate Transmission B B B B Press OK Text Size Priority A A A A Select Standard or Detail B B B B Press OK Original Type...

Page 1121: ...iLighter Note You can set the Image Density manual ly from seven levels B B B B Press OK Switch Title of Quick Dial Table A A A A Select a title on the Quick Dial Table B B B B Press OK Switch Display...

Page 1122: ...abel Insertion Priority Setting A A A A Select Programed Name or OFF B B B B Press OK Reduced Image Transmission Setting A A A A Select ON or OFF Auto Reduced Image Setting A A A A Select ON or OFF B...

Page 1123: ...End Reset A A A A Select ON or OFF B B B B Press OK Mix Original Size Priority Setting A A A A Select ON or OFF B B B B Press OK TX Stamp Priority A A A A Select ON or OFF B B B B Press OK Line Prior...

Page 1124: ...mitation You can program only one Economy Time A A A A Enter the Economy Time with the num ber keys and press AM or PM to change AM PM Note If you make a mistake press Clear or the Clear Stop key and...

Page 1125: ...n Key A A A A Select the Quick Operation Key you want to program B B B B Select the function you want to program in the Quick Operation Key The functions that are half bright have al ready been set C...

Page 1126: ...2 Sided Printing RX Reverse Printing p 146 Reverse Order Printing Paper Tray G3 G4 Separate Tray p 152 G3 G4 Sepa rate Tray Checkered Mark p 139 Checkered Mark Center Mark p 140 Center Mark Print Rec...

Page 1127: ...ttings you require Switch Reception Mode A A A A Select Manual Reception or Auto Reception B B B B Press OK Authorized RX A A A A Select ON or OFF B B B B Press OK Note To cancel this setting press Ca...

Page 1128: ...t quantity with the num ber keys Note If you make a mistake press Clear or the Clear Stop key and try again The range of available print quantities is 1 to 10 B B B B Press OK Note To cancel this sett...

Page 1129: ...B Press OK Note To cancel this setting press Cancel Paper Tray A A A A Select paper tray Note When no tray is specified Auto Select will be selected If you want to select the bypass tray specify it w...

Page 1130: ...to choose the output tray Note If you select OFF the received fax is delivered to a default tray B B B B Select a line type C C C C Select a tray to deliver the received pa per D D D D Press OK Note T...

Page 1131: ...Reference option Advanced Features 203 Checkered Mark A A A A Select ON or OFF B B B B Press OK Note To cancel this setting press Cancel Center Mark A A A A Select ON or OFF B B B B Press OK Note To c...

Page 1132: ...Facsimile Reference option Advanced Features 204 Print Reception Time A A A A Select ON or OFF B B B B Press OK Note To cancel this setting press Cancel F F F F Press the User Tools Counter key The in...

Page 1133: ...If a part of the transmission fails due to a telephone line fault this feature resends the failed part automatically p 214 ECM Parameter Setting Allows you to change and print the function settings to...

Page 1134: ...ck reception p 260 Programming a Memory Lock ID Select Dial Push Phone Select a line type when you connect the machine to G3 analog line Note This function is not available in some areas p 261 Selecti...

Page 1135: ...the total num ber of pages transmitted and received on the dis play Transmissions Total number of transmitted pages Receptions Total number of received pages A A A A Press the User Tools Counter key...

Page 1136: ...r machine and then sent on to another fax machine This is useful if for example you are visiting an other office and would like a copy of your mes sages sent to that office so you can read them Refere...

Page 1137: ...ferently One receiver can be specified with this func tion For multiple receivers use Group Dial Chapter 3 Groups in the Basic Features manual You can print a Forwarding Mark on messag es that are for...

Page 1138: ...lready programmed a receiver name is shown If you want to change the receiver press Receiver and go to step F To cancel Forwarding press Cancel and go to step I F F F F Select an end receiver with the...

Page 1139: ...ols Counter key B B B B Press Facsimile Features The Facsimile Features menu is shown C C C C Select Key Operator Tools The Key Operator Tools menu is shown D D D D Select Forwarding Note If Forwardin...

Page 1140: ...k When you switch Memory Lock on received messages are stored in memory and are not print ed automatically When a message is received in the Memory Lock mode the Confidential File i indicator blinks T...

Page 1141: ...erator Tools menu is shown D D D D Select Memory Lock RX Note If Memory Lock RX is not shown press U U U U Prev or T T T T Next E E E E Select ON or OFF F F F F Press OK Note To cancel this setting pr...

Page 1142: ...can turn this function on or off with the following procedure Limitation If you turn ECM off you cannot use the follow ing features JBIG Transmission Super G3 Communication A A A A Press the User Tool...

Page 1143: ...le Reference option Advanced Features 215 E E E E Select ON or OFF F F F F Press OK Note To cancel this setting press Cancel The display will return to step D G G G G Press the User Tools Counter key...

Page 1144: ...function settings set the User Parameter Switches Preparation Access to some User Parameter Settings requires the installation of optional equipment or that other settings be made beforehand Switches...

Page 1145: ...6 TID Print Off On 03 0 Automatic printing of the Memory TX Result Report Off On 2 Automatic printing of the Memory Storage Report Off On 3 Automatic printing of the Polling RX Reserve Report Off On...

Page 1146: ...ubstitute RX Not possible Reception off 2 1 Receive when the machine cannot print Substitute Reception during printer error 00 Enabled unconditionally Free 01 Enabled when Own Name Own Fax Number is r...

Page 1147: ...ight Printing mode Immediate printing Off When turning on the op eration switch On 1 Long Document Transmission Well Log Off On 2 Batch Transmission Off On 3 Reset when function changed Off On 7 Syste...

Page 1148: ...AX Er ror Report Off On 1 Reprint the documents that fail to print from LAN FAX driver Off On 5 4 3 2 Store the documents in memory that could not be printed from the LAN FAX driver 0000 0 minute 0001...

Page 1149: ...er p 222 Print ing the User Parameter list Do not change any bit switches other than those shown on the previous pages A A A A Press the User Tools Counter key B B B B Press Facsimile Features The Fac...

Page 1150: ...same Switch G G G G Press OK Note To cancel these settings press Cancel The display will return to step E H H H H Repeat steps E E E E and F F F F to change the Switch settings I I I I After all the...

Page 1151: ...nting a list press Cancel The display will return to step D E E E E Press the Start key Note To cancel printing a list press Cancel The display will return to step D F F F F Press the User Tools Count...

Page 1152: ...pgrade Unit is installed A maximum of 20 characters for each name when using G3 and a maximum of 24 characters for each name when using G4 Full Partial agreement When you program Own Names and Facsim...

Page 1153: ...therefore it helps you screen out unwanted messages such as junk mail and save you from wasting fax paper Note To use this feature program the Special Senders function and then select ON in Authorize...

Page 1154: ...rs the ma chine prints the Specified number of copies for all received documents Limitation You cannot use multi copy printing with Polling Reception Confidential Reception or Memory Lock Note Print 2...

Page 1155: ...gram any Special Senders the machine outputs the documents received from all senders using the default paper tray Limitation For Polling Reception and Free Polling you cannot select the paper tray Pap...

Page 1156: ...nder Note If Program Special Sender is not shown press U U U U Prev or T T T T Next E E E E Select destination to program When programming a new destination press Not Programed F F F F Enter a destina...

Page 1157: ...ct only the item you want to program If you select Same as basic settings the settings will be the same as Reception Mode p 198 Forwarding p 208 and Memory Lock p 212 To cancel these settings press Ca...

Page 1158: ...you select Yes the name of the end re ceiver is shown on the right of Receiv er Reception File Print Qty A A A A Press Reception File Print Qty B B B B Select Number of Sets C C C C Enter the print q...

Page 1159: ...s 231 Print 2 Sided A A A A Press Print 2 Sided B B B B Select ON or OFF C C C C Press OK Memory Lock A A A A Press Memory Lock B B B B Select ON or OFF C C C C Press OK RX Reverse Printing A A A A Pr...

Page 1160: ...K J J J J Press OK A Special Sender has been programmed K K K K Press the User Tools Counter key The initial display is shown Programming Initial Set Up of a Special Sender Use this function to progra...

Page 1161: ...ender is not shown press U U U U Prev or T T T T Next E E E E Press Initial Set Up F F F F Select a function you want to program In this feature Authorized RX has the same settings as Reception Mode p...

Page 1162: ...is selected Note If Vertical is not selected press Vertical C C C C Enter the vertical size of the paper with the number keys Note You can specify a vertical size from 210mm 8 3 inch to 305mm 12 0 inc...

Page 1163: ...alternately If you enter a length and change the unit by pressing mm or inch the length is converted automat ically according to the unit fractions are rounded off F F F F Press G G G G Press OK G G G...

Page 1164: ...n press U U U U Prev or T T T T Next E E E E Press Delete F F F F Select a Special Sender you want to delete G G G G Press Delete A Special Sender is deleted and Not Pro gramed is shown Note To cancel...

Page 1165: ...shown C C C C Select Key Operator Tools D D D D Press Print List next to Program Special Sender Note If Program Special Sender is not shown press U U U U Prev or T T T T Next E E E E Press the Start...

Page 1166: ...g Transfer Box es For details about how to print out and delete mes sages stored in boxes see the following p 60 Personal Boxes p 64 Information Boxes Note The combined total of items that can be stor...

Page 1167: ...n registering a password a mark is dis played before the Box Name Receiver optional You can program one delivery destination for each Personal Box Specify the Quick Dial the delivery destination is st...

Page 1168: ...ools D D D D Select Box Setting The Box Setting menu is shown E E E E Select a box to program When programming a new box press Not Programed Note To change a box already programmed press it and go to...

Page 1169: ...Clear or the Clear Stop key and try again To change Box Name press Box Name and then repeat from step G If you make a mistake press Clear or the Clear Stop key and try again J J J J Specify any settin...

Page 1170: ...C Press OK K K K K Press OK A box mode is shown next to the box L L L L Press Exit M M M M Press the User Tools Counter key The initial display is shown Deleting Personal Boxes This section describes...

Page 1171: ...Next When selecting a file set with a password the password input screen is displayed Enter the password using the number keys and press OK If you enter an incorrect number press Clear or the Clear St...

Page 1172: ...ot be a space Password optional Up to 20 characters long and can be composed of digits 0 9 and spaces the first character cannot be a space When registering a password a mark is dis played before the...

Page 1173: ...ogramming a new box press Not Programed Note To change a box already programmed press it and then go to step I If the desired box is not shown press U U U U Prev or T T T T Next F F F F Press Informat...

Page 1174: ...o step M K K K K Enter a password Note If you make a mistake press Clear or the Clear Stop key and try again L L L L Press OK M M M M Press OK A box mode is shown next to the box N N N N Press Exit O...

Page 1175: ...Operating InstructionsFacsimile Reference option Advanced Features 247 C C C C Select Key Operator Tools D D D D Select Box Setting E E E E Press Delete F F F F Select a box you want to delete...

Page 1176: ...Delete The box is deleted and Not Programed is shown Note To cancel deleting a box press Do not De lete The display will return to step F H H H H Press the User Tools Counter key The initial display i...

Page 1177: ...s dis played before the Box Name Receiving Station required You can store 5 Receiving Stations destina tions to which messages will be forwarded for each box Specify Receiving Stations with Quick Dial...

Page 1178: ...res menu is shown C C C C Select Key Operator Tools D D D D Select Box Setting E E E E Select a box to program When programming a new box press Not Programed Note To change a box already programmed pr...

Page 1179: ...Box Name and then re peat from step G If you make a mistake press Clear or the Clear Stop key and try again J J J J Specify the condition of registration Programming Receiving Stations A A A A Select...

Page 1180: ...d try again C C C C Press OK K K K K Press OK A box mode is shown next to the box L L L L Press the User Tools Counter key The initial display is shown Deleting Transfer Boxes Limitation If the specif...

Page 1181: ...T T T T Next When selecting a file set with a password the password input screen is displayed Enter the password using the number keys and press OK If you enter an incorrect number press Clear to del...

Page 1182: ...ow the procedure below to print a list show ing the currently programmed Personal Boxes Information Boxes and Transfer Boxes A A A A Press the User Tools Counter key B B B B Press Facsimile Features T...

Page 1183: ...er of the telephone line their machine is connected to in their own machine p 82 Transfer Request Be sure to insert a pause after the area code For example if you are in the United States and your fax...

Page 1184: ...D D D Select Transfer Report Note If Transfer Report is not shown press U U U U Prev or T T T T Next E E E E Specify the fax number for each line Programming a G3 Fax number A A A A Press G3 Fax No Di...

Page 1185: ...he User Tools Counter key The initial display is shown Programming a Confidential ID Program a Confidential ID to print Confidential Reception p 55 Printing a Confidential Mes sage Limitation If you d...

Page 1186: ...Program Confidential ID is not shown press U U U U Prev or T T T T Next E E E E Enter an ID with the number keys Note If you make a mistake press Clear or the Clear Stop key and try again F F F F Pre...

Page 1187: ...mmed on the sender s ma chine Reference Polling Transmission p 22 Polling Reception p 26 Default ID Transmission p 117 Transfer Request p 82 Note A Polling ID can be any combination of digits 0 9 and...

Page 1188: ...programming an ID press Cancel The display will return to step D G G G G Press the User Tools Counter key The initial display is shown Programming a Memory Lock ID Program a Memory Lock ID to print Me...

Page 1189: ...D G G G G Press the User Tools Counter key The initial display is shown Selecting Dial Push Phone Use this function to select a line type when the machine is connected to a G3 analog line A Dial and P...

Page 1190: ...erator Tools D D D D Select Select Dial Push Phone Note If Select Dial Push Phone is not shown press U U U U Prev or T T T T Next E E E E Press Push Button Phone or Dial Phone 10PPS to select the line...

Page 1191: ...occupies a sin gle line You should program the Own Fax Number 1 ISDN allows two or more terminals such as a fax machine and digital telephone to be con nected to a single line These terminals are iden...

Page 1192: ...SDN G3 Line Note If Program ISDN G3 Line is not shown press U U U U Prev or T T T T Next E E E E Select an item you want to program Programming Own Number 1 and Own Number 2 A A A A Select Own Number...

Page 1193: ...umber 1 Own Fax Number 2 Sub address p 86 Sub address Note Program Own Fax Number 1 as your own dig ital number Program Own Fax Number 2 as another digital number which occupies a sin gle line You sho...

Page 1194: ...he User Tools Counter key B B B B Press Facsimile Features The Facsimile Features menu is shown C C C C Select Key Operator Tools D D D D Select Program ISDN G4 Line Note If Program ISDN G4 Line is no...

Page 1195: ...A A A A Select Own Number 1 or Own Number 2 B B B B Enter your own facsimile number with the number keys C C C C Press OK Programming a Sub address A A A A Select Sub address B B B B Enter a sub addr...

Page 1196: ...hine To send a fax simply select Print from the Windows application then select LAN FAX as the printer and specify a destination In addition to sending faxes the LAN FAX driver allows this machine to...

Page 1197: ...sFacsimile Reference option Advanced Features 269 Reference Network settings Administrator Reference 2 Copier System Edition Important If errors occur on the machine when used as a PC FAX they are not...

Page 1198: ...rating Systems Microsoft Windows 95 98 Me Microsoft Windows 2000 Microsoft Windows NT4 0 CPU i486DX4 100 MHz or more Pentium 133 MHz or more Windows 2000 RAM 16 MB or more 32 MB or more Windows 2000 D...

Page 1199: ...B Type the full path and file name of the setup program into the text box and then click OK B B B B Select the language you use and then click Next The LAN FAX Driver setup program launches C C C C Af...

Page 1200: ...H H H H Select the port When connected via a LAN A A A A Select the model you use and then click Next When connected via a parallel port A A A A Select LPT1 and then click Next I I I I Confirm the ins...

Page 1201: ...ick the Paper tab Note With Windows 2000 click the Advanced tab and then click Printing Defaults D D D D Make the paper settings Note The Gray Scale box does not appear in Windows NT or Windows 2000 A...

Page 1202: ...number with number keys when using Quick Dials Enter q q q q p p p p p p p p and the registered number with number keys when using Group Dials Note You can specify a destination using the Address Boo...

Page 1203: ...mitted to the destination and a copy of the document you send will be printed from your machine Click Print to print a copy of the document you specified without sending it to the des tination Transmi...

Page 1204: ...pe G3 G4 or G3 2 Programming New Destinations A Enter the destination B Click Add Editing Programmed Destinations A Select the destination you want to edit from the list The name of the company should...

Page 1205: ...lick OK Note The setting method may differ depending on the application you are using In all cas es select LAN Fax M1 for the printer C C C C Click Print PC FAX Operation Messages Message Causes and R...

Page 1206: ...at were not sent or re ceived successfully Power Failure Report Even if the main power switch is turned off the contents of the machine s memory for example programmed numbers will not be lost However...

Page 1207: ...se keep the ma chine plugged in and the main power switch on for about one week after the power loss oc curs RDS Remote Diagnostic System If your machine has a problem a service repre sentative can pe...

Page 1208: ...s out communication will not be possible after 200 communications 1 000 with the optional Expansion Memory in stalled Limitation The Memory Storage Report Polling Reserve Report and Confidential File...

Page 1209: ...Replacing the Stamp Cartridge The optional Document Feeder ADF is required When the stamp becomes lighter replace the car tridge Note Use the cartridge specified for this machine A A A A Lift the opt...

Page 1210: ...ures 282 C C C C Set a new cartridge while holding down the lock lever Insert the cartridge until its metal parts are not visible D D D D Replace the stamp cover until it clicks E E E E Close the opti...

Page 1211: ...nap in modular type connector Important Make sure the connector is the correct type before you start By law in the USA you must program your phone number identification your FAX NUMBER into your machi...

Page 1212: ...tor Note You can only install either the optional ISDN Unit or the optional Extra G3 Interface Unit Connecting the Machine to ISDN The optional ISDN Unit is required For details about how to install t...

Page 1213: ...me telephone may not be connected or may suffer reduced functionality Limitation When you use the handset or an optional external telephone with the On Hook Dial key for tele phone calls you can not t...

Page 1214: ...the handset bell volume Adjust the handset ringer volume using the volume switch Selecting the Line Type Select the line type to which the machine is connected There are two types tone and pulse dial...

Page 1215: ...ns can take place simultaneously You cannot perform two Immediate Transmissions simultaneously If two fax messages are received simultaneously they cannot be printed out at the same time If two commun...

Page 1216: ...e Unit JBIG compression for transmission reception becomes possible You can extend the following features Function Without optional Fax Function Upgrade Unit With optional Fax Function Up grade Unit Q...

Page 1217: ...Resolution Standard Image Density Auto Original Type Text ISDN Unit ISDN Option Type 3800C This allows you to send and receive messages via ISDN Integrated Service Digital Network Extra G3 Interface...

Page 1218: ...Operating InstructionsFacsimile Reference option Advanced Features 290 Handset Handset Type 1018 This permits voice communication...

Page 1219: ...Expansion Memory required Transmission Time G3 3 seconds at 28 800bps Standard resolution G4 3 seconds Detail resolution Data Compression Method MH MR MMR JBIG optional Fax Function Upgrade Unit requ...

Page 1220: ...Operating InstructionsFacsimile Reference option Advanced Features 292 Power Consumption Standby Mode 200W Transmission 200W Reception 200W Maximum Power Consumption 1 500W...

Page 1221: ...ptable Original Sizes Where Original is Set Acceptable Original Size Maximum Num ber of Sheets Paper Thickness Exposure Glass Maximum A3 297 420mm 11 17 279 432mm 1 Optional Document Feeder ADF single...

Page 1222: ...Operating InstructionsFacsimile Reference option Advanced Features 294 Paper Size and Scanned Area Exposure Glass Optional Document Feeder ADF...

Page 1223: ...uced to fit the pa per p 117 Auto Reduce The machine detects paper sizes in the following ways When you place an original in the optional Document Feeder ADF an original wider than about 268mm 10 5 is...

Page 1224: ...ally a length of about 420mm 16 5 can be scanned however it is only possible to specify a scanning size up to 432mm 17 Length 1 245mm 245mm 270mm 270mm 318mm 318mm Width 242mm B5L A4L 81 2 13 L 242mm...

Page 1225: ...47 W L from the optional Document Feeder ADF Immediate Transmission 297 1 200mm 11 47 W L from the optional Document Feeder ADF Note During Immediate Transmission the length of the scanning range can...

Page 1226: ...000 2 The number of destinations you can specify for one file 500 The number of destinations you can specify for all files 500 2 000 3 The number of Quick Dials you can register 400 1 200 3 The number...

Page 1227: ...ons in the Quick Dials and 100 destinations in the number keys as a Group When the optional Fax Function Upgrade Unit is installed 1 200 destinations in the Quick Di als 1 000 destinations in the numb...

Page 1228: ...ion Sends a Confidential Message This feature is divided into Default ID Confidential Transmission and Over ride ID Confidential Transmission p 19 Confidential Transmission Polling Transmission Upon r...

Page 1229: ...a ture p 76 SUB Code SEP Code If you wish to receive a message stored in the memory of another par ty s fax machine you can use this fea ture p 78 SEP Code Transfer Request Sends an original to a dest...

Page 1230: ...Document Feeder ADF p 98 2 Sided Transmission Dou ble Sided Transmission Standard Message Use this feature to stamp a standard message at the top of the first original sent p 100 Standard Message Sta...

Page 1231: ...bel Insertion Auto Reduce If the receiver uses paper narrower than the message the message is re duced to fit a paper size available on the receiving party s machine before being sent p 117 Auto Reduc...

Page 1232: ...n the display The results of the last 50 receptions are displayed from the lat est one p 51 Checking the Reception Re sult RX File Status Memory Status The status of the memory is shown on the display...

Page 1233: ...tered Quick Dial Table It would be convenient to list the re ceivers that you fax to frequently on the first page of the Quick Dial Table p 172 Changing the Order of the Quick Dial Table Program Title...

Page 1234: ...Irregular Scan Area function p 183 Programming and Chang ing a Scan Size Print List Report This feature allows you to print vari ous reports and lists manually You can print the following reports and...

Page 1235: ...Type Priority Auto Image Density Adjust Scan Density Switch Title of Quick Dial Table Switch Display Adjust Sound Volume Program Fax Information Fax Header Print Setting Auto Reduced Image Setting Cl...

Page 1236: ...Mode Chapter 2 Selecting the Recep tion Mode in the Basic Features manual Authorized Reception p 199 Forwarding p 229 Reception File Print Quantity p 230 2 Sided Print p 141 Reception Reverse Printing...

Page 1237: ...d in Memory Lock mode p 212 Memory Lock ECM If a part of the transmission fails due to a telephone line fault this feature resends the failed part automatically p 214 ECM Parameter Setting Allows you...

Page 1238: ...ming a Polling ID Program Memory Lock ID Register an ID required for Memory Lock reception p 260 Programming a Memory Lock ID Select Dial Push Phone Select a line type when you connect the machine to...

Page 1239: ...n 274 Batch Transmission 124 Book Fax 96 Box Setting 205 238 Broadcasting Sequence 125 C Canceling Transmission 32 Transmission Files 30 Center Mark 140 Chain Dial 73 Changing Line Type 93 Transmissio...

Page 1240: ...cess 125 E ECM Error Correction Mode 124 205 214 Economy Transmission Time 15 Editing Programmed Destinations 276 End Receiver 82 135 Error Report 278 Expansion Memory 289 Extra G3 Interface Unit 289...

Page 1241: ...137 Reception 137 Transmission 126 Journal 45 Just Size Printing 149 K Key Operator Code 171 Key Operator Settings 205 Key Operator Tools 170 309 Keystroke Program 153 L Label Insertion 116 Line Type...

Page 1242: ...nsmission 22 Polling Transmission Clear Report 25 Power Failure Report 278 Print 2 Sided 226 Print Completion Beep 139 Printed Report 127 Printing 277 Box List 254 Confidential Message 55 File Receive...

Page 1243: ...on 128 Transmission Result Report Memory Transmission 127 Reports Lists 187 Requesting Party 82 135 Reverse Order Printing 130 146 RTI Own Name 132 RX File Status 51 S Scan Size 183 Changing 183 Delet...

Page 1244: ...fer Result Report 136 137 Transfer Station 82 135 Transmission Features 73 Transmission Mode 15 Transmission Options 115 Transmission Result Report Immediate Transmission 128 Transmission Result Repor...

Page 1245: ...317 Operating InstructionsFacsimile Reference option Advanced Features Copyright 2001...

Page 1246: ...318 Operating InstructionsFacsimile Reference option Advanced Features UE USA G307 8657...

Page 1247: ...his Manual 3 1 Sample Print Locked Print Sample Print 5 Printing the Remaining Sets 7 Deleting a Sample Print File 10 Checking the Error Log 11 Locked Print 13 Printing with Using the Control Panel 15...

Page 1248: ...ries Novell NetWare are registered trademarks of Novell Inc PostScript is a registered trademark of Adobe Systems Incorporated PowerPC is a registered trademark of International Business Machines Corp...

Page 1249: ...ate injury or damage to property The statements above are notes for your safety Important If this instruction is not followed paper might be misfed originals might be damaged or data might be lost Be...

Page 1250: ...for Printer Client Reference 4 Keys that appear on the machine s panel display Keys and buttons that appear on the computer s display Keys built into the machine s control panel Keys on the computer s...

Page 1251: ...printer driver see the printer driver s Help file Note You can identify the file you want to print by the User ID and the time when the job was stored The actual number of pages the printer can save...

Page 1252: ...used to identify the user associated with a job The User ID can consist of up to eight alphanumeric a z A Z 0 9 characters E E E E Click OK F F F F After making all desired settings click OK G G G G C...

Page 1253: ...Reference 7 Printing the Remaining Sets A A A A Press the Printer key B B B B Press View Sample Print Jobs The User ID and the time when the job was stored are displayed ZEVS042N Facsimile Copy Docum...

Page 1254: ...you want to print Note Press U U U UPrev or T T T TNext to display any documents not appearing on the display panel D D D D To change the print quantity follow the procedure below A Press Change Set...

Page 1255: ...is changed and the file list display returns E E E E Press Print The display for checking the setting appears F F F F Press Yes The document is printed and then deleted from the optional Hard Disk Dri...

Page 1256: ...nce 10 Deleting a Sample Print File A A A A Press the Printer key B B B B Press View Sample Print Jobs The User IDs and print request times of the stored documents appear on the display panel C C C C...

Page 1257: ...k Drive Note To cancel deletion press No F F F F Press Exit Checking the Error Log When a print job is not saved on the Hard Disk Drive it remains in the error log and can be checked using the control...

Page 1258: ...est times of the stored documents appear on the display panel C C C C Press Show Error Log to check the error log Note Press U U U UPrev or T T T TNext to display any documents not appearing on the di...

Page 1259: ...ce For more information about settings for a printer driver see the printer driver s Help file Note You can identify the file you want to print by the User ID and the time when the job was stored The...

Page 1260: ...Command to print The job is saved on the Hard Disk Drive G G G G Enter the password using the control panel and then specify whether to print or delete Reference p 15 Printing with Using the Control...

Page 1261: ...rence 15 Printing with Using the Control Panel A A A A Press the Printer key B B B B Press View Locked Print Jobs The User ID and the time when the job was stored are displayed ZEVS042N Facsimile Copy...

Page 1262: ...the file you want to print Note Press U U U UPrev or T T T TNext to display any documents not appearing on the display panel D D D D Press Print The display for entering a password appears E E E E En...

Page 1263: ...Addendum for Printer Client Reference 17 F F F F Press Yes The document is printed and then deleted from the optional Hard Disk Drive Note To cancel the print job press No G G G G Press Exit...

Page 1264: ...Client Reference 18 Deleting a Locked Print File A A A A Press the Printer key B B B B Press View Locked Print Jobs The User ID and the time when the job was stored are displayed C C C C Select the do...

Page 1265: ...D D D D Press Delete The display for entering a password appears E E E E Enter a password using the number keys and then press OK F F F F Press Yes The document is deleted from the optional Hard Disk...

Page 1266: ...mains in the error log and can be checked using the control panel Limitation The error log displays up to 20 of the newest jobs If you turn off the printer power the log up to then is deleted A A A A...

Page 1267: ...ss Show Error Log to check the error log Note Press U U U UPrev or T T T TNext to display any documents not appearing on the display panel D D D D Check the error log and then press Exit The display r...

Page 1268: ...NDEX C Checking the Error Log 11 20 D Deleting a Locked Print File 18 Deleting a Sample Print File 10 L Locked Print 13 P Printing a Locked Print File 13 Printing the Remaining Sets 7 Printing with Us...

Page 1269: ...23 Addendum for Printer Client Reference Copyright 2001...

Page 1270: ...24 Addendum for Printer Client Reference UE USA G570 8900...

Reviews: